File Explorer hides some files and folders by default; on Windows 11, View > Show > Hidden items shows them again, and Windows 10 has the same switch in Folder Options. That setting covers ordinary hidden items only; Windows keeps a separate group of protected system files out of sight, and those are best left alone.
What you’re hunting for decides which route is quickest, so start there.
AppData, a USB drive or everything?
| If you are after | Best route |
|---|---|
| A hidden app folder such as AppData or ProgramData | Turn on hidden items once, then browse to the typical path in the folders section below |
| Folders on a USB drive or memory card that seems empty | Turn on hidden items, then use the Command Prompt section if they still don’t appear |
| Everything that is hidden, all the time | The Windows 11 View menu or the Windows 10 Folder Options setting |
| Something you downloaded and can’t find | It probably isn’t hidden at all; see where Windows puts your downloads |
Microsoft’s File Explorer support page gives this route for Windows 11:
- Open File Explorer from the taskbar, or press the Windows logo key + E.
- Select View > Show.
- Select Hidden items. Hidden files and folders now appear in File Explorer.
To hide them again, go back to View > Show and select Hidden items a second time so the check mark goes away. For a longer Windows 11 walkthrough, including the other places the same switch lives, see showing hidden files on Windows 11.
Windows 10: Folder Options
In Microsoft’s words, “Support for Windows 10 has ended on October 14, 2025,” and Microsoft “will no longer provide free software updates from Windows Update, technical assistance, or security fixes for Windows 10.” The setting itself still works on a Windows 10 PC. Microsoft’s Windows 10 steps on the same support page are:
- Open File Explorer from the taskbar.
- Select View > Options > Change folder and search options.
- Select the View tab.
- In Advanced settings, select Show hidden files, folders, and drives, then select OK.
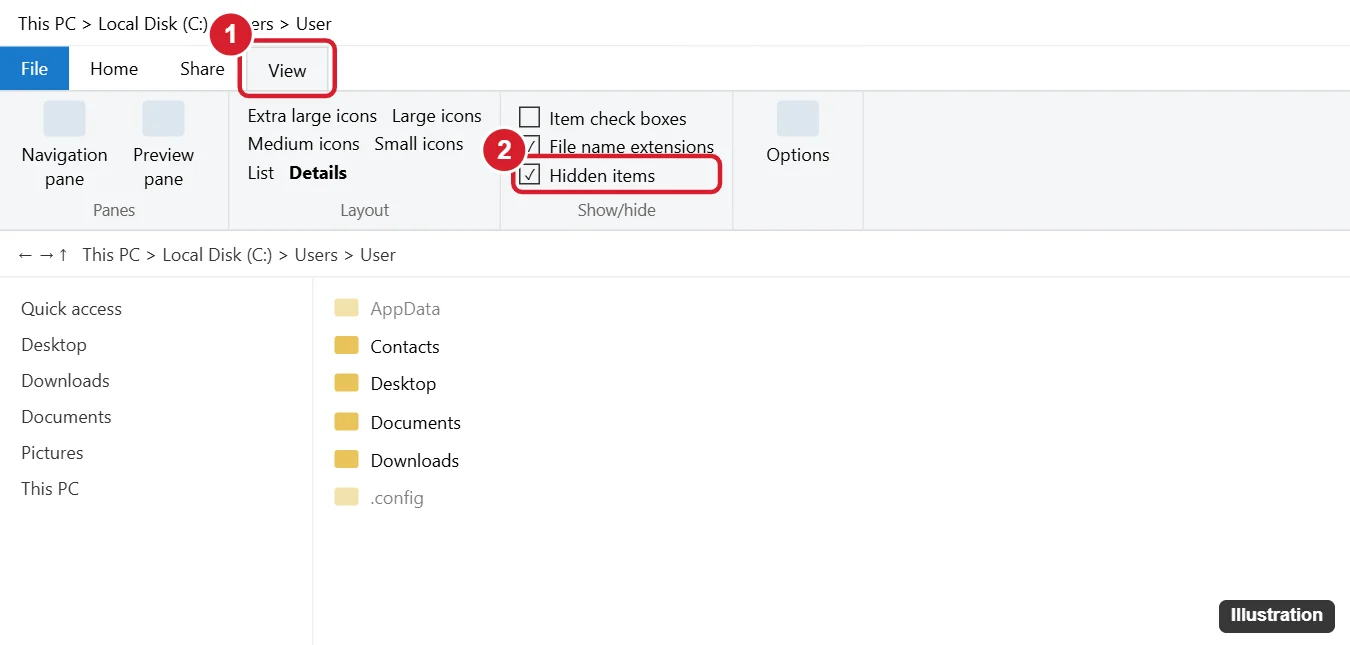
The illustration shows an older Windows 10 ribbon with a Hidden items box on the View tab. Microsoft’s current Windows 10 instructions use the Options route above, so follow those steps if your ribbon looks different.
The same Advanced settings list holds other display choices too. If the little hover boxes over files bother you, you can turn off icon pop-up descriptions from Folder Options while you’re there.
Turn it on from Settings instead
Settings has its own switch, which Microsoft describes on its page about finding lost files after an upgrade:
- Windows 11: right-click the Start button, select Settings, then System > Advanced. Expand File Explorer and make sure Show hidden and system files is set to On.
- Windows 10: open Settings > Update & Security > For developers. Under File Explorer, select Show settings next to Change settings to show hidden and system files, then in the Advanced settings list choose Show hidden files, folders, or drives, then select Apply, Apply to Folders and OK.
Note that the Windows 11 switch is named for system files as well as hidden ones. If you only want ordinary hidden items, the View menu is the narrower choice.
Turning on hidden items doesn’t reveal everything. Windows treats some operating system files as protected, and Microsoft’s File Explorer instructions don’t cover showing them. Leave that protection in place and work with ordinary hidden items only.
A hidden folder isn’t protected; anyone who turns on the same setting can see it. Access is controlled by folder permissions, and turning off inherited permissions is one part of that.
Most people who go looking for hidden items want one of a few app folders. Microsoft Learn’s list of Windows environment variables gives their typical locations:
| Folder | Typical path | What usually lives there |
|---|---|---|
| AppData\Roaming | C:\Users\<name>\AppData\Roaming | Settings that apps keep for your account |
| AppData\Local | C:\Users\<name>\AppData\Local | Data apps keep on this PC only, such as caches |
| ProgramData | C:\ProgramData | App data shared by every account on the PC |
Replace <name> with your account’s folder name under C:\Users. The AppData folder itself is hidden, which is why it doesn’t appear in your user folder until hidden items are on. For faster ways in, see finding the AppData folder in Windows 11.
A USB drive or memory card that looks empty
Turn on hidden items first and look again. If the drive itself is missing from File Explorer, start with opening a USB drive in Windows 10 instead.
When the drive shows up but its folders don’t, Command Prompt can list and clear the hidden attribute. Microsoft documents the commands on Microsoft Learn (dir and attrib); it doesn’t describe this particular repair, so use it only on your own data drives, never on C: or the Windows folder.
- Scan the drive with Windows Security before you open anything on it, and don’t run unfamiliar shortcut or script files you find there.
- Open Command Prompt from the Start menu.
- Type
dir /a:h E:\and press Enter, replacing E with the drive’s letter. This lists the hidden items; without/a, Microsoft says dir leaves out hidden and system files. - To make everything on the drive visible again, type
attrib -h -s /s /d E:\*and press Enter. The-hand-sparts clear the hidden and system attributes,/sincludes every subfolder and/dincludes the folders themselves.
Microsoft notes that a file with the system or hidden attribute set has to have it cleared before other attributes can change, so the command clears both at once. For a single folder of your own, the same command works with the folder’s path in place of E:\*.
Does showing hidden items also show file extensions?
No, extensions are a separate option. On Windows 11 it’s View > Show > File name extensions; on Windows 10 it’s the Hide extensions for known file types box in the same Advanced settings list. To put them away again, see hiding file extensions in Windows.
Once you’ve found what you needed, consider turning hidden items back off so that app folders stay out of the way during everyday browsing.

Kermit Matthews runs Live2Tech from just outside Philadelphia. He is an IT specialist with over 20 years of experience, from a university help desk to small-business IT, IT management and his own consulting practice, and has written tech guides full time since 2020. Steps are checked against the current software on a real device or the maker’s official documentation. More about Kermit.