Working with columns in a document in applications like Microsoft Word or Google Docs is helpful when you are creating or editing a document that benefits from that layout.
The Google Docs column system is quite versatile, and you can easily switch between different column amounts if you aren’t sure which option is best for the current document.
Our tutorial below will show you how to switch columns in Google Docs without worrying that it will cause many issues with the current document content.
How to Switch Back to One Column in Google Docs
- Open your document.
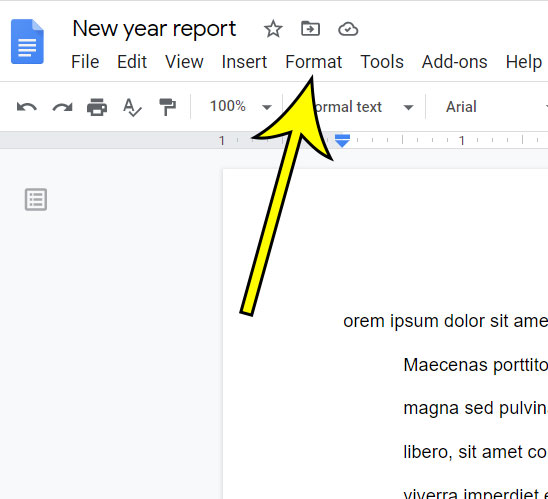
- Select the Format tab.
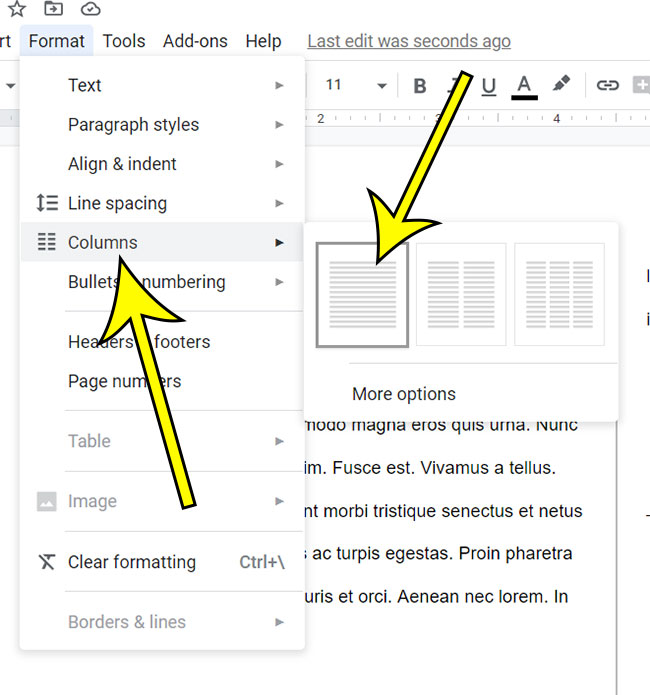
- Choose the Columns option.
- Click the one-column icon.
Our guide continues below with additional information on how to switch columns in Google Docs, including pictures of these steps.
Adding a second or third column in Google Docs is useful if you are creating a document that has the need for columnization.
This is a standard feature for most word-processing applications, and Google Docs has a handful of column options for you to choose from.
But if you are working on a document that has two or three columns, either because you made that change yourself or because you are working on a document that someone else created, it’s possible that you may need to switch back to one column.
Fortunately, the method for switching back to a single column in Google Docs is very similar to the method that was used to add the second or third columns in the first place. Our guide below will show you how.
Related Article: Do you use horizontal lines in your documents? Our Google Docs horizontal line thickness article will show you how to change their appearance.
How to Change a Multi Column Document to a Single Column Document in Google Docs (Guide with Pictures)
The steps in this article were performed in the desktop version of the Google Chrome Web browser but will work in other desktop browsers like Firefox or Edge, too.
Step 1: Sign into your Google Drive and open the document.
Step 2: Select the Format tab at the top of the window.

Step 3: Choose the Columns option, then click the single column option at the left.

Now that you know how to switch columns in Google Docs, you will be able to try out multiple column layouts in your document so that you can tell which one works best for the current project.
Note that if your document has multiple sections with different numbers of columns, then you will need to click inside the section with the multiple columns before completing the steps above.
Be sure to check over the document after changing the number of columns, as some document objects might be moved or affected by this adjustment.
More Information About Google Docs Columns
If you have completed the how to switch columns in Google Docs steps above, then you have likely seen how to addition or removal of a column or two can affect the appearance of the entire document.
But there are some other ways that you can customize the column options for a document.
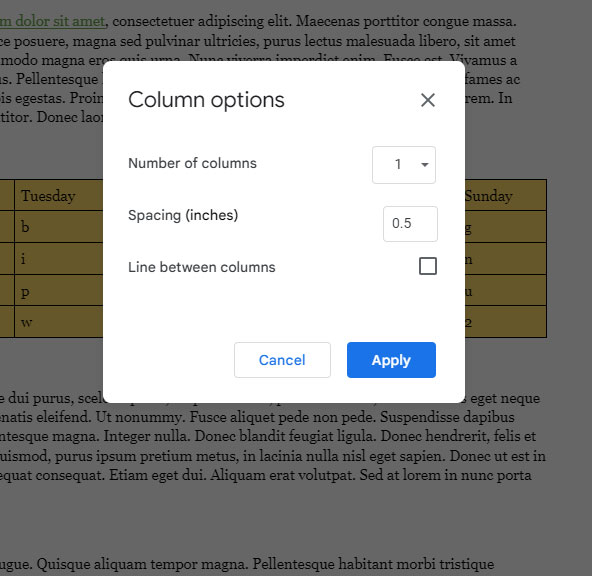
If you go to Format > Columns > More options, it will open the Column options dialog box shown below.
As you can see, this menu provides you with the following options:
- Number of columns – you can use the drop-down menu here to toggle between the 1, 2, or 3 column options.
- Spacing (inches) – specify the amount of space that you want to use between the columns in the document.
- Line between columns – choose whether or not to include a vertical line between each of the columns in the document.

Kermit Matthews is a freelance writer based in Philadelphia, Pennsylvania with more than a decade of experience writing technology guides. He has a Bachelor’s and Master’s degree in Computer Science and has spent much of his professional career in IT management.
He specializes in writing content about iPhones, Android devices, Microsoft Office, and many other popular applications and devices.
