When you add pictures to a Microsoft Word document they will often need a little editing. This could mean rotating the picture or cropping it slightly.
But you might also need to make some adjustments to the appearance of the picture content, and one of those adjustments might involve putting a border around the perimeter of the image.
This tutorial will show you how to add a border around a picture that you have inserted into your Microsoft Word document.
We go over the steps briefly at the start of the article, then go into a bit more depth below with pictures
You can add a border to a picture in a Microsoft Word document by selecting the picture, clicking the Picture Format tab that appears after selecting the picture, then clicking the Picture Border button and choosing a border color and border style.
Following the steps in this article will give you a thin border around the image in your document unless you have adjusted the border weight.
Our guide continues below with pictures for each of these steps, as well as additional instructions on making the border thicker or thinner, as well as using a different border style.
How to Add Picture Border in Microsoft Word
- Open the document with the picture.
- Click the picture to select it.
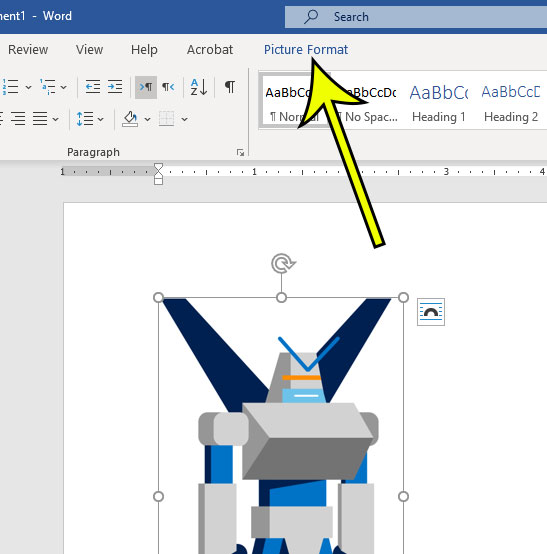
- Select the Picture Format tab at the top of the window.
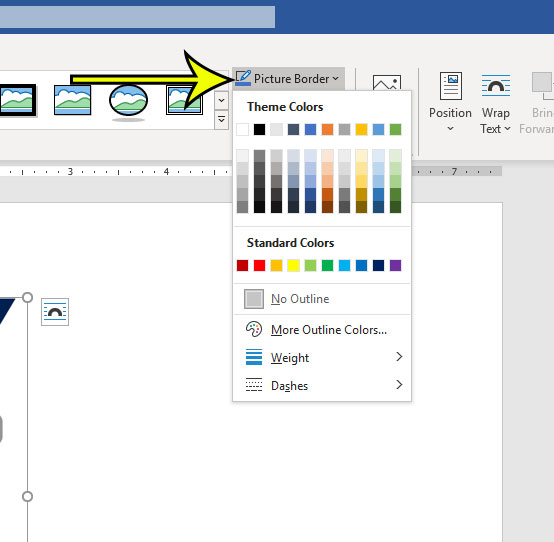
- Click the Picture Border button, then choose the desired color for the border.
Our tutorial continues below with additional information on putting borders around pictures in Word documents, including pictures of these steps.
How to Put a Border Around an Image in Microsoft Word for Office 365 (Guide with Pictures)
The steps in this article were performed in the Microsoft Word for Office 365 version of the application, but will also work for most other recent versions of Word as well.
Step 1: Open the document containing the image around which you wish to add the border.
Step 2: Click the picture to select it.

Step 3: Select the Picture Format tab at the top of the window.

Step 4: Click the Picture Border button in the Picture Styles section of the ribbon, then choose a desired color for the picture border.
This picture styles group lets you perform some other changes besides add borders. You can also apply picture effects like a shadow or a reflection, or you can apply a picture layout to your image automatically.

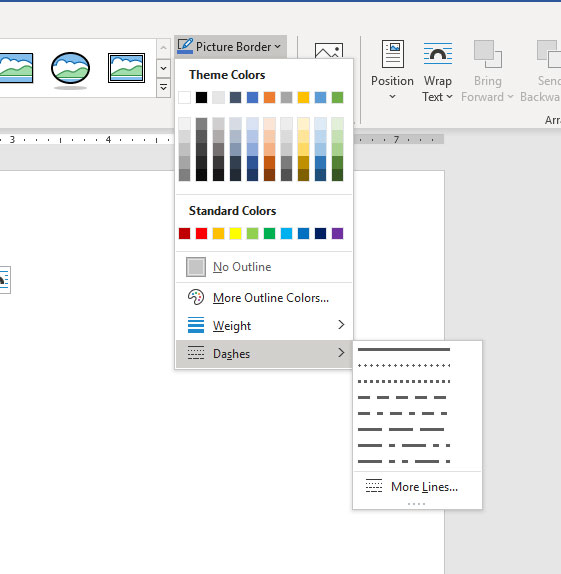
Step 5: Click the Picture Border button again, then choose the Weight option and select a thickness for the picture border.
You can then repeat this step, selecting the Dashes option instead if you would like to change the style of the border.

Our tutorial continues below with additional discussion about working with picture borders in Microsoft Word.
More Information on How to Make Microsoft Word Picture Borders
If you have experimented with different border styles or colors for your picture borders and couldn’t find something that you liked, then you might want to remove that border.
You can do this by selecting the picture, clicking the Picture Format button, selecting Picture Border, then choosing the No Outline option.
While there are a number of border colors shown on the dropdown menu by default, if you don’t see the one that you want then you can click the More Outline Colors for even more choices.
If you have a blank document then you won’t see the Picture format tab, or the Picture Border drop down menu. These menu options only appear when you have added a picture to your document and selected it.
Page borders work a little differently than picture borders. If you want to add border styling to your entire page instead of a single picture or multiple pictures then you will need to select the Design tab at the top of the window, then click the Page Borders button in the Page Background group of the ribbon.
Once you have added your picture border you may want to adjust its position or change the way that text wraps around this. You can find these options on the Layout tab in the Arrange group.
Do you need a quick way to separate different elements of your document? Find out how to draw a horizontal line in your document and quickly create a visible separator.
Additional Reading

Kermit Matthews is a freelance writer based in Philadelphia, Pennsylvania with more than a decade of experience writing technology guides. He has a Bachelor’s and Master’s degree in Computer Science and has spent much of his professional career in IT management.
He specializes in writing content about iPhones, Android devices, Microsoft Office, and many other popular applications and devices.