Even if you’ve been a Microsoft Word user for a long time, there are certain formatting options or objects that you need, but might not know where to find. For example, you might need to know how to curve text in Word if you’re designing a document that would benefit from having that effect.
A traditional Microsoft Word document, such as one that you might create for school or your job, is rarely more than plain text and maybe a picture or graph. But there are a lot of other elements that can be included in a Word document, including curved words.
You can curve text in Microsoft Word selecting the text, clicking the Insert tab, clicking the WordArt button and choosing an option from the drop down menu. You can then select the Format tab > Text Effects > Transform > then choose a curved path.
Whether you’re designing a flyer or a newsletter, or anything else that needs to be visually appealing, there are many cases where you might find yourself needing to curve a Word in your document. Our guide below will show you how to use the tools in Microsoft Word to achieve your curved text.
How to Arch Microsoft Word Text
The steps in this article were performed in Microsoft Word for Office 365, but will also work in most other versions of Word.
This first part of this section provides a brief overview of how to curve text.
If you would like to see the full tutorial with pictures, simply keep scrolling, or click this link to jump to that section. We also discuss how to curve text without WordArt further down in this article.
- Open the Word document.
- Choose where to add the curved text, then type it.
- Select the text.
- Click the Insert tab.
- Choose the WordArt button, then select a style.
- Click the Drawing Tools – Format tab.
- Select Text Effects, then Transform, then a curved text style.
- Adjust the WordArt text box as needed.
Our guide continues below with additional information on how to curve text in Word, including pictures of these steps.
Would you like to include the number of pages next to your page numbers? Our page 1 of 2 in Word tutorial can show you how to set that up.
Full Tutorial – How to Curve Text in Microsoft Word
As mentioned above, this section provides additional information on curving text in Microsoft Word, including pictures.
Note that this method uses WordArt. However, you can also curve text without WordArt. That method is discussed in the section below this one.
Step 1: Open your document in Word.
Step 2: Click at the point where you want to place the curved text, then type it.
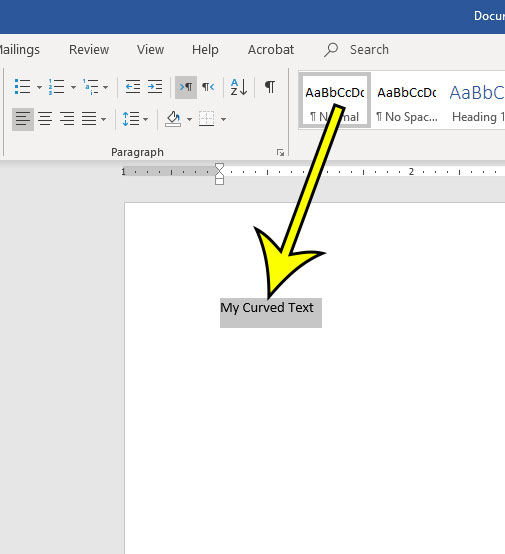
Step 3: Use your mouse to select the text that you wish to curve.
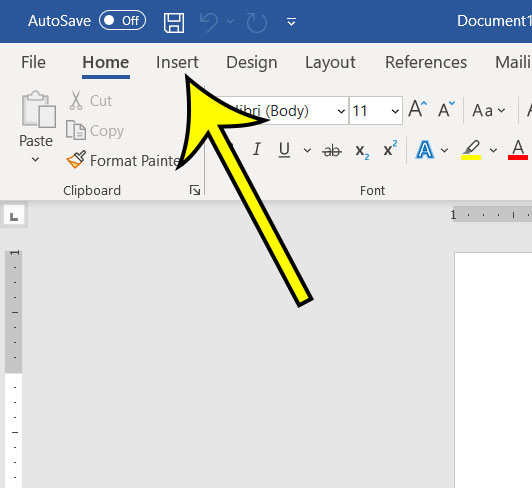
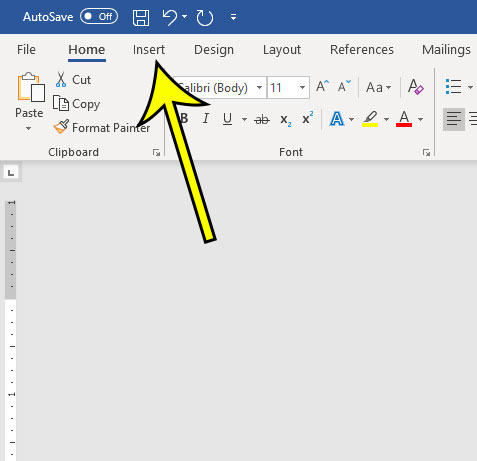
Step 4: Select the Insert tab at the top of the window.
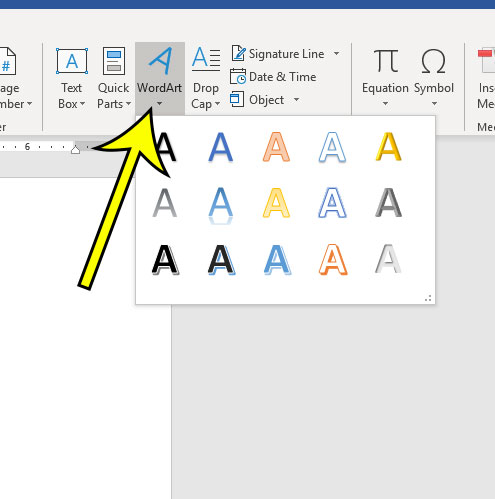
Step 5: Click the Word Art button, then choose the desired style for your curved text.
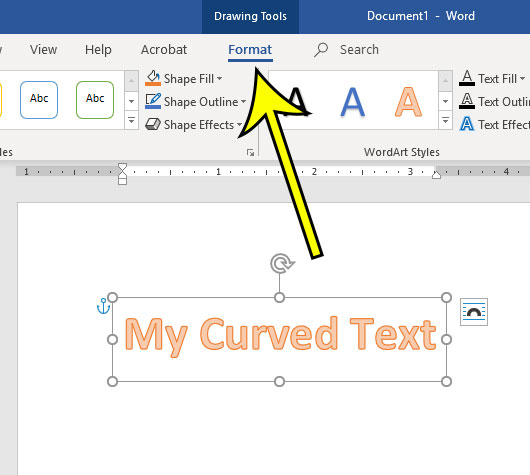
Step 6: Select the Drawing Tools Format tab at the top of the window.
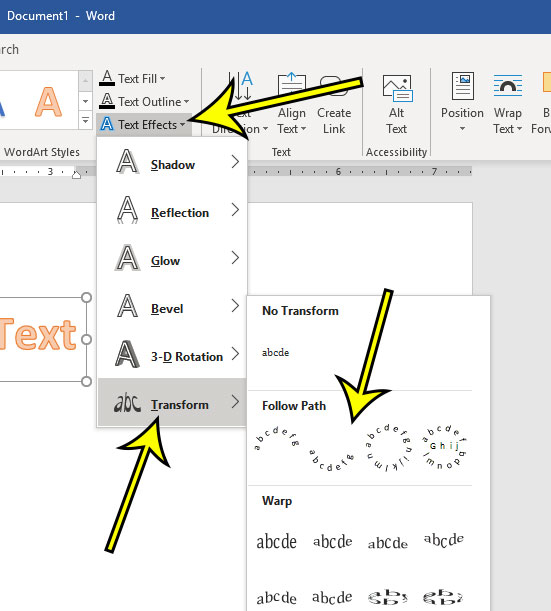
Step 7: Choose the Text Effects option, select Transform, then click the desired curve type under Follow Path.
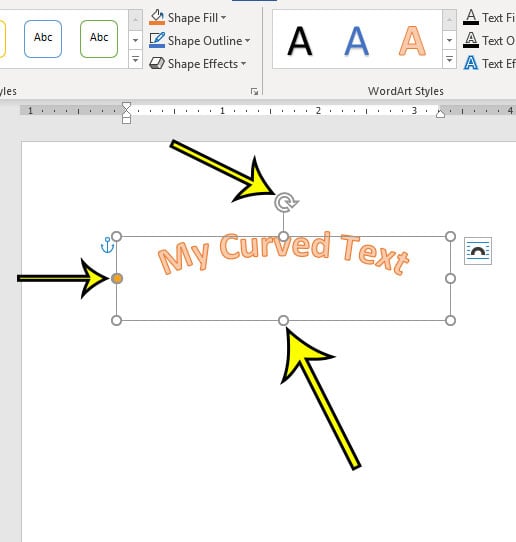
Step 8: Adjust the layout options for your curved text by clicking the white anchors to change the size of the text box, clicking and dragging the orange anchor to adjust the curvature, or clicking on the arrow to rotate the text.
The next section provides an alternate method for curving text.
If you’re adding math equations or other similar text to your document, then this how to do fraction on Word guide can show you a useful tool in the application.
How to Curve Text in Microsoft Word Without WordArt
Sometimes you will want to avoid using certain types of objects in Microsoft Word, including WordArt. Therefore you might want to try this method of curving text instead.
Step 1: Click the Insert tab.
Step 2: Click the Text Box button and choose your text box type.
Step 3: Enter the text into the text box.
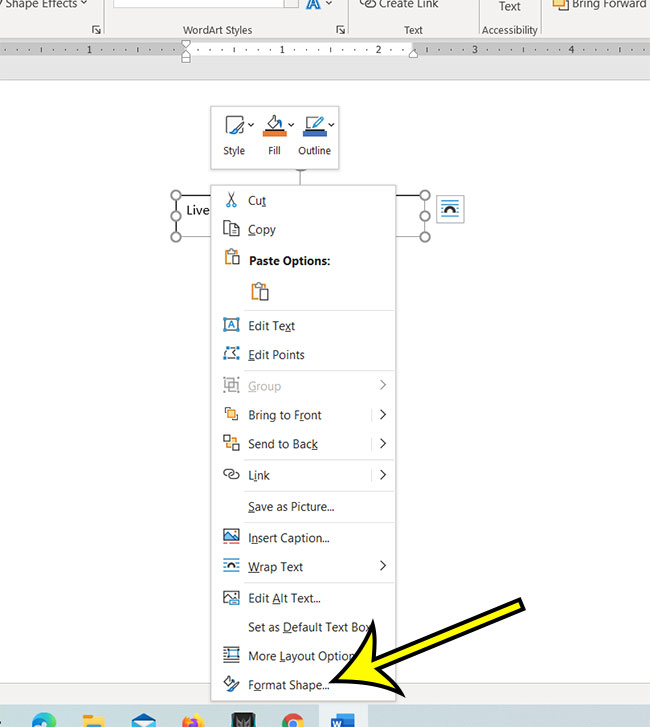
Step 4: Right-click the text box and choose Format Shape.
Note that you need to right-click on the text box border, not inside the text box.
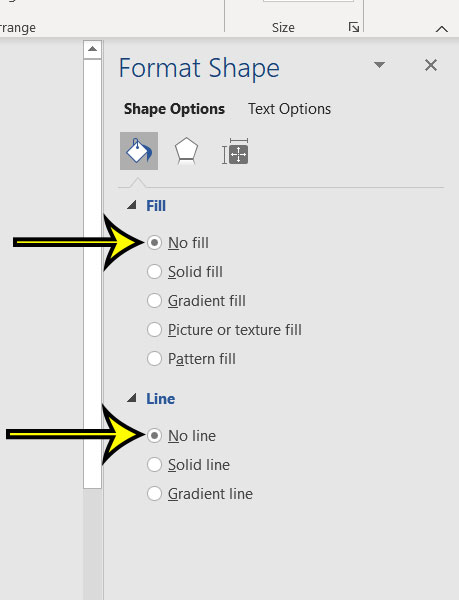
Step 5: Select No Fill and No Line from the column at the right side of the window.
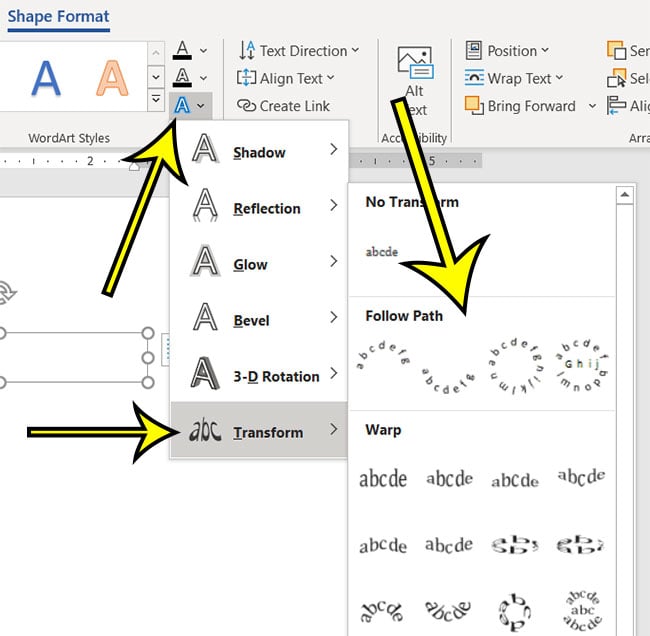
Step 6: Click the Text Effects button, select Transform, then click one of the curved text options under Follow Path.
Depending on the version of Word that you are using you may or may not see a preview of the curved text after you select the shape transformation. Otherwise, you will need to click outside of the text box.
You can edit the text in the text box and adjust its formatting until it looks the way that you want it to look. You can also adjust the size of the text box or rotate it using the controls that surround the text box when it’s selected.
Our tutorial continues below with additional discussion about ways of adding curves to text in Word.
If you see a lot of weird symbols in your document that you can’t remove, then read this how to remove paragraph symbols in Word 2013 article to stop showing all of those different marks.
Frequently Asked Questions About How to Bend Words in Word
Where do I find the different Word Art styles in Microsoft Word?
When you select the Insert tab at the top of the window, you will see a WordArt button in the Text group of the ribbon.
If you click that button it will display the WordArt drop down menu where you can choose from one of the different options that is shown there.
Whichever WordArt icon you select will be applied to the existing text that you used your mouse cursor to select.
How do I add a curved line in Microsoft Word?
If you want to place a curved line in your document instead of choosing to curve or bend text, then you will need to utilize the Shapes tool instead.
You can select the Insert tab at the top of the window, then click the Shapes button in the Illustrations group in the ribbon.
You can then select the Curved line option in the Lines section of the dropdown menu, then draw the line in the document.
Note that the curved line can take some getting used to, as it won’t start curving until you single click your mouse. You can double click your mouse when you are done drawing the curved line, which will create the shape box.
Drawing a line like this in Word takes a little practice, so you might need to try it a couple of times first.
More Information on Curving Text to a Custom Shape in Word
There are a lot of WordArt styles that you can pick from when you are using the Word Art option to create the curved text effect. Plus, you can always go back and choose a different WordArt option or WordArt style after you use the transform option if you don’t like the result.
The placeholder text in a text box can be selected and deleted.
One of the benefits of using a text box to create curved text is that you can move a text box almost anywhere in the Word window, which gives you far more placement options than you have when you use WordArt text.
If you format your curved text and find that you made a mistake, you can undo curved text by pressing the Ctrl + Z keyboard shortcut.
Do you need your curved text to be a specific size? Find out how to show the ruler in Microsoft Word so that you can tell how large part of your document will be when you print it.

Kermit Matthews is a freelance writer based in Philadelphia, Pennsylvania with more than a decade of experience writing technology guides. He has a Bachelor’s and Master’s degree in Computer Science and has spent much of his professional career in IT management.
He specializes in writing content about iPhones, Android devices, Microsoft Office, and many other popular applications and devices.
