An email that claims to come from your bank, or a reply that landed hours after it was sent, can be checked by reading its full header: the hidden record of each server the message passed through and whether the sending domain vouched for it. In classic Outlook for Windows, open the message in its own window and choose File > Properties. In the new Outlook for Windows and Outlook on the web, use More actions > View > View message details.
When the From line in the headers shows a name you no longer use, see where Outlook keeps your sender name for each account type.
Which Outlook do you have?
The steps depend on the app, not on your email provider, so work this out first.
- Classic Outlook for Windows is the desktop program that comes with Microsoft 365 and with Outlook 2016, 2019, 2021 and 2024. It has a File tab at the left end of the ribbon.
- The new Outlook for Windows has no File tab. It looks almost the same as Outlook in a browser, and classic Outlook may show a New Outlook toggle near the top right that switches between the two.
- Outlook on the web (work or school accounts) and Outlook.com (personal Microsoft accounts) run in a browser. They use the same menu as the new Outlook.
- Outlook for Mac and the Outlook mobile app on iPhone or Android are covered in their own section below, because Microsoft’s header instructions do not include them.
A header is the block of technical lines that travels with every message. Your email app normally hides it and shows only the friendly From, To, Date and Subject. The full version also lists the servers that handled the message, time stamps for each hop and the results of the sender checks your mail service ran when the message arrived.
View the header in classic Outlook for Windows
Classic Outlook only shows the header from the message’s own window. The Reading Pane, where a message opens when you single-click it, does not offer the Properties command.
- Find the message in your Inbox or another folder and double-click it so it opens in a separate window.
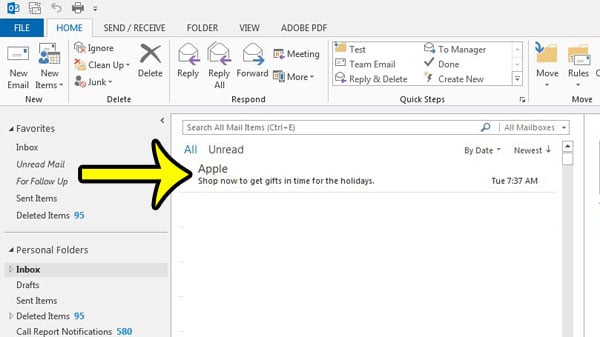
Outlook 2013 shown; current screens look different. - In that message window, click File.
- Click Properties. Depending on your version and layout, the button may sit on the Info page that opens after you click File.
- Look at the Internet headers box at the bottom of the Properties dialog. The text is long, so click inside the box and scroll, or copy it out as described further down.

Outlook 2013 shown; current screens look different. - Click Close when you are done. Viewing the header changes nothing about the message.
Outlook 2010 and 2013
The same Properties dialog opens from the message window’s ribbon in these older versions: on the Message tab, click the small arrow button at the bottom-right corner of the Tags group. If you do not see a Tags group, check that the Message tab is selected. File > Properties works too, and it is the route Microsoft documents.

View the header in the new Outlook and Outlook on the web
The new Outlook for Windows, Outlook on the web and Outlook.com share one menu, so these steps work in all three. You can do it from the Reading Pane; there is no need to pop the message out.
- Select the message so it shows in the Reading Pane, or open it.
- Click More actions, the three-dot button at the top of the message (not the one for the whole mailbox).
- Point to View, then click View message details.
- A Message details window opens with the full header text. The sender’s address is listed under the From field near the top.
- Close the window with the X or the Close button.
Some older help pages call this command View message source. Microsoft’s current instructions use View message details, so look for that name first.
Outlook for Mac and the Outlook mobile app
Microsoft’s header page does not cover these apps, so treat the following as a starting point rather than a guaranteed label.
- Outlook for Mac: select the message, then try right-clicking (or Control-clicking) it and looking for View Source, or check the View menu in the menu bar for a Message submenu with the same command. The source opens as plain text that includes the header at the top. If you cannot find it and the account is a Microsoft 365 or Outlook.com account, open it in Outlook on the web or Outlook.com and use View message details.
- Outlook for iPhone and Android: Microsoft does not document a way to see full headers in the mobile app. Open the same mailbox in a phone or computer browser at the Outlook web address your account uses, then follow the web steps above. For a Gmail or other provider account, use that provider’s own web mail, which has its own view-original or show-source command.
Copy the header or send it to someone who can read it
Help desks and email administrators often ask for the header as text, not a screenshot, because they need every line and the exact time stamps.
- Open the header with the steps for your Outlook.
- Click inside the Internet headers box (classic) or the Message details text (new Outlook and web).
- Press Ctrl+A to select all of it, then Ctrl+C to copy. On a Mac, use Command+A and Command+C.
- Paste it into Notepad, Word or a new email with Ctrl+V.
Another option in classic Outlook is to drag the suspicious message into a new email so it is attached as an item. The attachment carries the whole original message with its header, which is handy when an IT team wants to inspect it. Before you forward anything, check your organization’s rules; many have a report button or a dedicated phishing address and prefer that you do not forward suspected phishing at all.
Headers include IP addresses, server names and your own address. Share them only with people or tools you trust.
What the important header lines mean
A raw header can run to dozens of lines. Most of them are routine. These are the ones worth reading when you are judging a message.
| Line | What it tells you | What to watch for |
|---|---|---|
| From | The sender name and address you see in Outlook | This line is easy to fake, so never rely on it alone |
| Reply-To | Where your reply will go | A different, unrelated domain is a common phishing sign |
| Return-Path | The address that receives bounce messages | A mismatch with From is normal for newsletters but suspicious for a “personal” note |
| Received | One line per server hop, with a time stamp | Read from the bottom up; a big gap between two hops shows where a delay happened |
| Date | When the sender’s app says the message was written | Compare with the top Received line to measure the total delay |
| Message-ID | A unique identifier created by the sending system | Its domain usually matches the real sending service |
| Authentication-Results | The SPF, DKIM and DMARC checks your mail service ran | Any “fail” deserves a closer look |
Bcc recipients are not listed in the header your copy carries.
A worked example of a delayed message
Suppose a colleague insists a report was sent at 9:02 a.m., but it appeared in Outlook at 11:40 a.m. In the header, the bottom Received line shows the sender’s server at 9:02, the next line shows the sender’s outbound filter at 9:03, and the top line shows your company’s server accepting it at 11:39. The two-and-a-half-hour gap sits between the sender’s filter and your server, so the delay happened in transit or at your mail gateway, not in Outlook. If instead every Received time is close together and the message still showed up late, look at your own connection and how often your app checks for mail.
Check authentication results: SPF, DKIM and DMARC
When a message arrives, the receiving service checks whether the sending domain authorized it. The results are written into an Authentication-Results line (some services add similar lines with other names).
- SPF (Sender Policy Framework) checks whether the server that sent the message is on the domain’s list of approved senders.
- DKIM (DomainKeys Identified Mail) checks a digital signature that proves the message was not changed after the domain signed it.
- DMARC (Domain-based Message Authentication, Reporting and Conformance) checks that the domain in the From address lines up with the domain that passed SPF or DKIM, and tells receivers what to do if it does not.
Look for words such as pass, fail, softfail or none after each check. A message from your bank that fails DMARC is a strong warning. A pass, however, only proves the message really came from the domain it names. Scammers can register look-alike domains and pass every check, so still read the domain itself carefully and never use links in a message you doubt.
Let Message Header Analyzer do the parsing
Microsoft offers a free Message Header Analyzer as part of the Microsoft Remote Connectivity Analyzer. It turns the wall of text into a table of hops and delays.
- Copy the full header from the recipient’s copy of the message. Headers in the sender’s copy are not necessarily useful, so ask the recipient for theirs.
- Open the Message Header Analyzer page and paste the text into the box.
- Click Parse.
- Review the summary and the list of hops, which shows how long the message spent at each server.
If a message never arrived at all, there is no header to analyze. In that case an administrator needs to use message tracking on the mail server instead. Microsoft also lists a Message Header Analyzer app in the Office add-in store; whether you can add it depends on your account and what your organization allows.
When the header is missing, blank or confusing
- No Properties command: you are in the Reading Pane. Double-click the message to open it in its own window, then click File.
- No File tab at all: you are in the new Outlook. Use More actions > View > View message details.
- Internet headers box is empty or very short: this can happen with drafts, with messages you sent yourself and sometimes with mail sent between people in the same organization. Ask a recipient outside your organization for their copy if you need full routing.
- Time stamps look wrong: each server writes its own time, often in UTC or with an offset such as -0500. Convert them to one time zone before comparing.
- You found a spoofed sender: report it with your organization’s tools, then create a rule in Outlook if the same sender keeps getting through.
Headers are also where an accented domain shows up in its xn-- form, which is explained in allowing international domain names in Outlook.
Email header questions
Can I see the header without opening the message in classic Outlook?
Microsoft’s documented route needs the message open in its own window. Attaching the message to a new email, or opening the same mailbox in Outlook on the web, are the practical alternatives.
Does viewing a header mark the message as read or alert the sender?
Opening the message can mark it as read, as with any message, but reading the header sends nothing to the sender. It only displays data that is already stored with the message.
Is a header that passes every check proof the email is safe?
No. It proves the named domain sent it. A fraudster who owns a similar-looking domain can pass SPF, DKIM and DMARC for that domain, so the domain name itself still needs checking.
Why does my header look different from someone else’s for the same message?
Each recipient’s mail service adds its own Received and authentication lines, so two copies of one message rarely match line for line. Always compare the copy that actually reached the person asking the question.
If the header shows mail reaching your server on time but appearing late on your screen, the cause may be how often your app checks for new messages; see how to make Outlook check for new mail more often. And if you are not sure which Outlook a PC is running before changing anything else, the first section of the guide to clearing the Outlook cache shows how to tell classic and new Outlook apart. Microsoft’s own walkthrough is on its view internet message headers page.

Kermit Matthews runs Live2Tech from just outside Philadelphia. He is an IT specialist with over 20 years of experience, from a university help desk to small-business IT, IT management and his own consulting practice, and has written tech guides full time since 2020. Steps are checked against the current software on a real device or the maker’s official documentation. More about Kermit.