Float both pictures first: set Wrap Text to In Front of Text so one picture can sit on top of the other. Then change which picture is on top with the ordering buttons or the Selection Pane, and group the pair so it moves as one.
New pictures arrive In Line with Text, which Microsoft says stops a picture from moving or grouping. These steps are for Word for Microsoft 365, Word 2024, 2021 and 2019.
Float both pictures
- Insert both pictures with Insert > Pictures, for example a background photo and a smaller logo.
- Select the first picture, then select the Layout Options button that appears beside it (or go to Picture Format > Wrap Text).
- Under With Text Wrapping, choose In Front of Text. For the bottom picture, Behind Text also works and lets you type over it.
- Repeat for the second picture, then drag the top picture over the bottom one. Hold Ctrl and press an arrow key to nudge it in small steps.
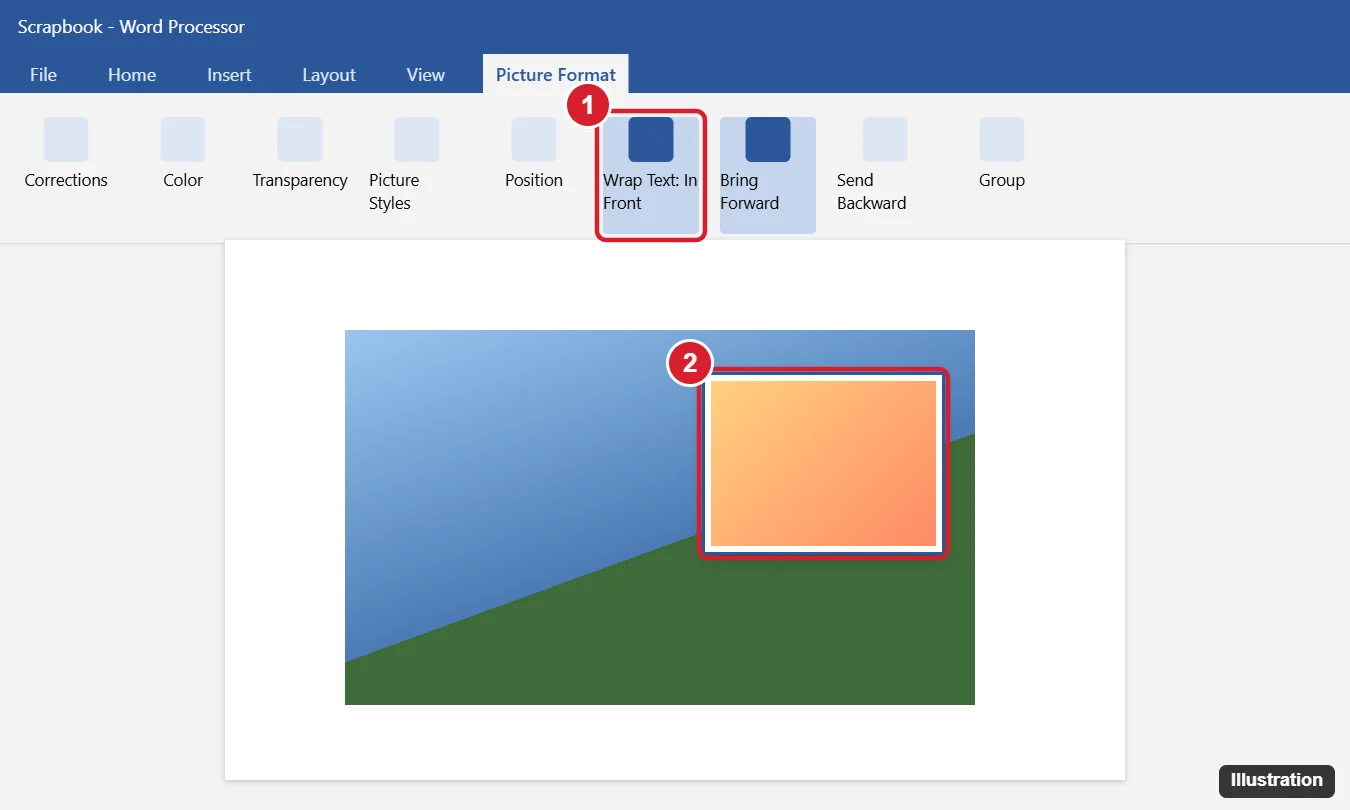
Wrap Text has other options, such as Square and Tight, that flow text around a picture instead of stacking it; putting text next to a picture in Word covers those.
If the pictures won’t overlap
If Word won’t let one picture sit over the other, check Allow overlap. Microsoft says selecting it for each picture lets the pictures overlap.
- Select the picture and open Layout Options, then select See more.
- On the Position tab, under Options, select Allow overlap and select OK.
- Do the same for the other picture, then drag again.
Choose which picture is on top
To change which picture is in front, select one and use Bring Forward or Send Backward on the format tab that appears when the picture is selected. Microsoft describes these buttons as offering a choice between one layer (Bring Forward) and the top of the stack (Bring to Front); Send Backward works the same way toward Send to Back, which helps when you have more than two layers.
When the bottom picture is hard to click, use the Selection Pane instead:
- Go to Home > Select > Selection Pane, or press Alt+F10.
- Select a picture in the list and drag it up or down, or use the Bring Forward and Send Backward buttons in the pane.
- Use the hide button next to an item to hide the top picture for a moment while you work on the one under it, then show it again.
Microsoft notes that inline objects appear in the pane but can’t be reordered, which is one more reason to float both pictures first.
Group the pictures so they move together
- Select the first picture, hold Ctrl, and select the second.
- Go to Picture Format > Group > Group.
If Group is unavailable, check two things Microsoft lists: at least two objects must be selected, and each must use a wrap setting other than In Line with Text. To adjust one picture inside the group, select the group and then that picture. Grouping objects in Word has more on ungrouping and mixed groups. Lining the pictures up before you group is quicker with the Align commands in aligning pictures in Word.
Put words or a label on top
For a caption or title over the photo, draw a text box (Insert > Text Box), remove its fill and outline so only the words show, drag it over the pictures, and include it when you group. The same idea is the usual fix for wording baked into an image, as editing text in a picture in Word explains.
To let the bottom picture show through the top one, change the top picture’s transparency; changing opacity in Word covers pictures, shapes and text.
Keep the stack where you put it
A floating picture is tied to a paragraph by an anchor, and with Move with text selected it travels when that paragraph moves. If typing above the pictures shifts them, choose Fix position on page in Layout Options. To see the anchor, turn on formatting marks; the Layout box also has a Lock anchor option so the anchor stays with one paragraph. Locking an image in Word goes further, including protecting it from edits.
When the background photo should cover the page from edge to edge, set it up first with the full-page picture steps for Word.
Picture layering questions
Does this work in Word for Mac?
Microsoft’s grouping and Selection Pane pages list Word for Mac in their Applies To lists, but its wrap text page covers Word for Windows only, so labels on a Mac may differ.
Can I layer pictures in Word for the web?
Only partly. Microsoft says Word for the web can’t move a picture that was inserted in the desktop app if it has text wrapping or a fixed position on the page, and it doesn’t describe stacking or grouping there. Select Open in Word, change the layout in the desktop app and save; Word for the web keeps those layout settings.
How is this done in Google Docs?
The wrap names are similar but the menus differ; see overlaying pictures in Google Docs.
Microsoft’s own pages on wrapping text and moving pictures, the Selection Pane and grouping objects have the full option lists.

Kermit Matthews runs Live2Tech from just outside Philadelphia. He is an IT specialist with over 20 years of experience, from a university help desk to small-business IT, IT management and his own consulting practice, and has written tech guides full time since 2020. Steps are checked against the current software on a real device or the maker’s official documentation. More about Kermit.