Mobile phone notifications are a useful way to let you know when there is something new that requires your attention.
These notifications can stop you from constantly checking the device all the time so that you are able to do other things.
But if you get a lot of text messages and the notifications are becoming overwhelming, then you might be wondering how to turn off all text message notifications on iPhone 13.
How to Disable iPhone 13 Message Notifications
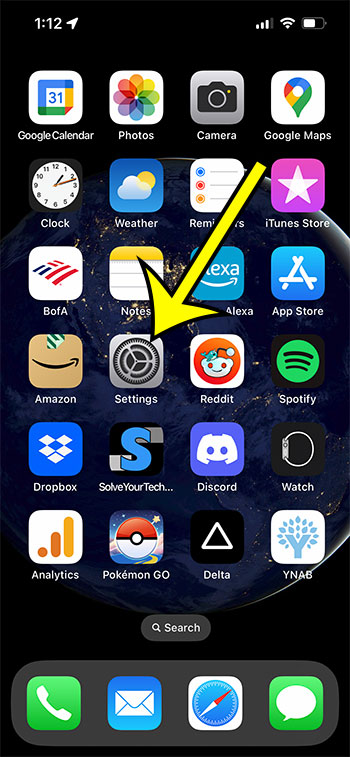
- Tap Settings.
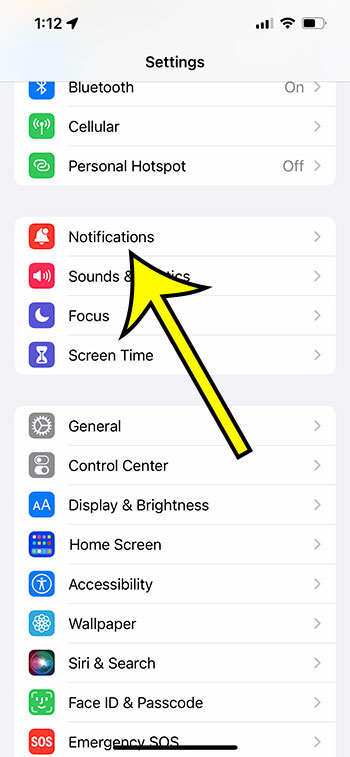
- Choose Notifications.
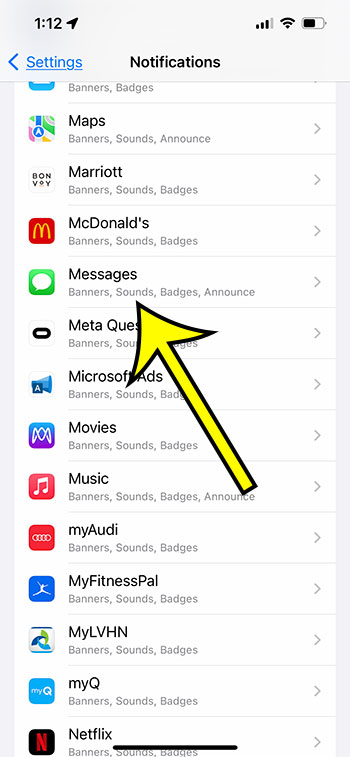
- Select Messages.
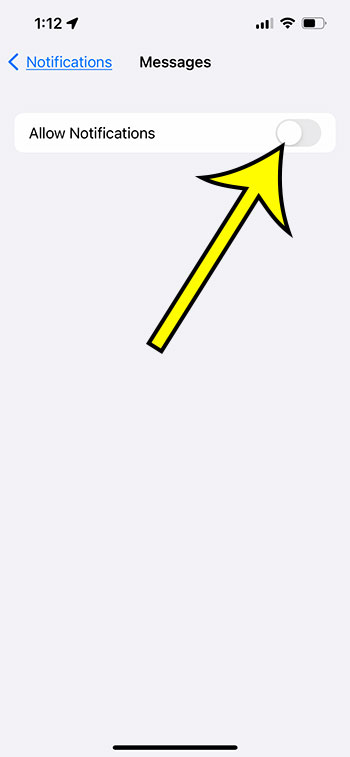
- Tap Allow Notifications to turn them off.
Our guide continues below with more information on how to turn off all text message notifications on an iPhone 13, including pictures of these steps.
If you had previously tried to minimize the number of text message notifications that you receive, then you may have checked out our what does hide alerts mean article and followed the steps there stop alerts from a specific conversation.
While that’s helpful when you only need to change the notifications for one conversation, you might find that the rest of the notifications from the other conversations are simply too much to handle.
The constant screen illumination can be distracting, and it can also cause your battery to wear down. Plus, if your phone isn’t silenced, then the text alerts could be disrupting people around you as well.
Fortunately, you can follow our how to turn off all text message notifications on iPhone 13 tutorial and just stop all of those alerts and choose to check your messages on your own terms.
How to Silence All Text Message and iMessage Notifications on an iPhone 13 (Guide with Pictures)
The steps in this article were performed on an iPhone 13 in the iOS 16 operating system.
Step 1: Open the Settings app on your iPhone.
Step 2: Select the Notifications option.
Step 3: Scroll down and choose the Messages option.
Step 4: Turn off Allow Notifications.
Now that you know how to turn off all text message notifications on an iPhone 13, you will be able to reduce the number of notifications that you get throughout the day.
If you are worried that this might be too significant of a change, then you could also go to the Settings > Focus menu and tinker with the settings on that menu to set up a Do Not Disturb system.
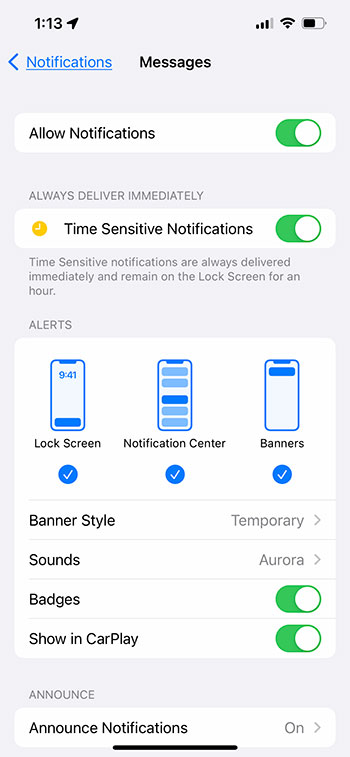
Your iPhone also has some other notification settings that you could choose to adjust if you don’t want to completely turn them off. The image below shows some of those:
As you can see in the picture above, you are also able to customize message notifications in the following ways:
- Time Sensitive Notifications – if you turn this on, then your notifications will be delivered to you immediately, and they will remain on the lock screen for an hour.
- Lock Screen – choose whether or not your text message notifications are shown on the lock screen
- Notification Center – choose whether the notifications appear in the Notification Center
- Banners – choose whether there is a temporary banner at the top of the Home screen to show new messages
- Banner Style – select between temporary or persistent banners
- Sounds – set the text tone and vibration pattern
- Badges – show the number of missed text messages in a bubble on the app icon
- Show in CarPlay – display text message notifcations on the CarPlay interface
- Announce Notifications – read text messages while using AirPods
- Show Previews – show part of the text message in the notifications
- Notification Grouping – customize whether or not message notifications are grouped together
- Customize Notifications – set the option to repeat alerts
There are a lot of ways to adjust the manner in which you get notifications about new text messages if you aren’t quite sure whether or not you want to stop them or mute them all entirely.
Plus you can change these settings whenever you want, so you can always come back to this menu and re-adjust the settings until you have a configuration that you’re happy with.

Kermit Matthews is a freelance writer based in Philadelphia, Pennsylvania with more than a decade of experience writing technology guides. He has a Bachelor’s and Master’s degree in Computer Science and has spent much of his professional career in IT management.
He specializes in writing content about iPhones, Android devices, Microsoft Office, and many other popular applications and devices.
