When you have information in a spreadsheet that you want to use in a document or a slideshow, then you might just copy and paste it as is.
But the needs of the document could vary, and it’s possible that things would be much simpler if the pasted text were an image instead.
Our tutorial below will show you how to copy as a picture in Excel so that you can paste an image of the data instead.
How to Use Excel’s Option to Copy as a Picture
- Open the Excel file.
- Select the data to copy.
- Choose the Home tab.
- Click the Copy arrow, then Copy as a Picture.
- Choose your preferred image settings, then click OK.
- Open the target file and press Ctrl + V to paste the copied data.
Our guide continues below with additional information on how to copy as a picture in Excel, including images of these steps.
It is a common activity in Microsoft Office programs to copy and paste data between spreadsheets, documents, and presentations. There is a lot of compatibility between these different file types, which often makes them easy to work with.
But you may find that data you copy and paste from Excel 2013 to another program is difficult to deal with due to the formatting restrictions of the target document or presentation.
One good way to avoid problems like this is to copy your selection as an image in Excel 2013, then paste the image instead of the cells themselves.
How to Copy a Selection as a Picture in Excel 2013 (Guide with Pictures)
The steps in this article will show you how to make a selection in Excel 2013, then copy that selection as a picture. You can then paste that copied picture into another program, such as Powerpoint or Word.
Step 1: Open your spreadsheet in Microsoft Excel 2013.
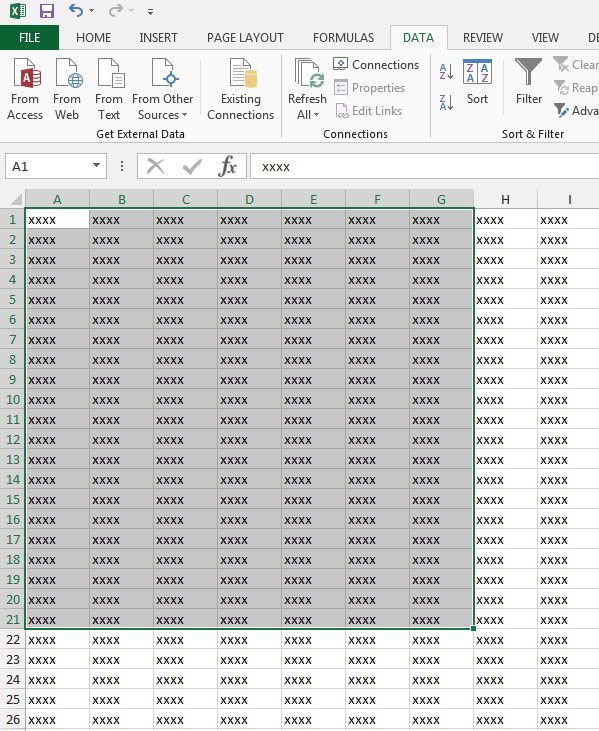
Step 2: Use your mouse to select all of the cells that you want to include in the copy.
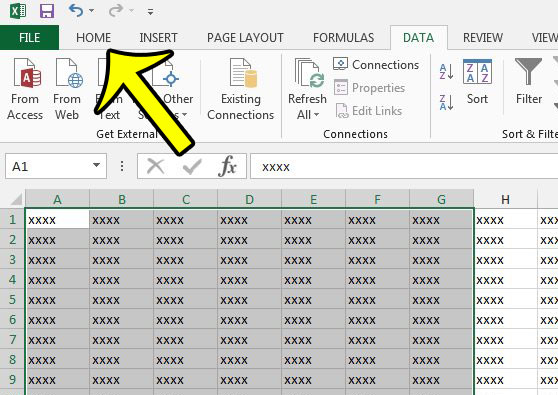
Step 3: Click the Home tab at the top of the window.
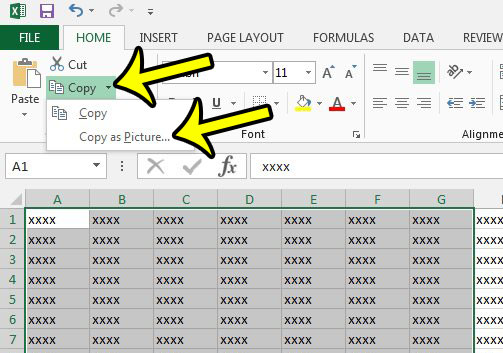
Step 4: Click the arrow to the right of Copy in the Clipboard section of the ribbon, then click the Copy as Picture option.
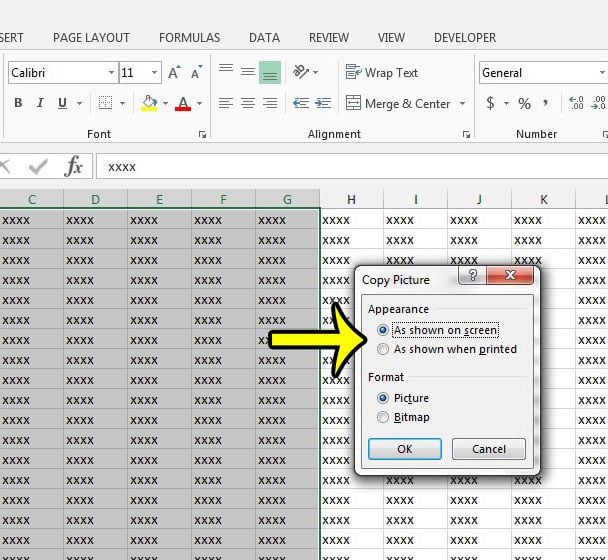
Step 5: Specify whether you wish to copy the selection as it appears on your screen, or as it would appear when printed, choose a picture format, then click the OK button.
Step 6: Navigate to the program in which you wish to paste the copied picture, then press Ctrl + V on your keyboard to paste the image.
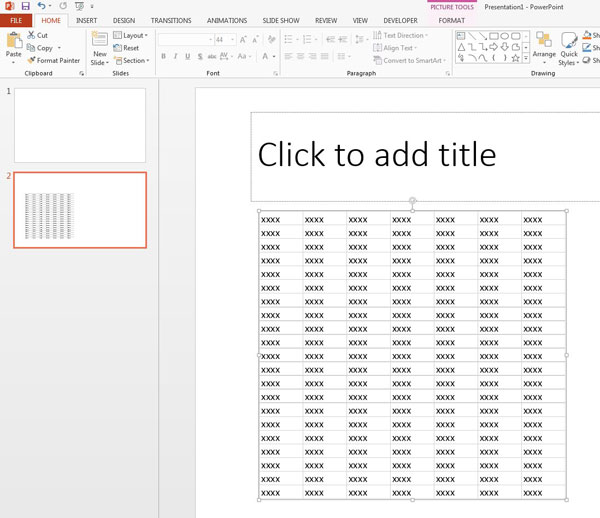
Now that you know how to copy as a picture in Excel, you will be able to use this method whenever the standard copy and paste method isn’t working for you.
Using the merge and center tool in Excel 2013 can help you to make data in your spreadsheet easier to read.
But cells that have been merged and centered can be difficult to format or edit, so you may be looking for a way to achieve the appearance created by merge and center, but to keep the data in its original, unmerged cell.
Learn how to center across multiple cells in Excel 2013 and see if that effect is more helpful for you.

Kermit Matthews is a freelance writer based in Philadelphia, Pennsylvania with more than a decade of experience writing technology guides. He has a Bachelor’s and Master’s degree in Computer Science and has spent much of his professional career in IT management.
He specializes in writing content about iPhones, Android devices, Microsoft Office, and many other popular applications and devices.