Finding the right font for an image or a project can make all the difference in the final version of that job. It’s something that can require a lot of trial and error, unfortunately, and it’s likely that you may not already have the right font for the job on your computer.
Figuring out how to add fonts to Photoshop is something that anyone who spends some time with the program will eventually need to know.
You may have already found your way around Photoshop, and learned how to do some useful things, but the method for adding new fonts might be escaping you.
You can install a new font for Photoshop by right-clicking on the font file, extracting it, then right-clicking on the extracted font file and clicking the Install button.
The reason why it seems so difficult to add new Photoshop fonts is that you can’t do it from within Photoshop.
Fonts are a function of the operating system, then Photoshop pulls the font information from there.
Our tutorial in this article will show you how to add a font to Photoshop CS5 by installing it in Windows.
How to Put Fonts in Adobe Photoshop
- Locate the font file.
- Right-click on it and choose Extract All.
- Click the Extract button.
- Right-click on the extracted file and choose Install.
Our guide continues below with additional information on adding fonts in Photoshop, including pictures of these steps.
How to Install a New Font in Photoshop CS5 (Guide with Pictures)
There are a number of places where you can find free fonts, including dafont.com and Google Fonts.
Both of these services will provide you with fonts that come in zip files, which you will need to extract before you can add that font to your computer and thus, Photoshop.
The steps below were performed on a computer using the Windows 7 operating system. However, these steps are very similar to other versions of Windows.
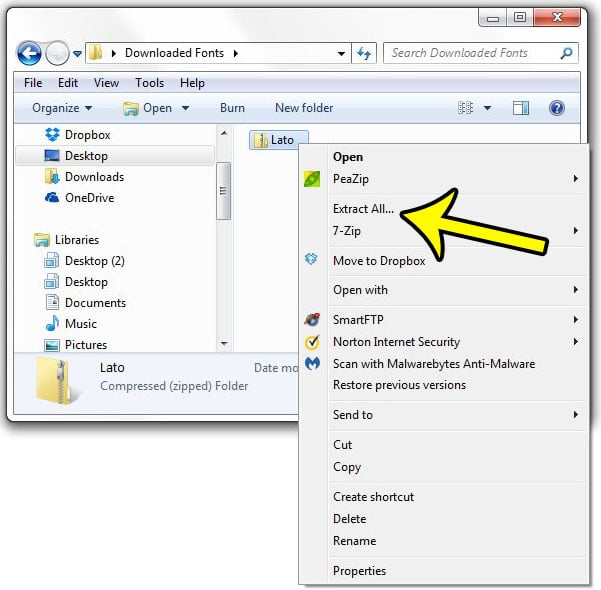
Step 1: Locate your downloaded font file, then right-click on it and select Extract All.
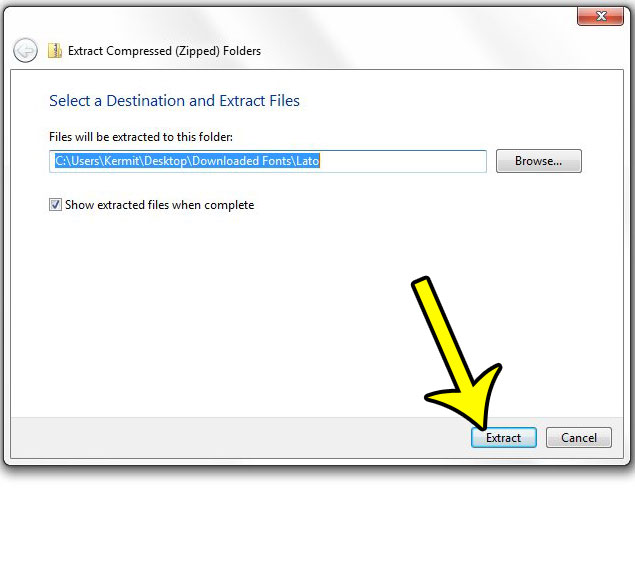
Step 2: Click the Extract button.
Note that you can choose to extract the font file to a different location, but you don’t need to. Windows will take care of installing the font in the correct location on its own.
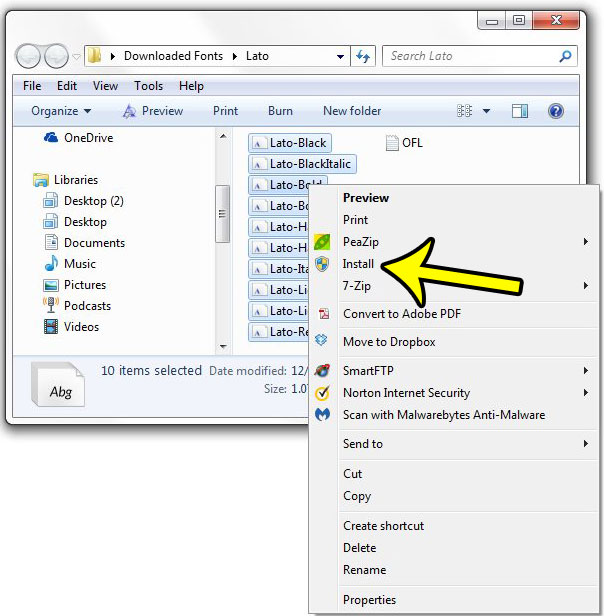
Step 3: Select the font file (or hold down the Ctrl key on your keyboard and select multiple font files) then right-click on the selected font and click the Install option.
Your font should now be available in Photoshop. If not, close Photoshop and restart it. As a bonus, you can also use this font in other applications that utilize the Windows system fonts, such as those in Microsoft Office.
How to Delete a Font from Photoshop CS5
Much like adding a font to Photoshop is something that occurs through your operating system, deleting a font is also an OS function.
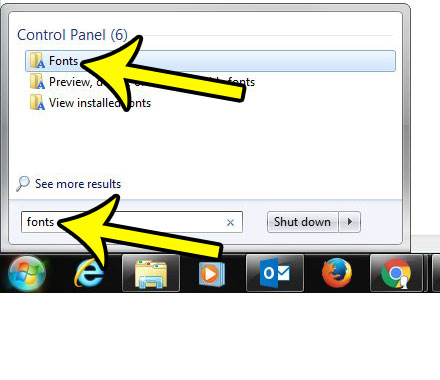
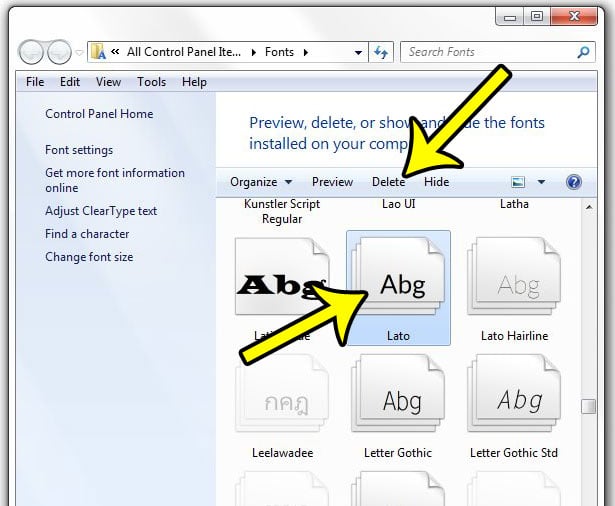
Step 1: Click the Start button at the bottom-left corner of the screen, then click inside the search field, type “fonts,” then click the Fonts result.
Step 2: Select the font that you want to delete, then click the Delete button.
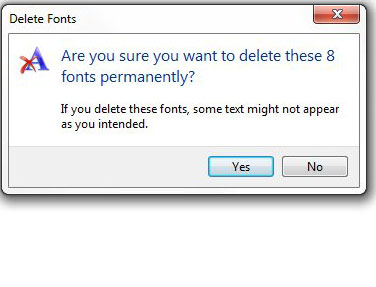
Step 3: Click the Yes button to confirm that you want to delete the font.
Occasionally a font will actually be a family of fonts, and this dialog window will indicate that you are actually uninstalling multiple fonts.
How to Change an Existing Font in Photoshop CS5
If you have a text layer in your Photoshop image, but the font is incorrect, then you might be trying to change it. If the font is in a text layer, then you will be able to switch fonts.
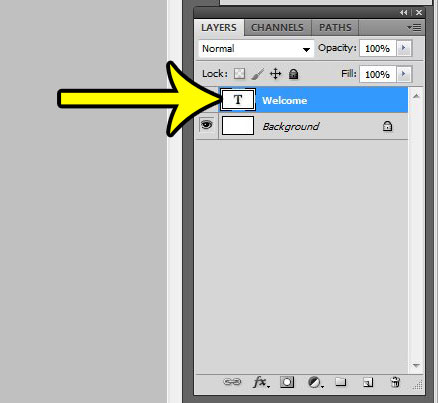
Step 1: Open your image in Photoshop, then select the text layer from the Layers panel.
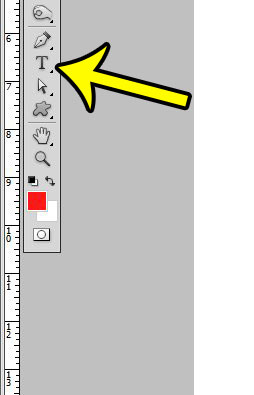
Step 2: Select the Text tool from the toolbox.
Step 3: Select the font drop-down menu at the top of the window, then click the font that you would like to use.
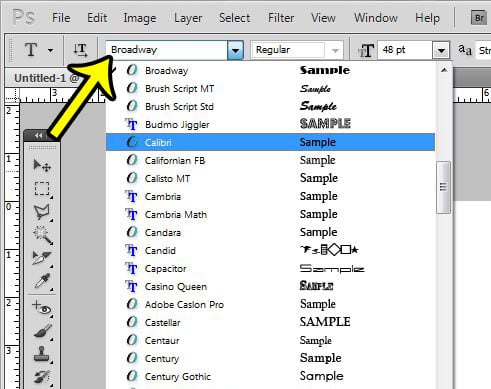
Our tutorial continues below with additional discussion on working with fonts in Adobe Photoshop.
More Information on How to Import Font into Photoshop CS5
One of the reasons why it can seem confusing to add a font to Photoshop is that it relies on the system fonts rather than something specific in Photoshop. Plus, if you don’t have a lot of experience with font files, then you might not realize that when you download fonts there are still a couple more steps before you can use them.
When you acquire a new font from someplace like Google Fonts you simply need to right-click on it and install it, just like you would if you were using a new font in Microsoft Word or Microsoft Powerpoint.
If you are using Photoshop on a MacBook Pro or a MacBook Air then installing new fonts for Photoshop is even easier. Simply double-click on the font file to see a preview of it, then click the Install Font button at the bottom-right of the preview window.
You can always get to the Fonts folder where you can view all the fonts on your system by clicking in the search bar and typing the word “fonts.”
You can interact with your Photoshop fonts in a lot of other ways, too. For example, you can underline text in Photoshop. That can be a difficult thing to replicate if you hadn’t been able to find the option, so it’s nice to know that there are additional Photoshop font settings.
Additional Reading

Kermit Matthews is a freelance writer based in Philadelphia, Pennsylvania with more than a decade of experience writing technology guides. He has a Bachelor’s and Master’s degree in Computer Science and has spent much of his professional career in IT management.
He specializes in writing content about iPhones, Android devices, Microsoft Office, and many other popular applications and devices.