The collaboration feature in Google Sheets makes it easier for a group of people to work on the same file. But if you have shared your file with others, you might not want them to be able to change some of the information found in that file.
Fortunately Google Sheets provides an effective way for you to achieve this by setting permissions for a particular worksheet in that file. Our guide below will show you how to protect a sheet in Google Sheets so that others are unable to change it.
How to Prevent Others from Changing Data on a Worksheet in Google Sheets
The steps in this article assume that you already have a spreadsheet in Google Sheets, and that there is a worksheet in that file that you want to protect. Completing these steps will modify the permissions of that sheet so that only you will be able to edit it.
Step 1: Sign into Google Drive at https://drive.google.com/drive/my-drive and open the file containing the sheet that you wish to protect.
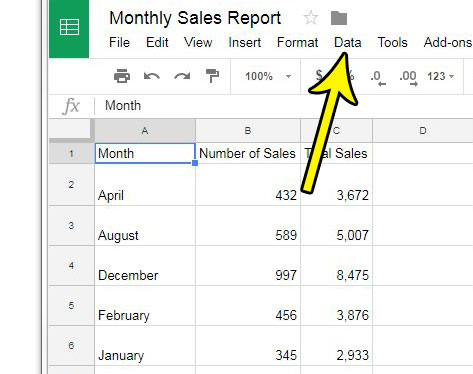
Step 2: Select the Data tab at the top of the window.
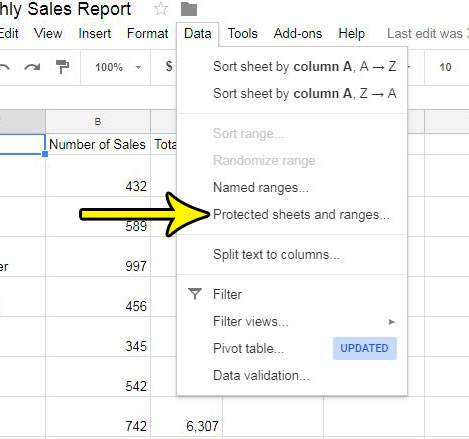
Step 3: Choose the Protected data and ranges option.
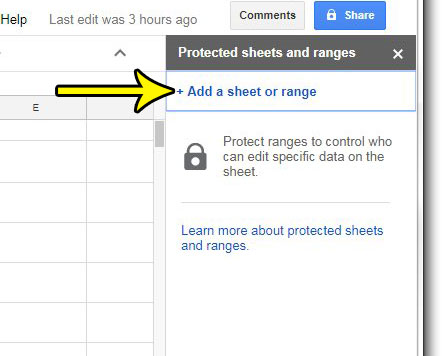
Step 4: Click the Add a sheet or range option in the column at the right side of the window.
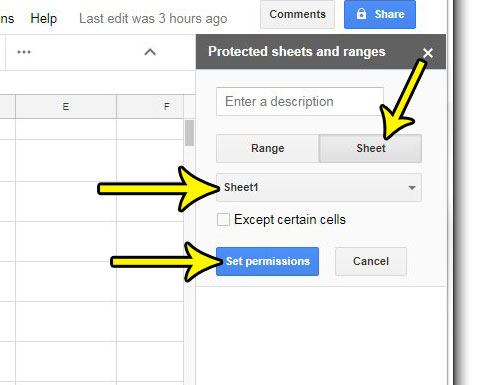
Step 5: Click the Sheet tab, select the worksheet that you wish to protect, then click the Set permissions button.
Step 5: Choose the Restrict who can edit this range option, select the Only you option, then click the Done button.
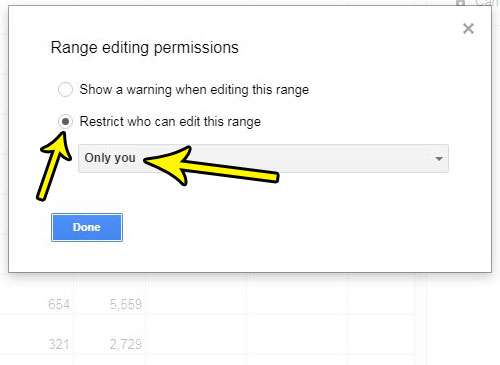
Now the only person that can edit the specified worksheet is you.
Is there a file in your Google Drive account that has a file name which isn’t helpful? Find out how to change a file name in Google Sheets and make your spreadsheets easier to identify in your Drive.

Kermit Matthews is a freelance writer based in Philadelphia, Pennsylvania with more than a decade of experience writing technology guides. He has a Bachelor’s and Master’s degree in Computer Science and has spent much of his professional career in IT management.
He specializes in writing content about iPhones, Android devices, Microsoft Office, and many other popular applications and devices.