The steps in this article are going to show you how to insert a check mark into a Microsoft Powerpoint presentation.
- The check mark symbol that you are adding with these steps is actually a symbol found in the Wingdings font.
- If the check mark seems to be too small, then simply select it the same way that you would select other text, then increase the Font size using the dropdown menu in the Font section on the Home tab.
- You can use a similar method if you want to add a check mark symbol in other Microsoft Office applications like Microsoft Word or Microsoft Excel.
A Microsoft Powerpoint presentation is a document whose primary purpose is to inform, while also being visually appealing.
Due to this nature, it’s helpful to include things like clipart, pictures, videos, and symbols in your Powerpoint slides.
One such item that you might want to include in one of your PPT slides is a check mark character. But adding one of these symbols isn’t as simple as you would probably hope.
Fortunately it’s possible to put a Powerpoint check mark into one of your Powerpoint slides by using an option on the Insert tab in the application.
How to Insert a Check Mark in Powerpoint
The steps in this guide were performed in the Microsoft Powerpoint for Office 365 version of the application, but will also work in similar versions of Powerpoint such as Powerpoint 2016 and Powerpoint 2019.
Step 1: Open your Powerpoint file.
Step 2: Select the slide where you wish to add the check mark.
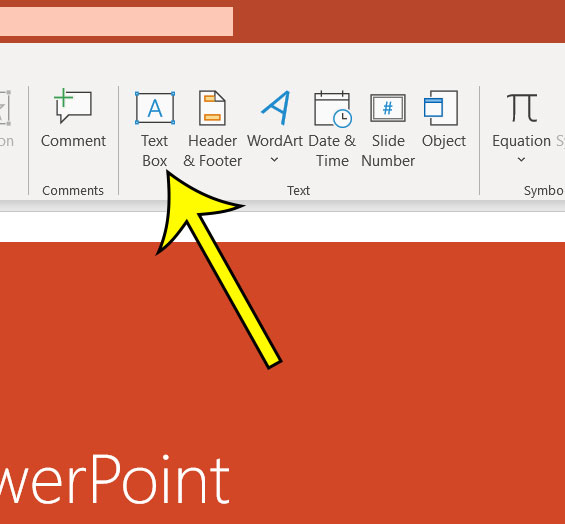
Step 3: Click inside an existing text box, or add a new text box by clicking the Insert tab at the top of the window, then clicking the Text Box button.
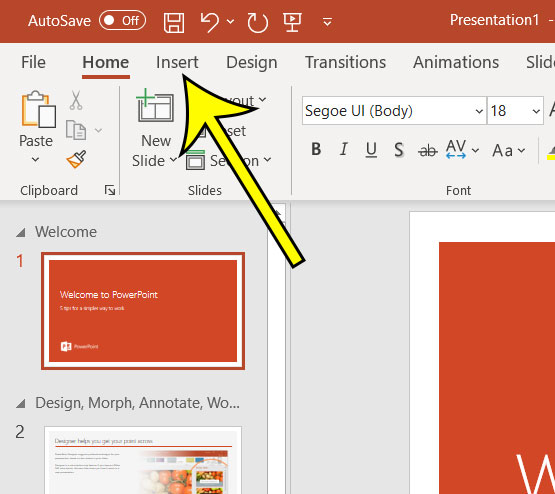
Step 4: Click the Insert tab again.
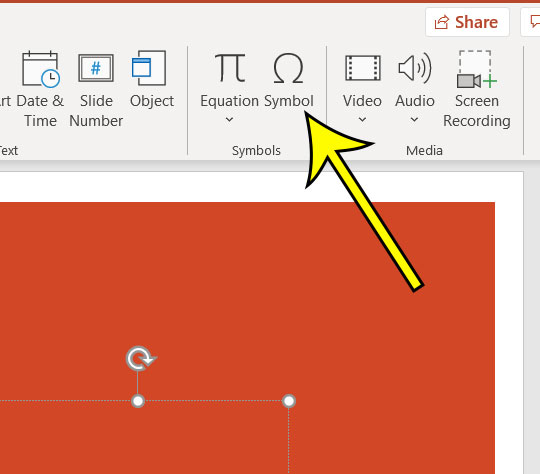
Step 5: Click the Symbol button in the Symbols group on the ribbon.
Step 6: Click the Font dropdown menu, then choose the Wingdings font.
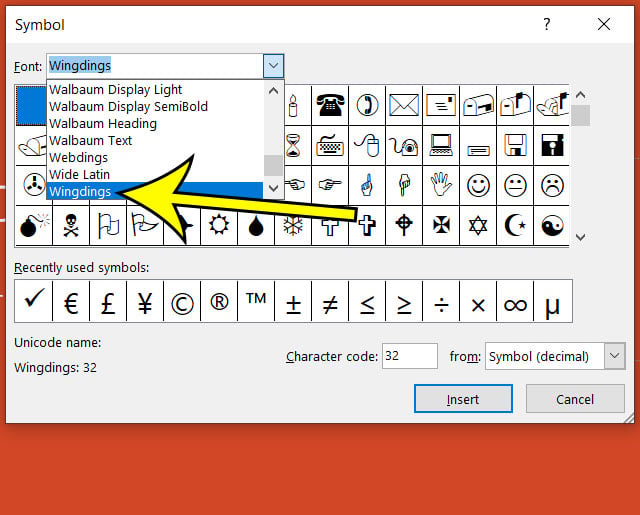
Step 7: Scroll down and click the check mark symbol, then click the Insert button. Alternatively you could double-click the check mark symbol and insert it as well.
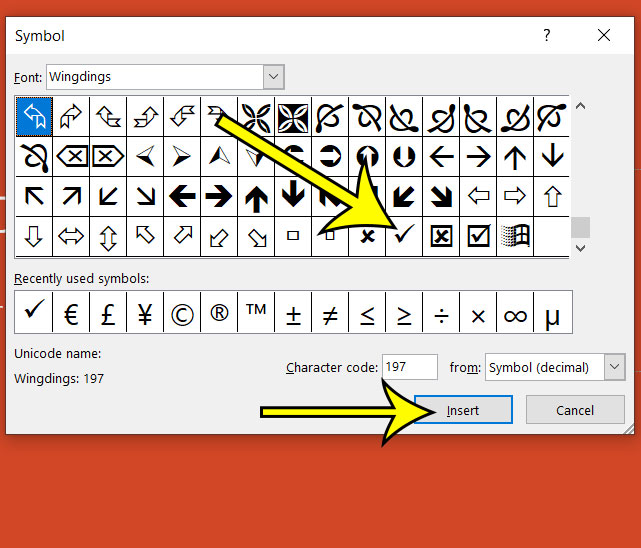
Note that there is also a check mark inside a check box, if you would prefer to use that symbol instead.
When you select the check mark on the Symbol dialog box, there is a value of 252 in the Character Map field at the bottom of the window. This is important to note if you like to use keyboard shortcuts.
The keyboard shortcut for the check mark symbol is Alt + 0252. That number sequence of 0252 must be entered on a number keypad. You can’t use the numbers above the letters on the keyboard. Technically this is going to insert an umlaut character, but selecting that character and switching to the Wingdings font will change it to the check mark symbol.
Check out some of our other Powerpoint tutorials, such as this one about how to switch your Powerpoint presentation to the portrait orientation.

Kermit Matthews is a freelance writer based in Philadelphia, Pennsylvania with more than a decade of experience writing technology guides. He has a Bachelor’s and Master’s degree in Computer Science and has spent much of his professional career in IT management.
He specializes in writing content about iPhones, Android devices, Microsoft Office, and many other popular applications and devices.