Videos and sound clips, not photos, are often what makes a PowerPoint file balloon, and Compress Media under File > Info shrinks every embedded clip in one pass. Keep an uncompressed copy of the presentation first, because compression lowers quality and drops embedded subtitles and alternate audio tracks. Compress Media is a Windows feature: Microsoft says it is not in PowerPoint for Mac or PowerPoint for the web.
Check whether media is the problem
Before compressing anything, confirm that media is really the problem. In PowerPoint for Windows, open the presentation and select File > Info. When the file contains embedded video or audio, the Multimedia section appears there with the Compress Media button.
Note the size of the whole file (in File Explorer, or the Properties area on the same Info page) so you can compare it after compressing. If the deck holds long or high-resolution clips, they are the likely bulk and Compress Media is the right tool. If the media is small and the file is still large, the cause is elsewhere, usually pictures or embedded fonts; skip to the last section.
No Multimedia section at all usually means the clips are linked rather than embedded, or the presentation has no media. Linked clips live outside the file, so there is nothing for Compress Media to shrink.
Save an untouched copy first
Compression is a trade: the file gets smaller and the clips lose detail. Microsoft also warns that embedded subtitles and alternate audio tracks are lost in the process. Use File > Save As (or Save a Copy) to save the presentation under a new name before you compress, and work on the copy. If you later need a sharper version for a big screen, the original is still there.
Run Compress Media
Microsoft’s article on compressing your media files gives these steps for current versions of PowerPoint for Windows (Microsoft 365, 2024, 2021, 2019 and 2016):
- Open the presentation that contains the audio or video files.
- Select the File tab, then Info.
- In the Multimedia section, select Compress Media.
- Choose a quality: Full HD (1080p), HD (720p) or Standard (480p).
- Wait for the compression to finish.
- Save the presentation, then check the file size again.
The quality choice applies to the media in the presentation as a whole; Microsoft’s steps do not offer a setting per clip. If one clip needs to stay sharp, compress a copy of the deck, then decide clip by clip which version to keep.
Older PowerPoint versions show the same feature with different names. In Microsoft’s instructions for older versions, the button is in the Media Size and Performance section, and the three choices are Presentation Quality, Internet Quality and Low Quality.
Which quality to pick
| Option | Microsoft’s description | A good fit when |
|---|---|---|
| Full HD (1080p) | Save space while maintaining overall audio and video quality | You present on a large screen or projector and want clips to stay crisp |
| HD (720p) | Quality comparable to media streamed over the Internet | Most meetings, online sessions and shared decks |
| Standard (480p) | Use when space is limited, such as sending presentations via email | The file must fit an attachment limit and clips are short or simple |
A sensible order is to try HD (720p) first, check the result, and only drop to Standard (480p) if the file is still too big. Going the other way is not possible on an already compressed copy: compressing again cannot restore detail that was removed, which is why the untouched copy matters.
Trim clips before you compress
If a clip has a long intro or dead air at the end, trimming it tells PowerPoint which part to play. Microsoft’s page on trimming a video, music clip or sound clip describes it:
- Select the video on the slide, then open the Playback tab and select Trim Video. For a sound clip, select it and choose Trim Audio on the Playback tab.
- In the dialog, use Play and Pause to find the cut point, and Next Frame and Previous Frame to fine-tune it.
- Drag the green marker to the new start and the red marker to the new end, then select OK.
Trimming on its own sets what plays. Microsoft’s page ties a shorter, trimmed file to compression: to save a trimmed copy of a clip, it says to run File > Info > Compress Media first, then right-click the clip and choose Save Media as. So trim first, then compress, and the shortened clips go into the smaller file. Trimming does not work on videos inserted from the web, which are not stored in the file anyway.
Embedded or linked: the other way to keep the file small
An embedded video is stored inside the presentation. A linked video stays as a separate file that the presentation points to. Microsoft’s page on inserting a video from your computer sums up the trade-off: embedding “increases the size of your presentation,” while a linked video “keeps your presentation file smaller, but links can break.”
To link instead of embed:
- On the Insert tab, select the arrow under Video, then This Device (or Video on My PC in some versions).
- Choose the video file.
- Select the down arrow next to the Insert button, then Link to File.
To keep links from breaking, Microsoft suggests copying the video into the same folder as the presentation and linking to it there. Then move or send the folder, not just the .pptx file. Linking suits a deck you present from your own PC; embedding (then compressing) suits a deck you email to someone else. For embedding steps in an older version, see embedding video in PowerPoint 2013.
Use formats PowerPoint handles well
Microsoft’s compression article notes that certain older video formats may not compress or export properly (it says this about Office on Windows RT PCs) and recommends modern formats such as H.264 video and Advanced Audio Coding (AAC) audio. If a clip refuses to compress, an old format is one possible reason. Re-export it from the program that created it in a modern format and insert it again.
Mac and PowerPoint for the web
Microsoft states that Compress Media is available in PowerPoint for Windows, “but not on PowerPoint for Mac or PowerPoint for the web.” On a Mac you can still trim clips (Microsoft’s trim article covers macOS), but there is no built-in Compress Media button. If a Mac deck is too large because of video, the practical routes are to trim the clip or compress the presentation on a Windows PC with PowerPoint.
If the file is still large
When the media is already compressed and the file is still heavy, look at the other usual suspects:
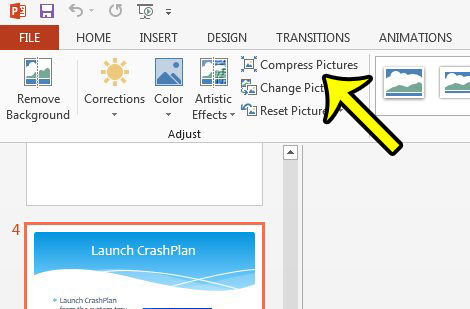
- Pictures. Full-resolution photos add up fast. PowerPoint’s Compress Pictures tool handles them; the same idea in Word is shown in compressing pictures in Word to reduce file size. Cropped pictures keep their hidden parts unless you delete the cropped areas, which matters if you shaped photos as described in cropping a picture into a circle in PowerPoint.


- Embedded fonts. Embedding every character of a font adds size. Embedding only the characters used is smaller; see embedding fonts in a PowerPoint file.
- Unused slides. Hidden or leftover slides still carry their media. Deleting slides you no longer need removes their clips from the file.
- Slide size. Changing the slide size later can force you to resize and re-crop pictures, so settle it early with changing the slide size in PowerPoint.
The same thinking applies to documents: if a Word file that carries the same videos or photos is also too big, compressing a Word file covers the Word side.
Compress Media questions
Why is Compress Media missing from File > Info?
It only appears in PowerPoint for Windows when the presentation contains embedded audio or video. Linked clips, online videos, PowerPoint for Mac and PowerPoint for the web do not show it.
Will compressing remove the captions from my video?
Embedded subtitles are lost, according to Microsoft, and so are alternate audio tracks such as a second language. Play each clip after compressing to confirm what is left.
Can I compress just one video?
Microsoft’s steps compress the media in the presentation together. To treat one clip differently, compress a copy of the deck and swap in the version of each clip you want, or prepare that clip at the size you need before inserting it.
Can I get the original quality back after compressing?
Not from the compressed file once it is saved. That is the reason to save an untouched copy before you start.

Kermit Matthews runs Live2Tech from just outside Philadelphia. He is an IT specialist with over 20 years of experience, from a university help desk to small-business IT, IT management and his own consulting practice, and has written tech guides full time since 2020. Steps are checked against the current software on a real device or the maker’s official documentation. More about Kermit.