Have you ever seen an email that you sent to someone on their phone or computer? The way that you see it on that device is the way that they see it, and you may find that you dislike the way your messages appear. Perhaps one of the biggest aesthetic parts of your emails is the font that is used for your text. If you don’t like the font that is being used by your Gmail account, then you might decide to change it.
Luckily this is a setting that Google lets you customize, so you can choose from a selection of fonts for the emails that you write in your Web browser. Our tutorial below will show you where to find and adjust this setting.
How to Use a Different Default Font When Composing Emails in Gmail
The steps in this article were performed in Google Chrome, but will also work in other desktop and laptop Web browsers like Chrome and Edge. Note that this will not change the default font on other devices where you might send emails from your Gmail account, such as your phone’s Mail app, or a program like Microsoft Outlook.
Step 1: Open your Web browser and sign into your Gmail account at https://mail.google.com/mail/u/0/#inbox.
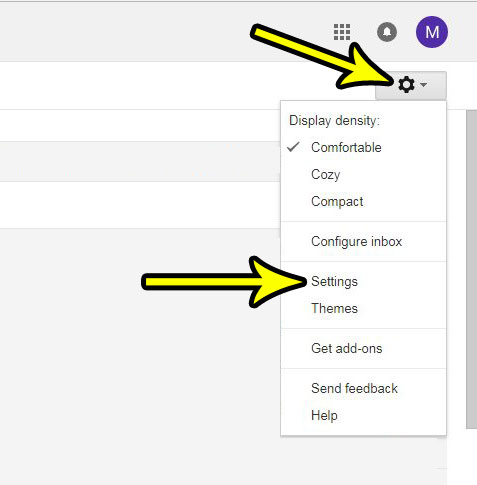
Step 2: Click the gear icon at the top-right of the window, then click the Settings option.

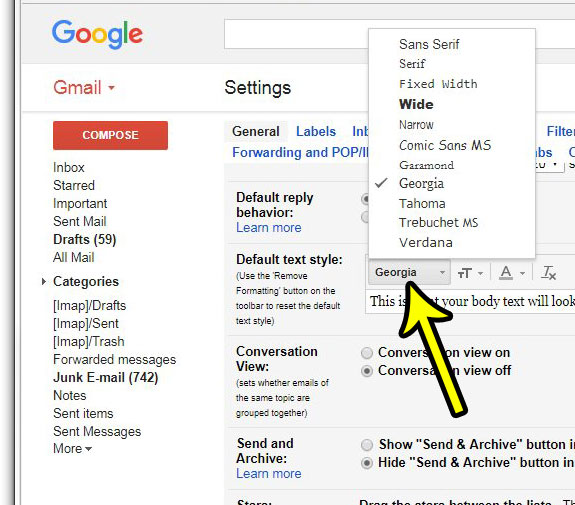
Step 3: Click the dropdown menu to the right of Default text style and choose the font that you would like to use by default when sending messages.

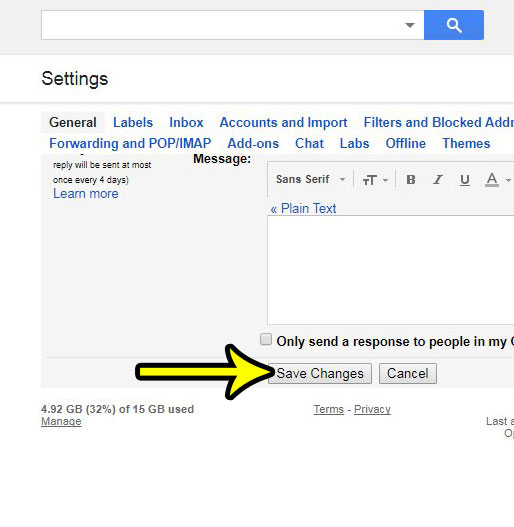
Step 3: Scroll to the bottom of the menu and click the Save changes button.

That settings menu in Gmail provides a number of different options that you can customize. For example, find out how to stop Gmail from automatically downloading images if you find that they are taking a while to load, or if you are on a data cap and don’t want to use your data for those pictures.

Kermit Matthews is a freelance writer based in Philadelphia, Pennsylvania with more than a decade of experience writing technology guides. He has a Bachelor’s and Master’s degree in Computer Science and has spent much of his professional career in IT management.
He specializes in writing content about iPhones, Android devices, Microsoft Office, and many other popular applications and devices.