When you first create a spreadsheet in Google Sheets it will contain a series of cells arranged into rows and columns. These cells will be distributed evenly, and adjust in size if you make a row or column bigger.
But occasionally your data will require one of those cells to be wider or taller than the data that surrounds it. This can be difficult to achieve with the default layout, but it is something that you can accomplish by merging some of your cells. This occurs by selecting several cells, then combining them into one larger cell. This cell merging can occur in a couple different ways, which we will show you how to use in the tutorial below.
Merging Cells in Google Sheets
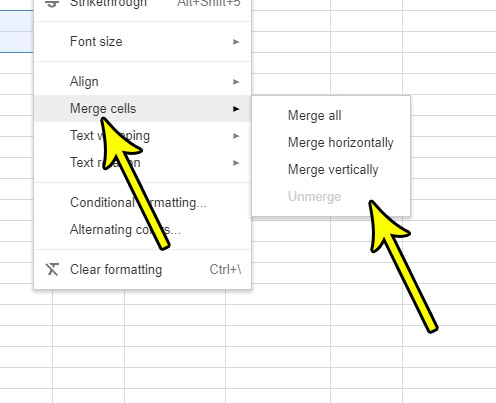
The steps in this article were performed in the desktop version of Google Chrome, but will work in other Web browsers like Firefox and Microsoft Edge. Note that you are going to have several options for merging your cells, and that you can also choose to unmerge them when you’re done if you don’t like the result of the merge. The three merge options available in Google Sheets are:
- Merge all – Combine all of the selected cells into one large cell
- Merge horizontally – Combine all of the selected cells in a row into one large cell. This option is not available unless you have selected cells in at least two columns.
- Merge vertically – Combine all of the selected cells in a column into one large cell. This option is not available unless you have selected cells in at least two rows.
Step 1: Sign into your Google Drive at https://drive.google.com and open the spreadsheet containing the cells that you want to merge.
Step 2: Use your mouse to select the cells that you want to merge.
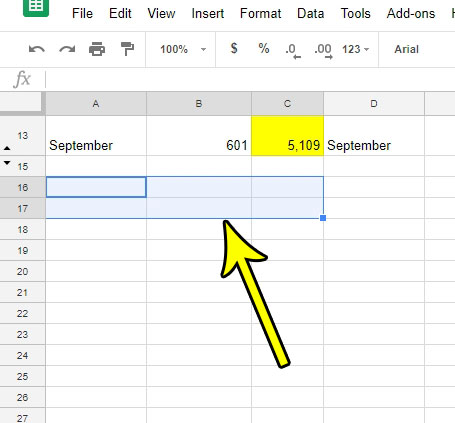
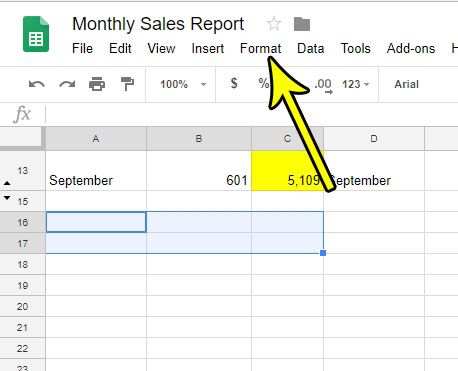
Step 3: Choose the Format tab at the top of the window.
Step 4: Select the Merge cells option, then click the option that indicates how you wish to merge the cells.
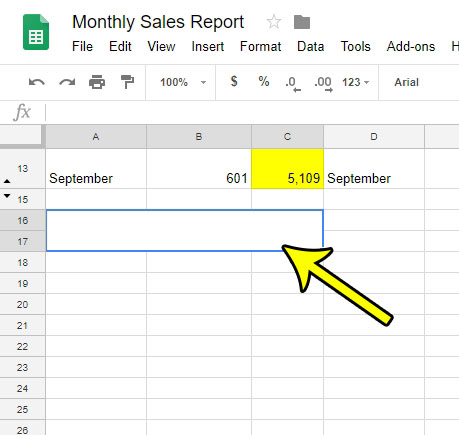
The visible gridlines between the cells should disappear, leaving you with a large merged cell. If you chose the Merge all option and selected cells in multiple rows and columns, then the result should look something like the image below.
If you elected the Merge horizontally option, then it will look something like this –
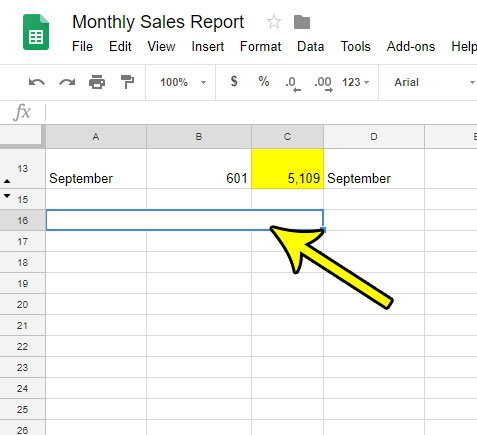
If you chose the Merge vertically option, then the result will be something like below –
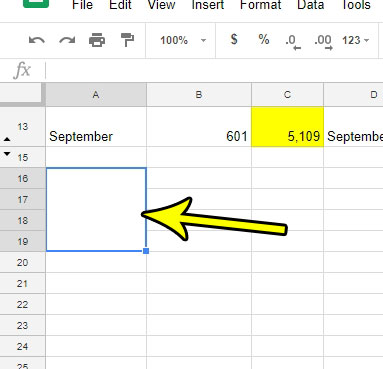
As you start typing data into your merge cell, you may find that it looks strange when that data is aligned to the left or right side of the cell. Find out how to center data horizontally if you think that will make your data look better.

Kermit Matthews is a freelance writer based in Philadelphia, Pennsylvania with more than a decade of experience writing technology guides. He has a Bachelor’s and Master’s degree in Computer Science and has spent much of his professional career in IT management.
He specializes in writing content about iPhones, Android devices, Microsoft Office, and many other popular applications and devices.