Making data easy to read in Excel can go a long way in helping the perceived quality of your work.
This can involve things like the font or font color, but it can also mean ensuring that all of the cells are appropriately sized for the data they contain.
Our tutorial continues below with additional information about how to expand all rows in Excel so that it’s easier to see all of the content inside your cells.
Summary – How to Increase Row Size in Excel
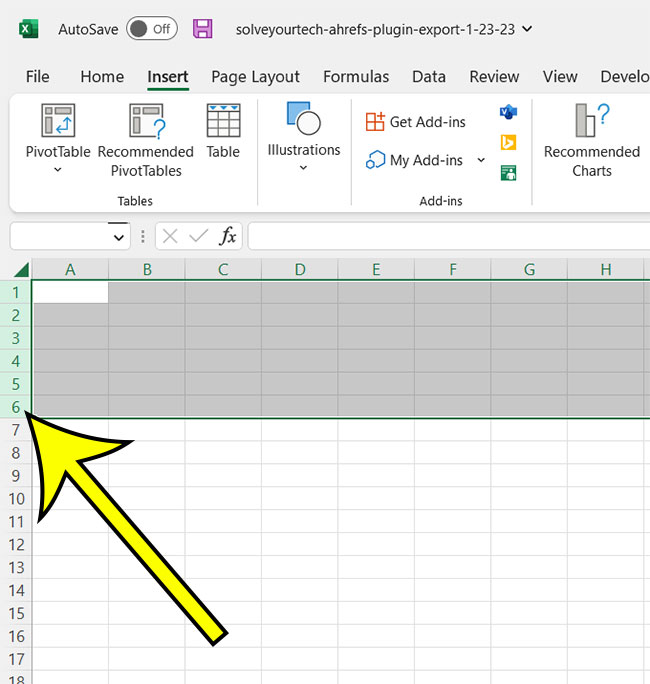
- Open the spreadsheet.
- Choose the rows to expand.
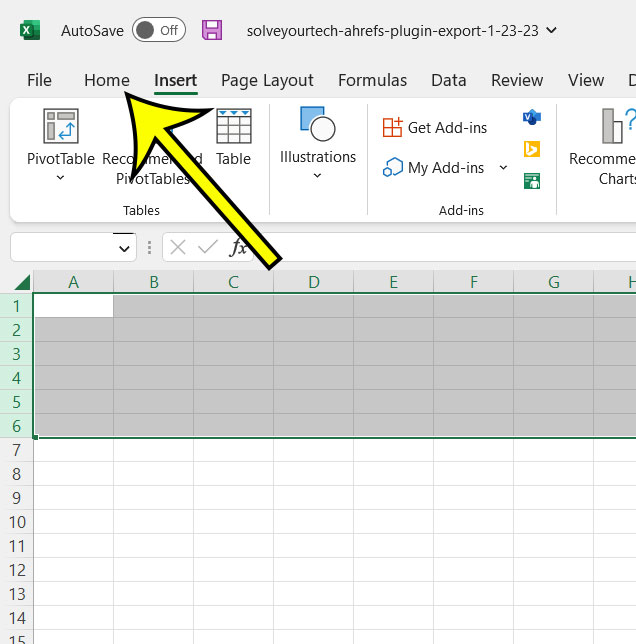
- Select the Home tab.
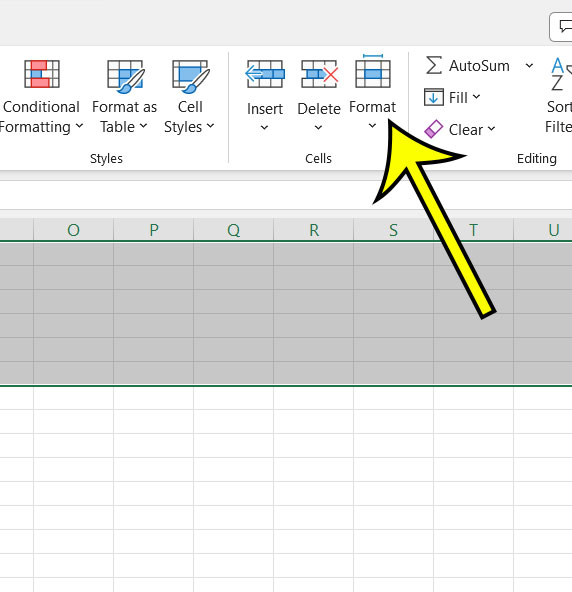
- Click the Format button.
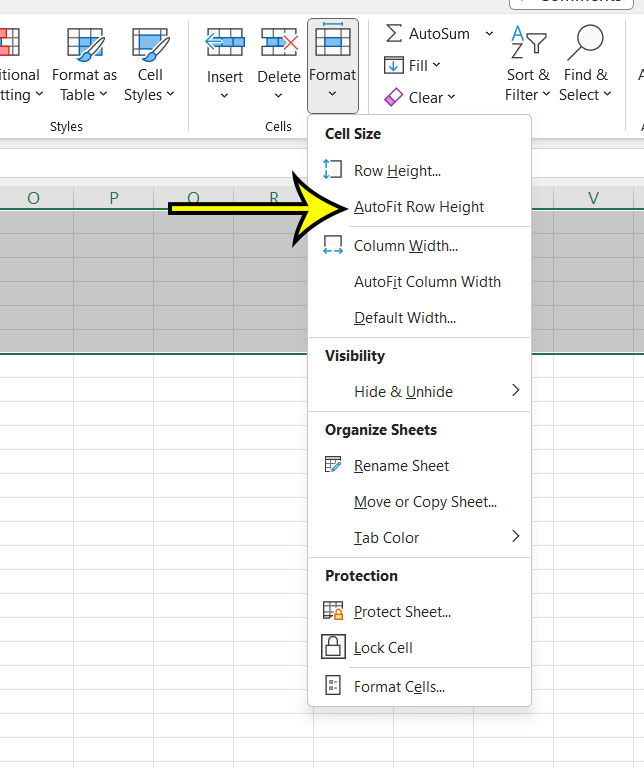
- Choose the AutoFit Row Height option.
Our guide continues below with additional information on this topic, including pictures of these steps.
While the typical spreadsheet structure is perfect for keeping small pieces of data in each cell, you may need to store big strings of data at some point. This can leave you wondering how to expand all rows in Excel so that you can see all of your stuff at once.
Many of the formatting options available in Excel can be found on one of the tabs of the navigational ribbon.
These tools occasionally contain settings that apply to a full worksheet, but many simply apply to the current selection. So, if you’re seeking a means to enlarge all of your rows in Excel, you’ve come to the right place.
You can expand rows in Excel by selecting all of the rows, going to the Home tab, selecting Format, and then selecting the AutoFit Row Height option.
If you have several lines of text in a cell in your spreadsheet, you may have observed that Excel 2013 does not display them all. You may already know how to change row height in Excel 2013, but doing so for each row that requires adjustment might be time-consuming.
Fortunately, you can increase the row height of each row in your spreadsheet in a handful of different methods. You can either manually set the height for each row or have Excel automatically fit the height to your data.
Related: Find out how to set row 1 to print on every page in Excel if you want to make your printed spreadsheets easier to read.
How to Make Your Excel Rows Larger
The steps in this article were performed in the desktop version of the Microsoft Excel for Office 365 version of the application but will work for most other Excel versions as well.
Step 1: Open the Excel file containing the rows that you want to expand.
Step 2: Select the rows that you would like to resize.
You can hold down the Ctrl key and click individual rows, or you can click the top row, hold down the Shift key, then click the bottom row to select all of the rows between those two rows.
You can also use the Ctrl + A keyboard shortcut to select the entire spreadsheet.
Step 3: Choose the Home tab at the top of the window.
Step 4: Select the Format button in the Cells group of the ribbon.
Step 5: Click the AutoFit Row Height button from the dropdown menu.
Alternatively, you could click the Row Height option instead and manually enter the desired height for the selected rows.
Now that you know how to expand all rows in Excel, you can use this technique whenever you need to make the rows in your spreadsheet larger because some of your information is hidden or difficult to read.
How to Use Excel’s Group Rows Feature
This method gives you another means to extend or collapse specific sections of your spreadsheet. It is important to note that the rows in a group must all be consecutive.
It’s also helpful to know that when you manually group rows like this, you can include blank rows in your group data if you like. If you are grouping rows and each group is quite tiny, it may be easier to extend or collapse rows once the full Microsoft Excel grouping system is completed.
Step 1: Select the first row number that you want to include in your group by clicking on it.
Step 2: While holding down the Shift key, click the last row number to add to the group.
It’s worth noting that you may also group columns in this manner.
Step 3: At the top of the window, select the Data tab.
Step 4: In the Outline area of the ribbon, click the Group button, then click the Group button from the dropdown.
Step 5: To collapse a grouped row, click the – button to the left of the row numbers, then click the + symbol to expand it.
If you can’t find these icons, they’re in the top left corner of the spreadsheet. This is one of the greatest approaches for learning how to expand all rows in Excel since grouping data in an Excel spreadsheet has a variety of benefits.
It is worth noting that there are small numbers 1 and 2 above the part with the + and – symbols. Clicking on the “1” collapses all groups, whereas clicking on the “2” expands all groups.
More Information About Expanding Excel Rows
In Excel, how can I extend all columns?
While the preceding article focused on working with rows, the majority of these approaches may also be used for columns. Simply substitute phrases like “row headings” with “column headings.”
If you want to autofit column width, for example, pick a couple of columns, go to the Home tab, select Format, and then Autofit Column Width.
If you grouped columns as described above and used the minus sign button to collapse them, you only need to click the plus sign button to expand them.
Because many users prefer to hide rows or columns when trying to fit data to a page when printing, the necessity for the Excel “expand all columns” method is just as common as knowing how to expand excel rows.
Excel can handle how many rows?
Microsoft Excel can manage large amounts of data. The number of open worksheets, for example, is limited by what your machine can handle rather than what Excel can handle.
However, Excel has a limit on the number of rows and columns it can manage. These are the restrictions:
- The maximum number of rows in Excel is 1,048,576.
- The maximum number of columns in Excel is 16,384.
These restrictions have been in place since Microsoft Excel 2007, and they continue to apply to Microsoft Excel for Office 365.

Kermit Matthews is a freelance writer based in Philadelphia, Pennsylvania with more than a decade of experience writing technology guides. He has a Bachelor’s and Master’s degree in Computer Science and has spent much of his professional career in IT management.
He specializes in writing content about iPhones, Android devices, Microsoft Office, and many other popular applications and devices.


