Visual documents like the presentations that you create in Google Slides, are often improved when you add different types of media. Therefore it’s useful for you to know how to work with images on your slides. You can put a picture in Google Slides by clicking the Insert image button in the toolbar, selecting the desired image source, then finding the image and selecting it.
A slideshow that you create in a program like Google Slides can include a lot of information that you want to give to others. Mixed amidst this information is likely to be some other objects, such as pictures.
Fortunately, you can add a picture to a slide in your presentation using a tool that is available in the application. These pictures can be added from a few different locations. Our guide below is going to show you how to add a picture to a slideshow in Google Slides.
How to Insert a Picture in Google Slides
- Open your presentation.
- Choose a slide.
- Click the Insert Image button.
- Select Upload from computer.
- Browse to the picture then click Open.
Our guide continues below with additional information on putting pictures into Google Slides slideshows, including pictures of these steps.
Once you have started adding pictures to your slides, you might want to know how to change opacity in Google Slides if you would like to make them transparent.
How to Put a Picture from Your Computer into a Google Slides Presentation (Guide with Pictures)
The steps in this article were performed in the desktop version of the Google Chrome Web browser, but will work in other desktop browsers like Edge or Firefox. This guide assumes that you already have the picture you want to use saved to your computer.
Step 1: Go to your Google Drive at https://drive.google.com and open the slideshow into which you wish to insert the picture.
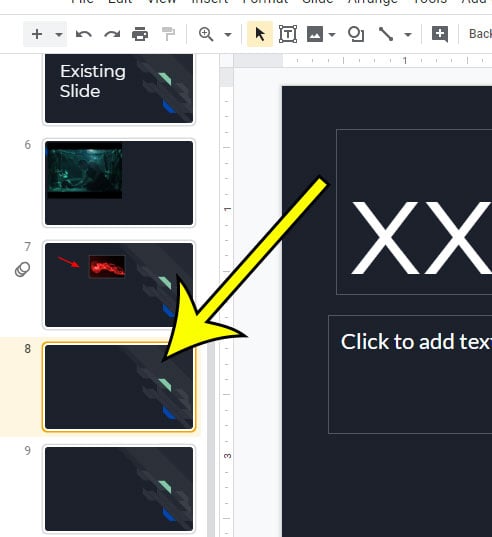
Step 2: Select the slide from the column at the left into which you wish to add the picture.

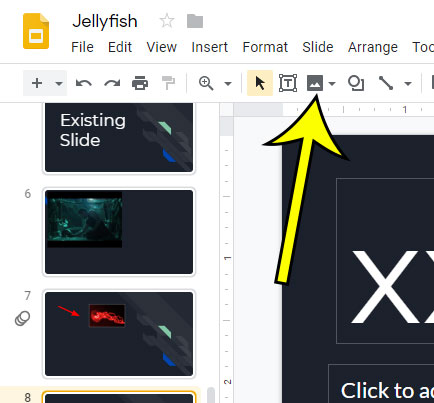
Step 3: Click the Insert image button in the toolbar above the slide.

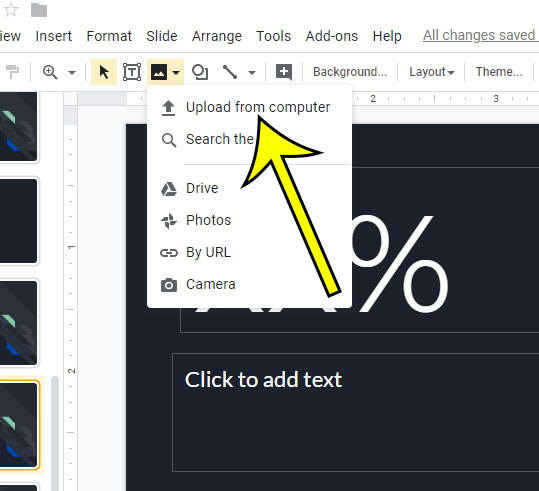
Step 4: Choose the Upload from computer option.

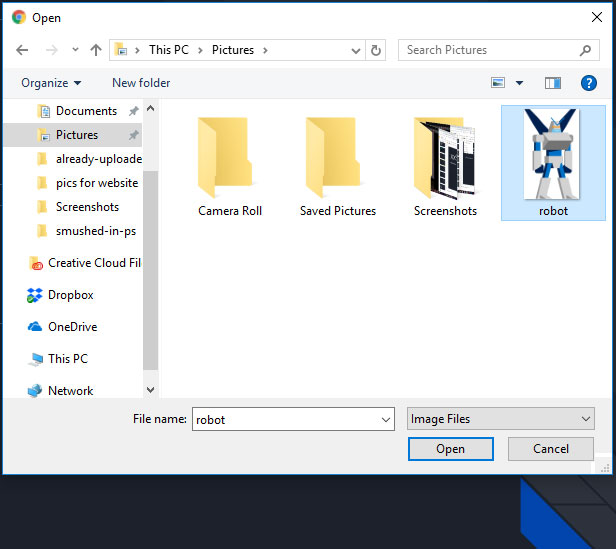
Step 5: Browse to the picture you want to use, select it, then click the Open button.

Our tutorial continues below with additional discussion on inserting pictures in Google Slides.
More Information on How to Add a Picture in Google Slides
After you put a picture in the slideshow you can then resize the picture using the controls around the picture, and you can drag it to the desired location in the slide.
When you click the Insert image icon above your slides you are going to see a dropdown menu that includes a number of different ways that you can add a picture to a slide. These options include:
- Upload from computer
- Search the web
- Drive
- Photos
- By URL
- Camera
If you click on a picture in your slideshow, aside from the controls that appear around the image which let you resize, rotate or move it, there are going to be buttons in the toolbar that let you Crop the image, Reset the image, or choose from a variety of Format options.
When you right-click on the image you will see many of those same options, as well as additional ways that you can interact with or modify the image.
If you have trouble remembering about the Insert image button in the toolbar then you can also add a picture to your slideshow from the menu bar at the top of the window. To do this you can click the Insert tab, choose Image, then select an option. You can then browse to the picture you want to use and select it.
Google Docs offers most of the same image options when you need to insert images in your document.
Is there a slide in your slideshow that you don’t want to display when you give your presentation? Find out how to skip a slide in Google Slides so that you can keep the slide, but not show it to your audience.
Additional Reading

Kermit Matthews is a freelance writer based in Philadelphia, Pennsylvania with more than a decade of experience writing technology guides. He has a Bachelor’s and Master’s degree in Computer Science and has spent much of his professional career in IT management.
He specializes in writing content about iPhones, Android devices, Microsoft Office, and many other popular applications and devices.