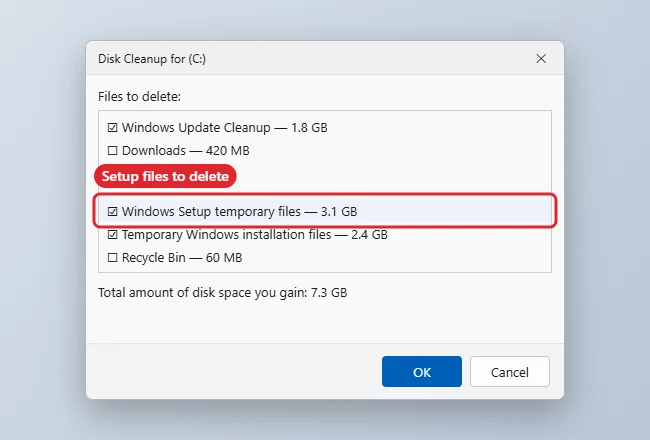
To delete leftover Windows 10 setup files, open Disk Cleanup, click Clean up system files, tick Windows Setup temporary files and Temporary Windows installation files, and click OK. After a feature update, these files can take up several gigabytes in hidden folders such as $WINDOWS.~BT. Windows can remove them safely with Disk Cleanup or Storage settings, without you deleting folders by hand.
Windows 10 reached end of support on October 14, 2025. Consumer Extended Security Updates (ESU) now run until October 12, 2027.
How to Delete Windows Setup Files in Windows 10
- Search Start for Disk Cleanup and open it for drive C.
- Click Clean up system files and select drive C again if asked.
- Tick Windows Setup temporary files, Temporary Windows installation files, and, if you do not plan to roll back, Previous Windows installation(s).
- Click OK, then Delete Files.
- Alternatively, open Settings, System, Storage, Temporary files, tick the same items, and click Remove files.
Can I delete $WINDOWS.~BT manually?
It is safer to use Disk Cleanup, which handles permissions and avoids breaking an update in progress.
Setup-Related Cleanup Items
| Item | Safe to delete? |
|---|---|
| Windows Setup temporary files | Yes, after updates finish |
| Temporary Windows installation files | Yes, unless an upgrade is in progress |
| Previous Windows installation(s) | Yes, but you can no longer roll back |
| Windows Update Cleanup | Yes; removes superseded updates |
Before You Delete: The 10-Day Rollback Window
After a feature update, Windows 10 keeps your previous installation so you can go back if something breaks. You can do this from Settings, Update & Security, Recovery, Go back to the previous version of Windows 10, normally for 10 days. Deleting Previous Windows installation(s) or Temporary Windows installation files removes that option immediately, so wait until you’re sure the update is working well. After the rollback period, Windows removes these files automatically.
Let Storage Sense Clean Up Automatically
- Open Settings, System, Storage.
- Turn on Storage Sense, then click Configure Storage Sense or run it now.
- Choose how often it runs and how long to keep files in the Recycle Bin and Downloads folder.
- Tick Delete previous versions of Windows if you want old installations removed automatically once the rollback period ends.
- Click Clean now to run it straight away.
Clean Up Old Update Components
Windows also stores superseded update files in the component store. To shrink it safely, open Terminal (Admin) or an administrator Command Prompt and run:
Dism.exe /Online /Cleanup-Image /StartComponentCleanup
The command can take several minutes and may look stuck at times; let it finish. Afterwards you won’t be able to uninstall updates that were superseded, which is rarely a problem. For everyday temporary files, see how to clear temp files in Windows 10.
If the Setup Folders Won’t Go Away
- An upgrade is in progress: finish or cancel it before cleaning, or setup may need to download again.
- The folders stay after cleanup: restart and run Disk Cleanup once more.
- To remove the Windows.old folder, see how to delete the old Windows folder.
Related: Create a restore point in Windows 10.

Kermit Matthews runs Live2Tech from just outside Philadelphia. He is an IT specialist with over 20 years of experience, from a university help desk to small-business IT, IT management and his own consulting practice, and has written tech guides full time since 2020. Steps are checked against the current software on a real device or the maker’s official documentation. More about Kermit.