Yes, you can record your iPhone’s screen, including on an iPhone 7, with the built-in Screen Recording feature. It captures everything on screen as a video saved to Photos, optionally with your voice from the microphone. It’s great for showing someone how to do something, saving a clip, or reporting a bug. This guide shows how to add the Screen Recording button, record with or without audio, stop and find your recording, and fix common problems.
Quick Answer
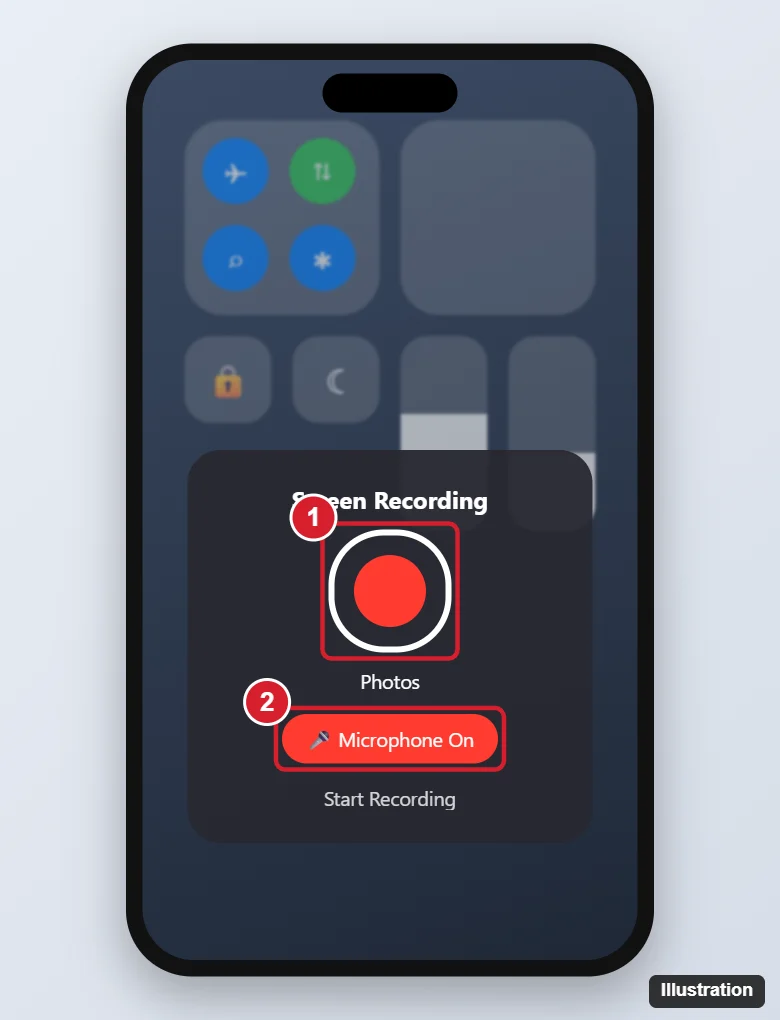
Add Screen Recording to Control Center first (Settings > Control Center). Then open Control Center, tap the record button (a circle inside a ring), and wait for the 3-second countdown. To stop, tap the red status bar or indicator at the top of the screen and tap Stop. The video saves to the Photos app.
Step 1: Add Screen Recording to Control Center
iOS 17 and earlier (including iPhone 7 on iOS 15)
- Open Settings > Control Center (Customize Controls on iOS 13 and earlier).
- Under More Controls, tap the green + next to Screen Recording.
iOS 18 and later
- Open Control Center and press and hold an empty area (or tap + at the top left).
- Tap Add a Control, search for Screen Recording, and tap it.
Step 2: Record Your Screen
- Open Control Center:
- iPhone 7, 8, and SE: swipe up from the bottom edge.
- iPhone X and later: swipe down from the top-right corner.
- Tap the Screen Recording button.
- After the 3-second countdown, the recording starts. The status bar, or the indicator in the Dynamic Island, turns red.
- Close Control Center and do what you want to record.
Record with Your Voice (Microphone)
- In Control Center, press and hold the Screen Recording button.
- Tap Microphone so it turns red and says On.
- Tap Start Recording.
With the microphone off, the recording still captures sound from most apps (system audio), but not your voice.
Step 3: Stop and Find the Recording
- Tap the red status bar or the red indicator at the top, then tap Stop. Or open Control Center and tap the record button again.
- A “Screen Recording video saved to Photos” message appears.
- Open Photos. The video is in your library and in Albums > Media Types > Screen Recordings.
To trim it, open the video, tap Edit, and drag the ends of the timeline.
Tips for Better Screen Recordings
| Tip | Why |
|---|---|
| Turn on Do Not Disturb or a Focus mode | Keeps notifications out of the video |
| Free up storage first | Recordings can be large, about 1 GB per 10 minutes or more |
| Trim the start and end | Removes the Control Center moments |
| Record in the orientation you’ll share | Avoids awkward rotation later |
Troubleshooting
Screen Recording is missing or greyed out
Screen Time may block it. Go to Settings > Screen Time > Content & Privacy Restrictions > Content Restrictions > Screen Recording and choose Allow. Work phones may restrict it through a management profile.
The recording has no sound
Turn on Microphone for your voice. Some apps, such as streaming video, calls, and some games, block audio or video capture for copyright and privacy reasons.
The recording stopped by itself
Storage may be full, a call came in, or an app that blocks recording opened. Check free space in Settings > General > iPhone Storage.
“Failed to save screen recording”
Restart the iPhone, free up storage, and try again. Updating iOS can also fix it.
Frequently Asked Questions
Does the iPhone 7 support screen recording?
Yes. Screen Recording was added in iOS 11, and the iPhone 7 supports up to iOS 15.
Does screen recording notify other people?
Most apps don’t notify anyone. Some apps, like Snapchat, may detect or block recordings. Get consent before recording video calls or private conversations.
Can I record for as long as I want?
There’s no fixed time limit. Recording continues until you stop it, your storage runs out, or the battery dies.
Summary
- Add Screen Recording to Control Center.
- Tap the record button, or press and hold it to turn on the microphone first.
- Tap the red indicator and choose Stop when you’re done.
- Find and trim the video in Photos.

Kermit Matthews is a freelance writer based in Philadelphia, Pennsylvania with more than a decade of experience writing technology guides. He has a Bachelor’s and Master’s degree in Computer Science and has spent much of his professional career in IT management.
He specializes in writing content about iPhones, Android devices, Microsoft Office, and many other popular applications and devices.