Strikethrough draws a line through text, which is great for to-do lists and showing edits, but it’s frustrating when it appears where you don’t want it. You can remove it in a couple of clicks, whether it was applied as formatting, as double strikethrough, or as a Track Changes deletion. This guide covers each case in Word for Windows, Mac, and the web, including how to remove strikethrough from a whole document at once. The steps are the same in Word 2013 through Microsoft 365.
Quick Answer
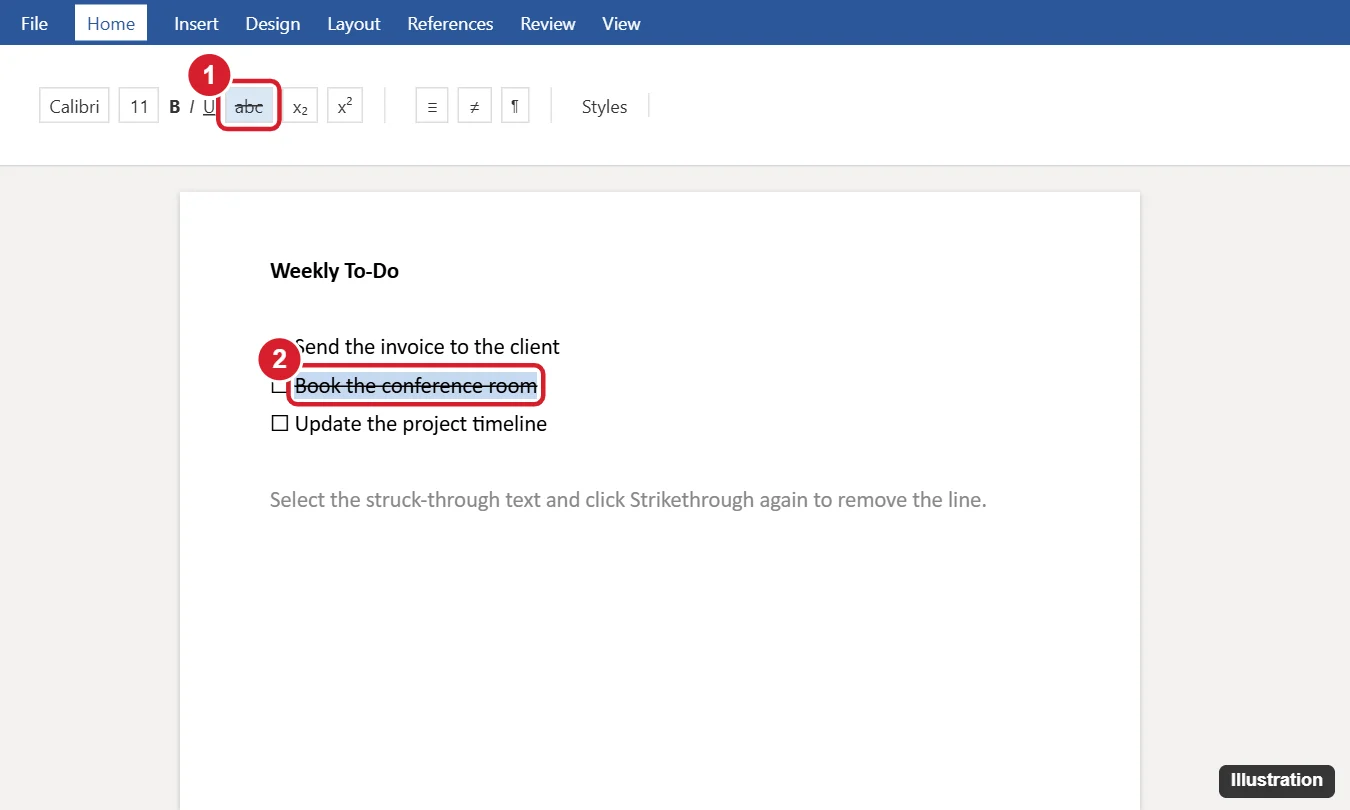
Select the struck-through text and click the Strikethrough button (abc) on the Home tab to turn it off. If the line is red and the text is colored, it’s probably a Track Changes deletion. Go to Review > Accept or Reject instead.
First, Identify the Type of Line
| What you see | What it is | How to remove |
|---|---|---|
| Single black (or text-colored) line | Strikethrough formatting | Strikethrough button or Font dialog |
| Two lines through the text | Double strikethrough | Font dialog (Ctrl + D) |
| Colored text with a line, and a bar in the margin | Track Changes deletion | Review > Accept or Reject |
| A line that isn’t part of the text | Shape, border, or underline | Select and delete the shape, or remove the border |
Method 1: Strikethrough Button
- Select the text with the line through it.
- On the Home tab, in the Font group, click Strikethrough (
abc).
If the selection mixes struck and normal text, you may need to click twice: once to apply strikethrough to everything, and again to remove it.
Method 2: Font Dialog (Also Removes Double Strikethrough)
- Select the text.
- Press Ctrl + D (Cmd + D on Mac) to open the Font dialog.
- Under Effects, uncheck Strikethrough and Double strikethrough.
- Click OK.
Method 3: Clear All Formatting
Select the text and press Ctrl + Spacebar to remove character formatting, including strikethrough, bold, and colors. Or click Clear All Formatting (the A with an eraser) on the Home tab, which also resets the paragraph style.
Method 4: Remove Strikethrough From the Whole Document
- Press Ctrl + H to open Find and Replace, and click More >>.
- Click in Find what (leave it empty), then click Format > Font and check Strikethrough. Click OK.
- Click in Replace with (leave it empty), click Format > Font, and uncheck Strikethrough until the box is clear. Click OK.
- Click Replace All.
Alternatively, press Ctrl + A and use the Font dialog to uncheck Strikethrough for everything.
Remove Track Changes Strikethrough
- Go to the Review tab.
- Click Accept to delete the struck text permanently, or Reject to restore it. Use the arrow on either button for All Changes.
- Turn off Track Changes so new edits aren’t marked.
To hide the markup without deciding yet, set the display to No Markup on the Review tab.
Word for Mac and the Web
- Mac: use the Strikethrough button on the Home tab, or Format > Font. Keyboard shortcut: Cmd + Shift + X toggles strikethrough in many versions.
- Web: Home tab > More font options (the three dots) > Strikethrough.
Frequently Asked Questions
Is there a keyboard shortcut for strikethrough in Word for Windows?
Not by default. You can assign one in File > Options > Customize Ribbon > Keyboard shortcuts: Customize (command: Strikethrough), or add the button to the Quick Access Toolbar.
Why does strikethrough keep coming back?
The paragraph style may include it, or Track Changes is on. Check the style with Modify Style > Format > Font, and turn off Track Changes.
Summary
- Select the text and click Strikethrough on the Home tab.
- Use Ctrl + D to remove single or double strikethrough.
- Use Find and Replace to remove it from a whole document.
- Accept or reject changes if the line comes from Track Changes.

Kermit Matthews is a freelance writer based in Philadelphia, Pennsylvania with more than a decade of experience writing technology guides. He has a Bachelor’s and Master’s degree in Computer Science and has spent much of his professional career in IT management.
He specializes in writing content about iPhones, Android devices, Microsoft Office, and many other popular applications and devices.