Windows 11 includes widgets, small cards that show weather, calendar events, to-do lists, news, stocks, photos, and more. They live on a Widgets board that slides out from the taskbar rather than sitting directly on the desktop like the old Windows 7 gadgets. This guide shows how to open the Widgets board, add and customize widgets, pin important ones, and what options exist if you want widgets directly on your desktop.
Quick Answer
Press Windows key + W or click the weather/widgets button on the left side of the taskbar. On the Widgets board, click + (Add widgets), choose a widget, and click Pin. Windows 11 does not place widgets directly on the desktop by default; for that, you need a third-party app.
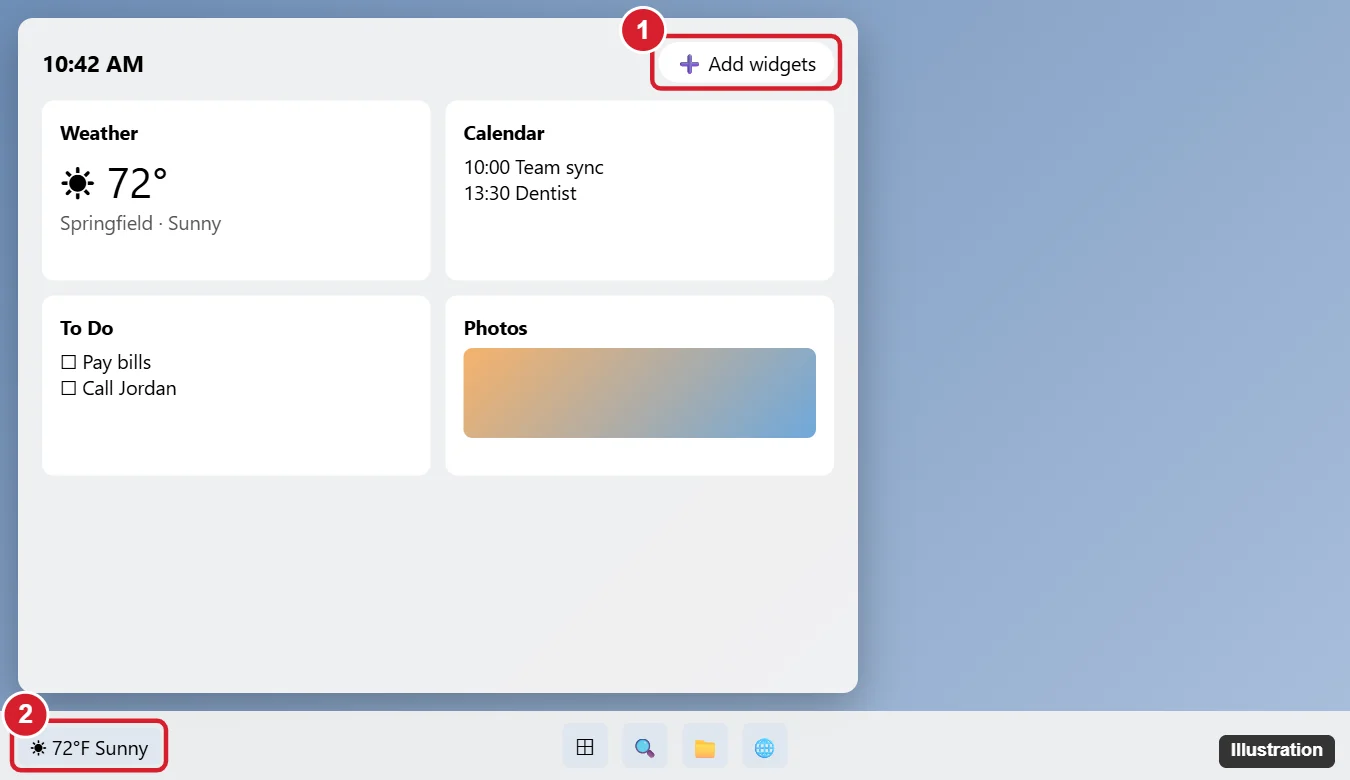
Open the Widgets Board
- Press Windows key + W.
- Click the weather or widgets icon at the left end of the taskbar.
- On touchscreens, swipe in from the left edge.
If the button is missing, go to Settings > Personalization > Taskbar and turn on Widgets.
Add a Widget
- Open the Widgets board.
- Click the + button (Add widgets) near the top.
- Browse the available widgets, including ones from installed apps.
- Click Pin next to the widget you want.
Customize Widgets
| Action | How |
|---|---|
| Resize | Click the widget's three-dot menu and choose Small, Medium, or Large |
| Change settings | Three-dot menu > Customize widget (for example, change weather location) |
| Move | Drag the widget to a new position |
| Remove | Three-dot menu > Unpin widget |
| Hide the news feed | Widgets settings > Show or hide feeds (options vary by version) |
Can You Put Widgets on the Desktop?
Windows 11's built-in widgets appear only on the Widgets board (and some on the lock screen), not as floating items on the desktop. If you want desktop widgets:
- Third-party apps: tools available from the Microsoft Store or trusted developers can add clocks, weather, system monitors, and calendars directly to the desktop. Check reviews and permissions before installing.
- Pin apps to the taskbar or Start for quick access instead.
Lock Screen Widgets
Windows 11 can show weather and other information on the lock screen. Go to Settings > Personalization > Lock screen and adjust the lock screen status or widgets options, depending on your version.
Troubleshooting
Widgets board is blank or will not open
Make sure you are signed in with a Microsoft account if prompted, update Windows, and restart. Widgets depend on the Microsoft Edge WebView2 component, so keep Edge updated.
The widgets button is missing
Turn on Widgets in Settings > Personalization > Taskbar. Some organizations disable widgets on work PCs.
Related: Add weather to the taskbar in Windows 11.
Frequently Asked Questions
How do I turn off widgets?
Turn off Widgets in Settings > Personalization > Taskbar.
Do widgets slow down my PC?
They use a small amount of resources. Turn them off if you do not use them.
Can I add third-party widgets to the board?
Yes. Some apps from the Microsoft Store provide widgets that appear in the Add widgets list.
Summary
- Press Windows + W to open Widgets.
- Click +, pick a widget, and click Pin.
- Resize, customize, or unpin widgets from their menu.
- Use a trusted third-party app for widgets directly on the desktop.

Kermit Matthews is a freelance writer based in Philadelphia, Pennsylvania with more than a decade of experience writing technology guides. He has a Bachelor’s and Master’s degree in Computer Science and has spent much of his professional career in IT management.
He specializes in writing content about iPhones, Android devices, Microsoft Office, and many other popular applications and devices.