Learning how to insert a picture into a spreadsheet in Excel 2010 is useful when you encounter a situation that calls for more than just data in your cells. Adding pictures to your cells is common for businesses that need to supply customers with product information, or even in personal situations where you might be organizing a personal collection for your hobby.
Fortunately Microsoft realized that their users would have many reasons to include pictures in their cells, and their is a tool that allows you to perform that action. Our guide below will show you how to add a picture to your spreadsheet, then show you how to find the menus that allow you to further customize that picture once it has been inserted.
How to Add a Picture to a Cell in Excel 2010
The steps below are going to show you how to place a picture into your spreadsheet in Excel 2010. In order to accomplish this, you should have the picture already saved to your computer, and know where to find it.
Step 1: Open your spreadsheet in Excel 2010.
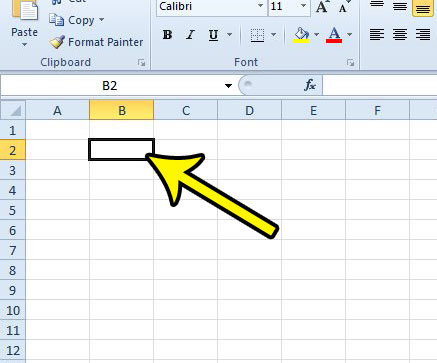
Step 2: Click the cell where you would like to insert the picture.
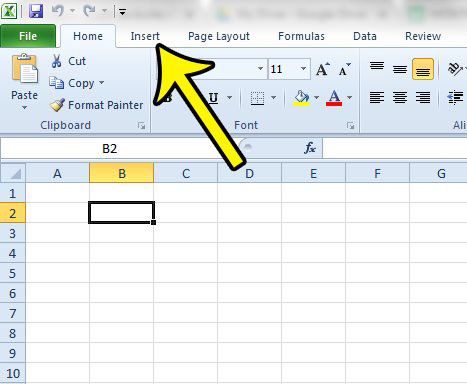
Step 3: Click the Insert tab at the top of the window.
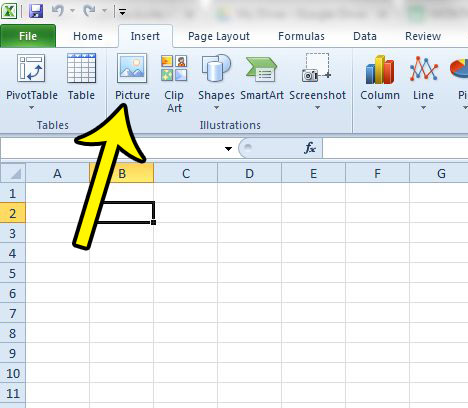
Step 4: Click the Picture button in the Illustrations section of the ribbon.
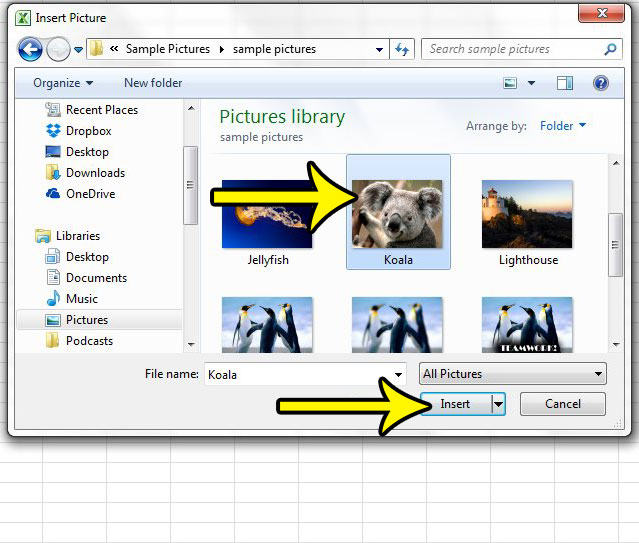
Step 5: Browse to the picture that you want to insert into the spreadsheet, click it once to select it, then click the Insert button. If the inserted picture is either too large or too small, continue to the next step to learn how to resize it.
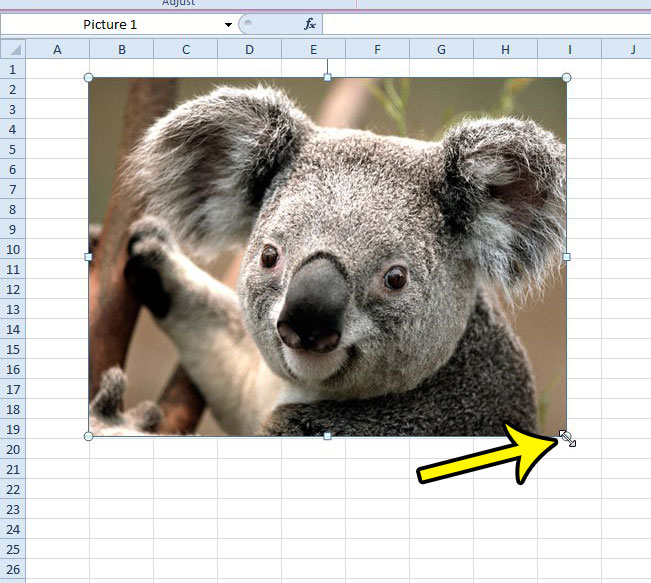
Step 6 (optional): Resize the picture by clicking on one of the corners of the image, then dragging your mouse to adjust the size as needed.
You can also access some additional formatting options by right-clicking the picture, then choosing the Format Picture option.
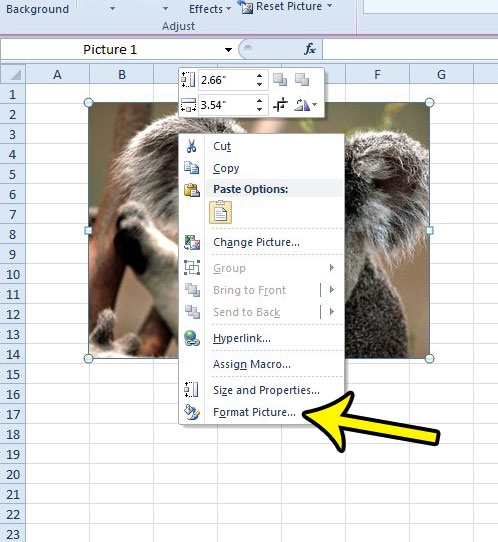
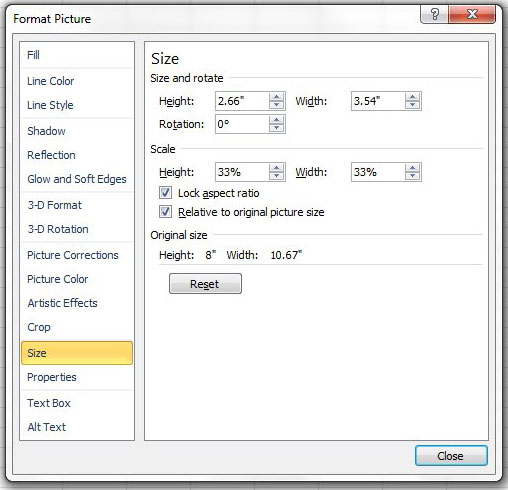
This will open a new window where you will be able to manually adjust the size of the image, add a border, apply some artistic effects, and more.
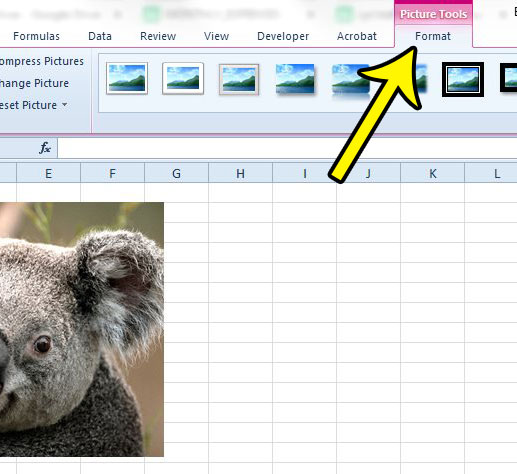
Finally, if you would prefer to make changes to your picture in a different way, you can click the Format tab under Picture Tools at the top of the window, then apply changes to the picture in that manner. If you do not see this tab you will need to click the picture to select it, which will cause the tab to appear.
One of the most frequent problems that Excel users often encounter after inserting a picture into their spreadsheet is that the picture does not behave in the same manner as data if you move or resize your cells. Learn how to lock an image to a cell in Excel 2010 if you would like to be able to adjust the picture along with the rest of the cells in the row or column.

Kermit Matthews is a freelance writer based in Philadelphia, Pennsylvania with more than a decade of experience writing technology guides. He has a Bachelor’s and Master’s degree in Computer Science and has spent much of his professional career in IT management.
He specializes in writing content about iPhones, Android devices, Microsoft Office, and many other popular applications and devices.