Need to nudge a paragraph in, start each paragraph with a first-line indent, or give a bibliography entry a hanging indent? On a computer, select the text and open Format > Align & indent > Indentation options, or press Tab or Increase indent for quick moves. In the Android, iPhone or iPad app, tap Edit, select the paragraph, tap Format (the A icon), and use the indent buttons (on the Paragraph tab on iPhone and iPad).
Pick the right indent and device
Docs treats four kinds of indent differently, so name the one you need first.
| Indent | What it does | Typical use |
|---|---|---|
| Left indent | Moves every line of the paragraph away from the left margin | Block quotes, nested notes |
| Right indent | Pulls every line in from the right margin | Block quotes indented on both sides |
| First line | Indents only the first line | Essays, letters, novels |
| Hanging | Keeps the first line at the margin and indents the rest | Works cited, references, bibliographies |
The device matters just as much, because the apps have fewer controls than the browser version:
| Task | Computer (browser) | Docs app (Android, iPhone, iPad) |
|---|---|---|
| Move a whole paragraph | Toolbar buttons, shortcuts, ruler or dialog | Increase indent and Decrease indent |
| Nest list items | Yes | Yes |
| First-line indent | Indentation options, ruler or Tab | No setting; set it on a computer or use a workaround |
| Hanging indent | Indentation options or ruler | No setting; set it on a computer or use a workaround |
| Exact size, like 0.5 inch | Yes | No |
You need edit access for any of this. If a document was shared with you as view only or comment only, the formatting tools are unavailable until the owner gives you edit access, or you make your own copy.
Quick indents on a computer
Press Tab for a first-line indent
Click at the very start of a paragraph, with nothing selected, and press Tab. The first line usually moves in by the default half-inch tab stop. Press Shift + Tab or Backspace to take it out.
Tab works for a short document, but you have to press it on every paragraph, and if whole paragraphs are selected when you press it, Docs typically indents the entire paragraphs instead. For a long essay, set a first-line indent once with Indentation options (next section).
Use the toolbar buttons or shortcuts
- Click in the paragraph, or select several.
- Click Increase indent on the toolbar. In a narrow window it may sit behind the three-dot More button at the end of the toolbar.
- Click again to move further, or click Decrease indent to move back.
Google’s list of Google Docs keyboard shortcuts gives Ctrl + ] to increase and Ctrl + [ to decrease paragraph indentation on Windows and ChromeOS, and Cmd + ] and Cmd + [ on a Mac. These move the entire paragraph one step at a time. Inside a bulleted or numbered list they change the list level instead.
Set exact indents with Indentation options
Use the dialog whenever an assignment or style guide names a measurement.
- Select the paragraphs. Press Ctrl + A (Cmd + A on a Mac) to select the whole document.
- Click Format > Align & indent > Indentation options.
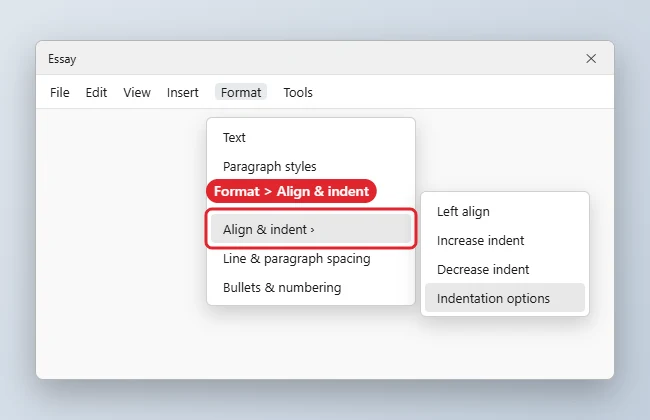
Indentation options set first-line and hanging indents. - Type a Left or Right amount to move whole paragraphs in from either margin. Enter the same number in both for a block quote indented on both sides.
- Under Special indent, choose None, First line or Hanging, and type the amount.
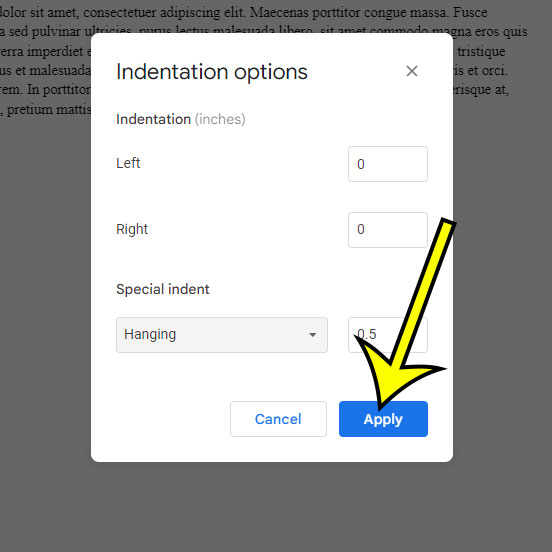
- Click Apply.
Settings apply only to the selected paragraphs, and a new paragraph you start by pressing Enter normally inherits the formatting of the one above it. To remove a special indent, select the text, reopen the dialog, set Special indent to None, and click Apply.
Make a hanging indent for a works-cited page
Most citation styles use a hanging indent for the reference list, so author names line up down the left edge and are easy to scan. Google’s help documents this dialog route; here it is with screenshots.
Step 1: Select the entries
Highlight every citation that needs the format, from the first entry to the last.
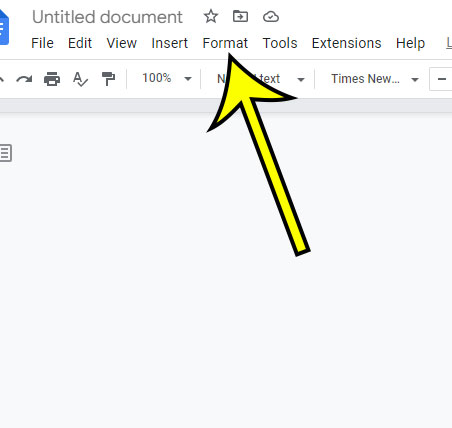
Step 2: Open the Format menu
Click Format in the menu bar.
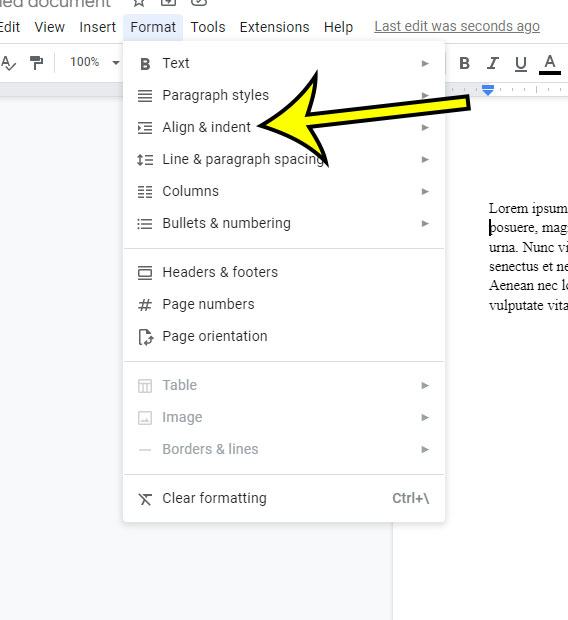
Step 3: Point to Align & indent
Hover over Align & indent to open its submenu.
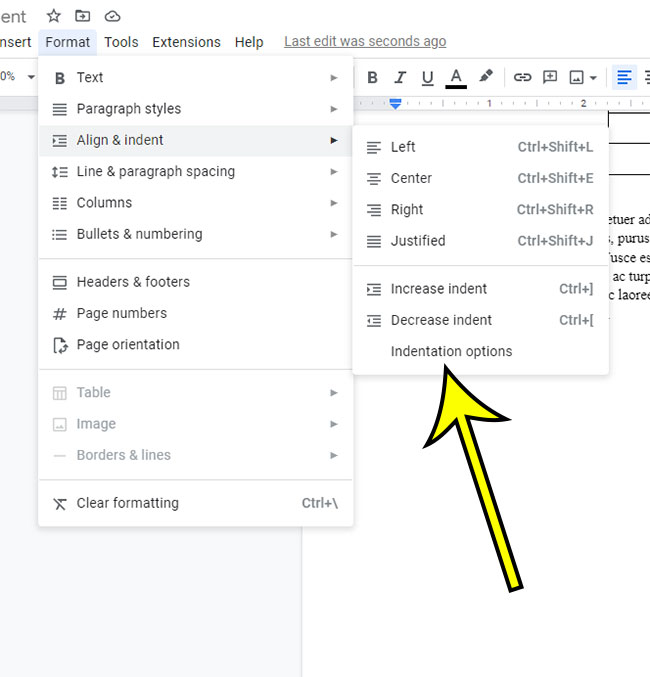
Step 4: Click Indentation options
Choose Indentation options at the bottom of the submenu.
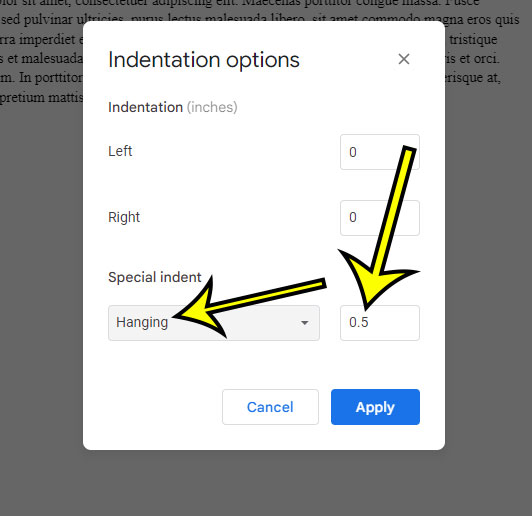
Step 5: Choose Hanging and apply
Under Special indent, choose Hanging, set the amount (0.5 inch is the usual value), and click Apply.
Formatting a full paper? See how to set up MLA format in Google Docs for the heading, spacing and works-cited page together. If you also write in Microsoft Word, the same idea is covered in how to do a hanging indent in Word.
Drag indents on the ruler
The ruler shows where each indent sits and lets you adjust by eye. If it’s hidden, choose View > Show ruler. Select the paragraphs first, then hover over a marker until its name appears:
- Left indent, the downward triangle at the left end, moves every line.
- First line indent, the small bar sitting on that triangle, moves only the first line.
- Right indent, the triangle at the right end, pulls lines in from the right.
For a hanging indent on the ruler, drag the left indent triangle to 0.5 inch, then drag the first-line bar back to 0. For a first-line indent, drag only the bar. The ruler is quick, but it’s easy to land a fraction off, so use the dialog when a teacher or publisher checks exact values.
Indent bulleted and numbered lists
In a list, indenting creates sub-points. On a computer, press Tab at the start of a list item to start a list inside the list, and Shift + Tab to move it back out; the increase and decrease buttons and shortcuts do the same. Google’s help on adding numbered and bulleted lists notes that pressing Tab starts a list inside a list and pressing Enter twice returns to the main list.
Each level can use a different bullet or number style, which is why an item can change from 1 to a when you indent it. If bullets end up at uneven positions, see how to align bullet points in Google Docs, and to change the symbols themselves, see how to change the bullet point style in Google Docs.
Indent in the Google Docs app
The apps move whole paragraphs and list items one step at a time. Labels and panel layouts change between app versions, so look for the same icons if your screen differs slightly.
Android
- Open the document in the Google Docs app and tap Edit (the pencil, bottom right).
- Tap inside the paragraph, or double-tap a word and drag the blue markers to cover several paragraphs.
- Tap Format (the A icon) at the top. A formatting panel opens.
- If the panel has separate Text and Paragraph tabs, tap Paragraph. On some versions the paragraph controls appear right away; scroll the panel if you don’t see them.
- Tap Increase indent once per step, or Decrease indent to move back.
- Tap the document to close the panel. Changes save automatically.
iPhone and iPad
- Open the document and tap Edit (the pencil).
- Tap inside the paragraph, or double-tap and drag the blue handles to select more.
- Tap Format (the A icon), then switch to the Paragraph tab. Google’s help on changing paragraph formatting shows this tab for alignment and line spacing.
- Tap Increase indent or Decrease indent near the bottom of the tab.
- Tap the document to return to typing.
On an iPad the Format panel may open at the side rather than the bottom; the controls are the same. List items work the same way on both platforms: tap inside the item, open Format, and use the indent buttons to change its level.
With a physical keyboard
| Action | Android with a keyboard | iPhone or iPad with a keyboard |
|---|---|---|
| Increase paragraph indentation | Ctrl + ] | Command + ] |
| Decrease paragraph indentation | Ctrl + [ | Command + [ |
Put the cursor in the paragraph (or select several) and press the shortcut. Google notes some shortcuts may not work in every language or keyboard layout. On-screen phone keyboards usually have no Tab key at all, which is why the Format panel buttons are the main route on a phone.
First-line and hanging indents when you only have a phone
The apps don’t offer a first-line or hanging setting, so these are the options, most reliable first.
Set it once on a computer, then keep writing on the phone
Indents belong to the document, not the device. Apply First line or Hanging with Indentation options on a computer, and the formatting should appear in the app. To add a new paragraph or citation from your phone, put the cursor at the end of a formatted one and tap Enter; the new paragraph usually carries the same indent. Check one entry after a few edits to confirm it did.
Imitate a hanging indent with line breaks
Warning: this splits one citation into separate paragraphs, so the breaks won’t move if you edit the wording later. Finish the text first.
- Type or paste the complete entry.
- Tap just before the first word of the second line and tap Enter, so that line becomes its own paragraph. Repeat for later lines.
- Select every line except the first and tap Increase indent once.
Phone line lengths don’t match a printed page, so check the result on a computer before you submit it. For a tablet-specific approach, see how to make a hanging indent in Google Docs on iPad.
Type spaces as a last resort
Four or five spaces at the start of a line look like a first-line indent on screen, but they shift with font changes and won’t pass a formatting check. Keep this for casual notes.
Common indent settings by document type
| Document | Body paragraphs | Reference list |
|---|---|---|
| MLA essay | First line, 0.5 in | Hanging, 0.5 in |
| APA paper | First line, 0.5 in | Hanging, 0.5 in |
| Chicago paper with bibliography | First line, 0.5 in | Hanging, 0.5 in |
| Business letter or report (block style) | None | Not used |
| Long block quotation | Left indent, 0.5 in | Not used |
These are the commonly used values. Your instructor’s or publisher’s instructions win if they differ.
Fixing indents that misbehave
Tab moves the whole paragraph
Either the whole paragraph was selected or the cursor is in a list. Click at the start of the first line with nothing selected, or set First line in Indentation options.
Some paragraphs ignore the new setting
Settings only reach selected paragraphs. Select all the affected text (or the whole document) and apply again.
Pasted citations won’t hang properly
Text from websites and citation generators often brings its own formatting and manual line breaks. Select the entries, choose Format > Clear formatting (Ctrl + \ on Windows and ChromeOS, Cmd + \ on Mac), and reapply the hanging indent. If each line ends in a manual break, delete the breaks so every entry is one paragraph.
The indent buttons are missing or grayed out
On a computer, widen the window or open the toolbar’s More button. In the app, tap Edit first; if there’s no pencil, you don’t have edit access.
Indents look different on another device or in Word
Indents made with spaces or line breaks shift when line lengths change. Indents set with the buttons or Indentation options usually carry over, including into a downloaded .docx file, while Tab-based indents can move if the other program uses different tab stops.
Indent questions
How far does one Increase indent step move text?
It moves the paragraph to the next fixed indent step. Neither the button nor the app lets you type a size, so use Indentation options on a computer when you need an exact number.
Can I indent a centered or right-aligned paragraph?
Yes, but the effect is hard to see because indents mostly change where text starts on the left. For centering text, images and tables, see how to center in Google Docs.
Next step: open your document on a computer, select the body or reference list, and apply the First line or Hanging setting once; after that, the app is fine for everyday writing and edits.

Kermit Matthews runs Live2Tech from just outside Philadelphia. He is an IT specialist with over 20 years of experience, from a university help desk to small-business IT, IT management and his own consulting practice, and has written tech guides full time since 2020. Steps are checked against the current software on a real device or the maker’s official documentation. More about Kermit.