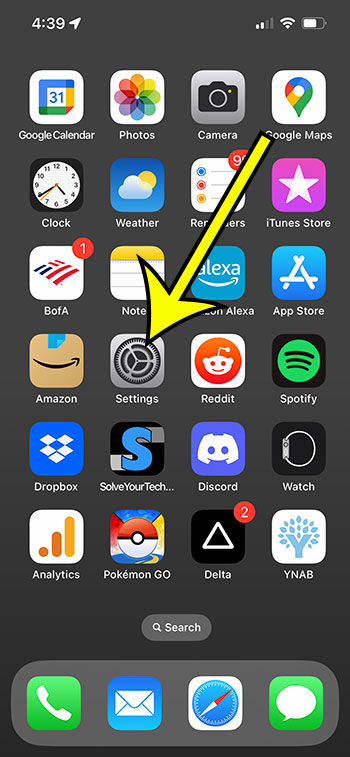
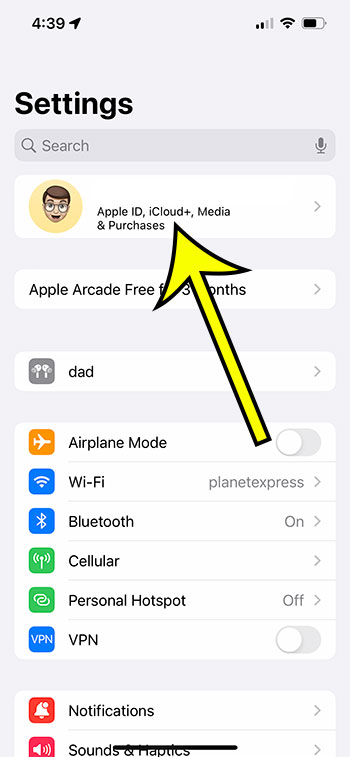
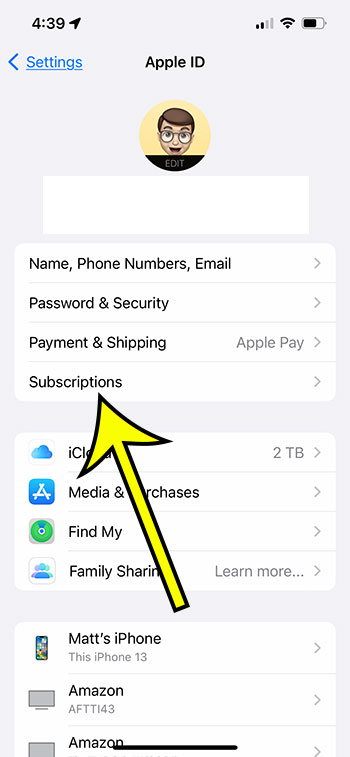
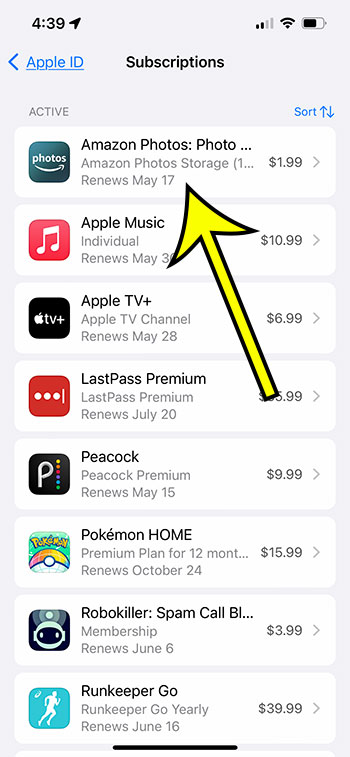
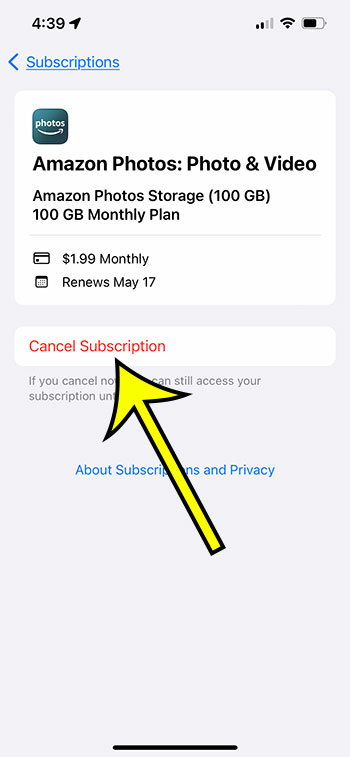
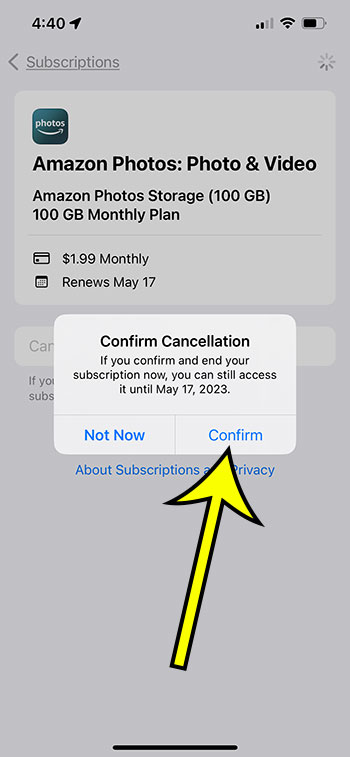
Subscriptions on your iPhone can be deleted by heading to Settings, selecting your Apple ID card, choosing Subscriptions, and then touching the one you wish to delete. Then you can select Cancel Subscription, followed by Confirm.
Our explanation of how to cancel subscriptions on iPhone 13 continues below with further information, including screenshots.
You can also watch this video about deleting iPhone subscriptions.
How to Check for and Cancel iOS Subscriptions
The procedures in this post were performed on an iPhone 13 running iOS 16.
Step 1: Open the Settings app on your iPhone.
Step 2: Click on your name at the top of the menu.
Step 3: Choose Subscriptions in the top section.
Step 4: Select the iPhone subscription that you want to cancel.
Step 5: Choose the Cancel Subscription button.
Step 6: Tap the Confirm button to confirm that you want to terminate this subscription at the end of the current term.
You can return to our site on a frequent basis now that you know how to delete subscriptions on iPhone 13 to check that you haven’t forgotten about any subscriptions or that you don’t have any that you’re paying for but not using.
Video About Deleting iPhone Subscriptions
More Information on Cancelling or Deleting iPhone 13 Subscriptions
You’ll see an “expired” or “inactive” column in the list of subscriptions on your device.
These are the subscriptions you previously had but are no longer active.
Unfortunately, you cannot directly remove these subscriptions from this option, and you must wait a year for them to be erased.
You can also access your iPhone subscriptions by visiting the App Store and selecting your profile symbol in the upper-right corner of the screen.
Then, choose Subscriptions to access the information you saw in the previous section.
This way for canceling iPhone subscriptions is demonstrated in the video below:
You can also use your Windows laptop or desktop computer to launch the iTunes application.
To open the correct menu, select Account, then View My Account, and finally View Account. Then, in the Settings section, select the Manage icon to the right of Subscriptions.
A menu similar to the one mentioned above can be found here.
It’s crucial to understand that most subscriptions on your iPhone will not be refunded. When the current subscription period expires, the subscription will simply terminate.
Summary – How to Cancel an iPhone Subscription
- Go to Settings.
- Select your name.
- Navigate to Subscriptions.
- Choose a subscription.
- Click on Cancel Subscription.
- Select Confirm.
Conclusion
Many apps and services on your iPhone 13 will demand a monthly or yearly subscription.
Because this type of payment system is so common, it’s simple to lose track of your ongoing subscriptions.
Fortunately, you can access this information on your smartphone in a few simple steps and cancel any existing subscriptions that you no longer require.
If you listen to music or watch movies on your iPhone, you may be using a subscription service.
In addition to these alternatives, you may have subscriptions to fitness applications, games, or cloud storage services.
When you have so many various reasons for paying for a subscription on your iPhone, it might be difficult to keep track of everything.
Fortunately, the Settings app has a tab that details all of your currently active and inactive subscriptions.
If you uncover something you no longer want or need, you can cancel it immediately from your iPhone by following the steps shown above.

Kermit Matthews is a freelance writer based in Philadelphia, Pennsylvania with more than a decade of experience writing technology guides. He has a Bachelor’s and Master’s degree in Computer Science and has spent much of his professional career in IT management.
He specializes in writing content about iPhones, Android devices, Microsoft Office, and many other popular applications and devices.
