When you want to disable the inverted camera or mirror effect on your iPhone, you can do it effortlessly.
Simply go to the ‘Settings’ menu on your iPhone. Choose the ‘Camera’ option, and then look for the ‘Mirror Front Camera’ option under those options. Turn it on when you discover it. This will basically disable the inverted camera effect.
Following these instructions will ensure that your selfies and front-camera photographs appear as they do in the viewfinder rather than being flipped.
Continue reading our post about how to disable the iPhone inverted camera, which includes screenshots of the methods.
For more details on this topic, see this iPhone video on how to turn off an inverted camera.
How to Stop iPhone Mirroring Selfies (Guide with Pictures)
The procedures in this post were carried out using an iPhone 13 running iOS 16.
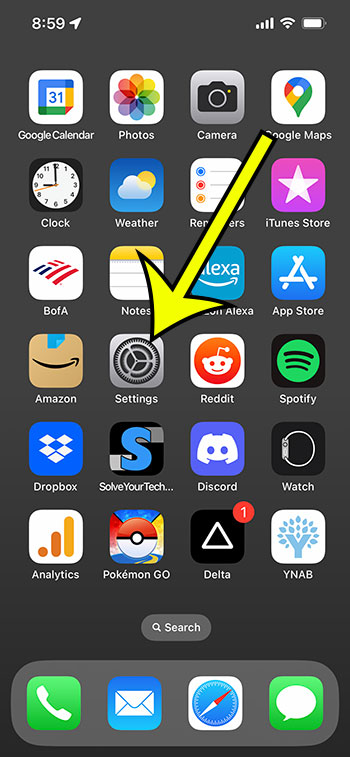
Step 1: Launch the iPhone Settings app.
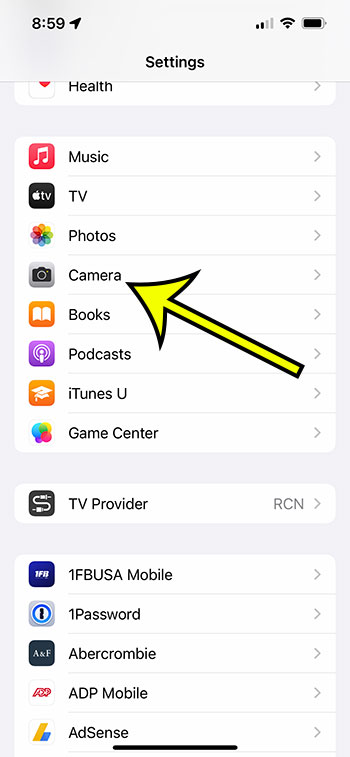
Step 2: Scroll down and choose Camera from the menu.
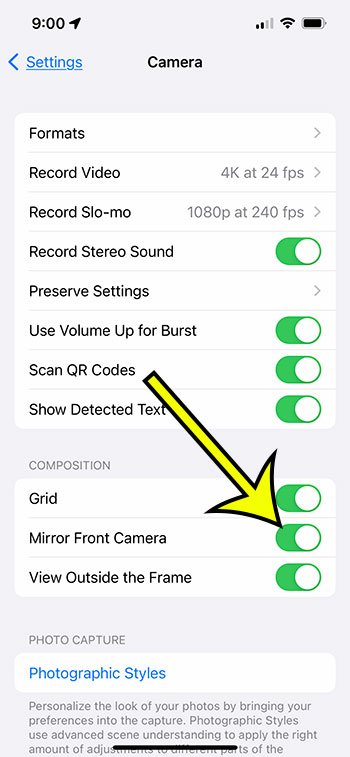
Step 3: To activate the Mirror Front Camera, tap the button to the right of it.
You’ll be able to find and toggle this setting whenever you need to alter it for a picture you’re taking now that you know how to turn off inverted camera on iPhone 13.
Video Instructions for Using the iPhone’s Inverted Camera Mode
More Details on iPhone Mirrored Selfies
If you have an older iPhone that has not been upgraded to iOS 14, you will not be able to mirror the camera.
If you want to manually flip an image on one of these older iPhones, you’ll need to open it in the Photos app and utilize the editing tools there.
To flip a photograph on an iPhone, utilize the Photos app. The procedure is as follows:
- Open the Photos app on your iPhone.
- Find the image you want to flip and tap to open it.
- Click the Edit button in the upper right corner of the screen.
- Tap the Crop and Rotate button at the bottom of the screen.
- Use your finger to flip the image by tapping the Flip button in the top-left corner of the screen.
- Tap Done to save the inverted image.
The techniques detailed above are for flipping a photograph in the Photos app, but other applications or photo editing tools available on the App Store may allow you to accomplish the same.
Summary – How to Disable the Flipped Camera Mode on an iPhone for Better Selfies
- Go to Settings.
- Choose Camera.
- Turn on the Mirror Front Camera.
Conclusion
If the photos you take with your iPhone’s front-facing camera don’t seem the same in the final form as they did when you took them, you might be wondering why.
When you look in the viewfinder of your camera app while taking a selfie using the selfie camera, it will resemble looking in a mirror. We are accustomed to seeing ourselves in this manner because it is how we see ourselves in mirrors, thus it does not register as being reversed.
However, photographs stored to your Photos app will not be mirrored in this manner, which may result in an image that you dislike.
The photos you capture using your iPhone’s front-facing camera will be different from the photos that appear in the Photos app.
This occurs because what you see as you take the photograph is intended to seem the same as when you look in the mirror.
However, once the image is captured, the iPhone will adjust it to show the image as it would appear to others.
For example, if you’re wearing a shirt with lettering on it, the text appears reversed when you gaze at yourself in the app’s viewfinder.
However, the final image will invert that text so that it reads correctly.
On the iPhone, you may change a setting so that the finished image looks exactly like the one you saw when you snapped the picture.

Kermit Matthews is a freelance writer based in Philadelphia, Pennsylvania with more than a decade of experience writing technology guides. He has a Bachelor’s and Master’s degree in Computer Science and has spent much of his professional career in IT management.
He specializes in writing content about iPhones, Android devices, Microsoft Office, and many other popular applications and devices.


