To enter the BIOS on a Dell computer running Windows 10, restart it and tap the F2 key repeatedly as soon as the Dell logo appears. You can also tap F12 to open the one-time boot menu and choose BIOS Setup. If the keys don’t work, go through Windows instead: Settings > Update & Security > Recovery > Restart now under Advanced startup, then choose Troubleshoot > Advanced options > UEFI Firmware Settings > Restart.
These steps work on Dell Inspiron, XPS, Latitude, Vostro, OptiPlex, Precision, and Alienware computers. Here’s each method in detail and what to do if your Dell boots straight into Windows.
Method 1: Press F2 at startup
- Save your work and shut down or restart the computer.
- Turn it on and immediately start tapping F2 about once per second.
- Keep tapping until you see the BIOS setup screen (it may say BIOS Setup, System Setup, or show Dell’s settings menu).
On some Dell laptops, you may need to press Fn + F2 if the function keys control volume or brightness. If you see “Entering Setup” in the corner of the logo screen, it worked.
Method 2: Use the F12 boot menu
- Restart the computer.
- Tap F12 repeatedly when the Dell logo appears.
- In the One-Time Boot Menu, use the arrow keys to select BIOS Setup and press Enter.
The F12 menu is also where you choose to boot from a USB drive just once.
Method 3: Enter the BIOS from Windows 10
This works even if Windows starts too fast to press a key.
- Open Settings with Windows key + I.
- Click Update & Security > Recovery.
- Under Advanced startup, click Restart now.
- Choose Troubleshoot > Advanced options.
- Click UEFI Firmware Settings, then Restart.
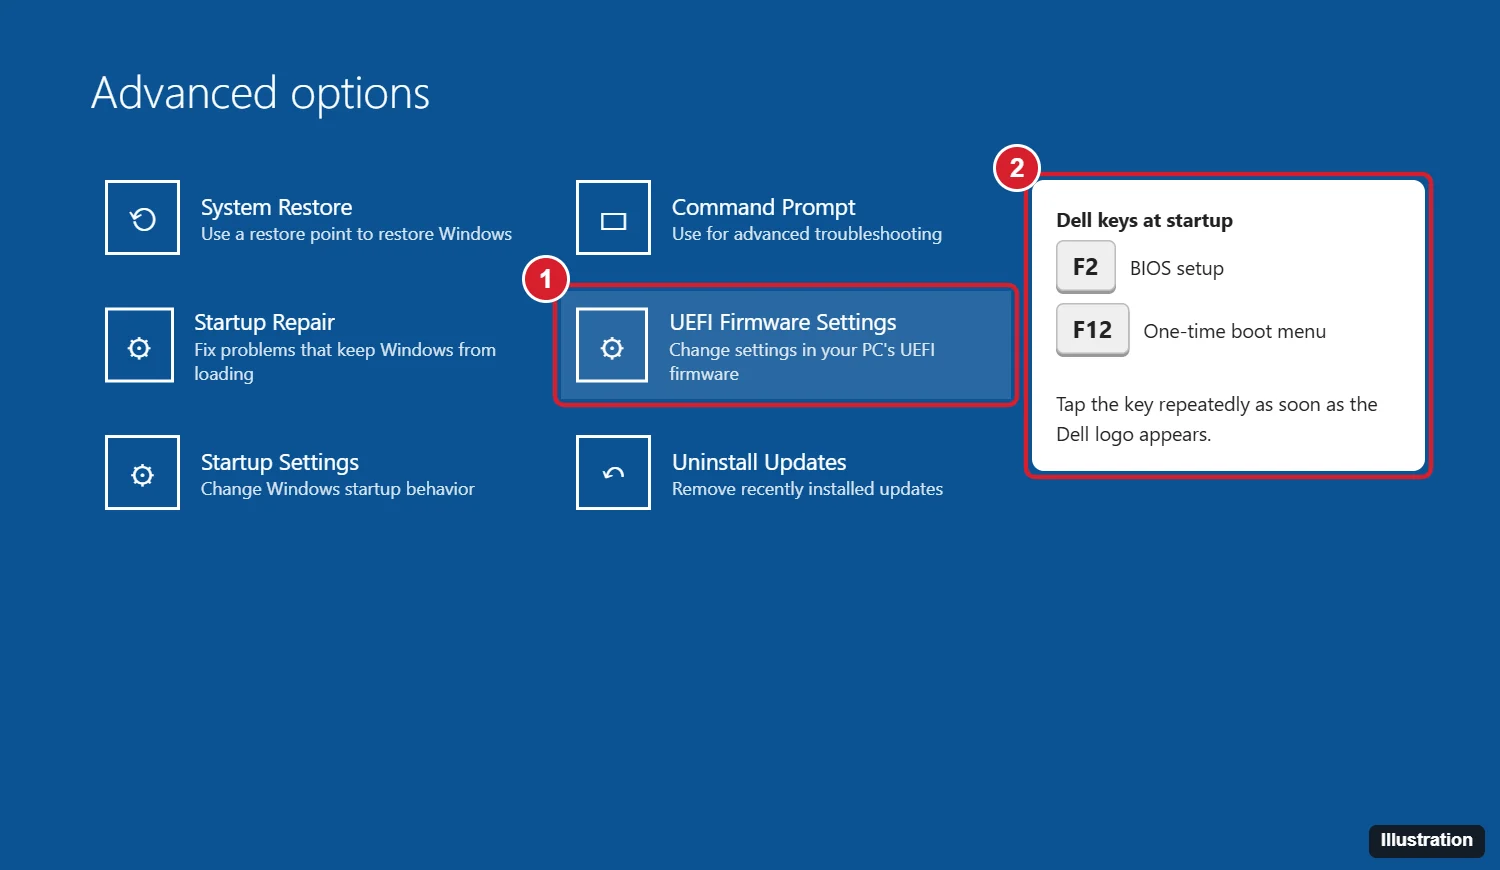
Shortcut: hold Shift while you click Restart in the Start menu to jump straight to the blue Advanced startup screen.
Dell BIOS keys at a glance
| Key | What it does |
|---|---|
| F2 | Opens BIOS (System Setup) |
| F12 | Opens the One-Time Boot Menu, including BIOS Setup and Diagnostics |
| F12 > Diagnostics | Runs Dell’s built-in hardware tests (ePSA) |
Can’t get into the Dell BIOS?
- Turn off Fast Startup. Go to Control Panel > Power Options > Choose what the power buttons do > Change settings that are currently unavailable, and uncheck Turn on fast startup. Then shut down fully and try F2 again.
- Use a wired keyboard. Some wireless and Bluetooth keyboards don’t work until Windows loads. Laptops should use the built-in keyboard.
- Start tapping sooner. Begin pressing F2 right as you press the power button.
- Use the Windows method above if the logo flashes by too fast.
- No UEFI Firmware Settings option? Your PC may use legacy BIOS mode, so use F2 at startup instead.
Be careful in the BIOS
Only change settings you understand. Common reasons to open the Dell BIOS include changing the boot order, turning on virtualization, and enabling TPM or Secure Boot. If something goes wrong, choose Restore Settings or Load Defaults, then Apply and Exit. For general steps on other brands, see how to enter BIOS on Windows 10.
Frequently asked questions
What is the BIOS key for Dell?
F2. F12 opens the boot menu, which also has a BIOS Setup option.
How do I exit the Dell BIOS?
Click Exit in the bottom-right corner, or press Esc. Choose whether to save changes when asked.
Does this work on Windows 11?
Yes. F2 and F12 work the same. In Windows 11, the Advanced startup option is in Settings > System > Recovery.
Can I update the Dell BIOS?
Yes, with Dell’s SupportAssist app or by downloading the update from Dell’s support site for your model. Keep a laptop plugged in during the update.

Kermit Matthews is a freelance writer based in Philadelphia, Pennsylvania with more than a decade of experience writing technology guides. He has a Bachelor’s and Master’s degree in Computer Science and has spent much of his professional career in IT management.
He specializes in writing content about iPhones, Android devices, Microsoft Office, and many other popular applications and devices.