A scanned document is really just a picture of a page, so you can’t click into it and change the words the way you can with a normal Word file. To edit it, the text first has to be recognized with OCR (optical character recognition). Word can do this for PDFs, and several free tools can pull text from scanned images. This guide covers the best ways to turn a scan into an editable Word document, how to get cleaner results, and what to do with tricky layouts.
Quick Answer
Save or scan the document as a PDF, then open Word and choose File > Open, select the PDF, and click OK when Word says it will convert it to an editable document. Check and fix any recognition errors, then save it as a .docx file.
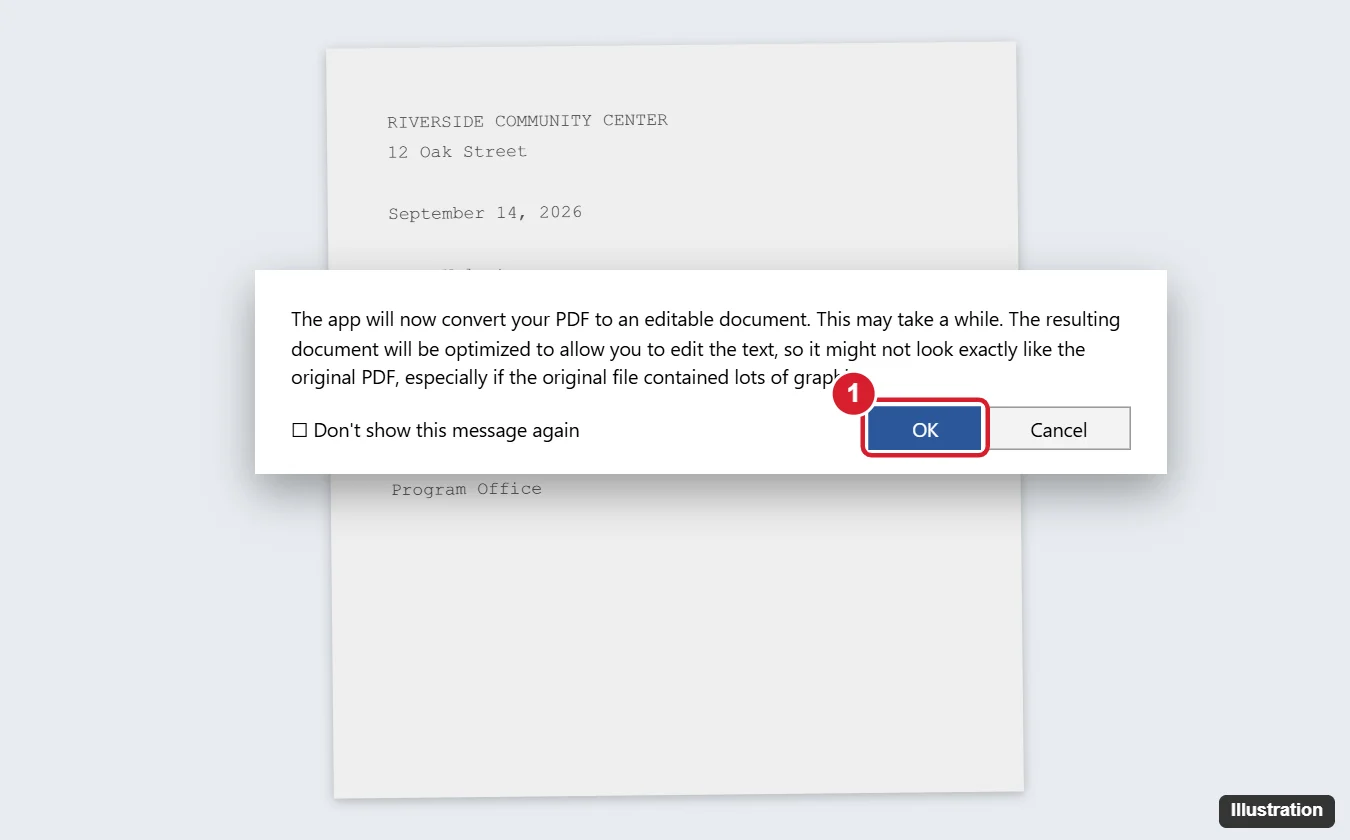
Method 1: Open the Scanned PDF in Word
- Scan the document to PDF (most scanners and scanning apps offer PDF). If you have an image file (JPG or PNG), see the other methods below or convert it to PDF first.
- Open Word and click File > Open > Browse.
- Select the PDF and click Open.
- When Word says it will convert the PDF to an editable document, click OK.
- Review the result. Word tries to recognize text and rebuild the layout; clean, high-resolution scans convert best, while low-quality scans may come through partly as images.
- Click File > Save As and save as a Word Document (.docx).
If the page comes through as a single picture, the scan didn’t contain recognizable text. Try one of the OCR tools below.
Method 2: Use Google Drive (Free OCR)
- Upload the scanned PDF or image (JPG, PNG) to Google Drive.
- Right-click it and choose Open with > Google Docs.
- Google Docs opens a document with the image at the top and recognized text below.
- Choose File > Download > Microsoft Word (.docx), then open it in Word and delete the image if you don’t need it.
Method 3: Copy Text From an Image on Windows
- Snipping Tool (Windows 11): take a screenshot of the scan, click Text actions, then Copy all text, and paste into Word.
- OneNote: insert the image into a page, right-click it, and choose Copy Text from Picture.
- Microsoft Lens or phone camera: on iPhone, Live Text lets you select text in photos; on Android, Google Lens does the same. Copy and paste into Word.
Method 4: Acrobat or Other PDF Editors
Adobe Acrobat Pro and many other PDF editors can run OCR on a scanned PDF (in Acrobat: Scan & OCR > Recognize text) and export it to Word with better layout preservation, especially for tables and columns.
Tips for Better Results
- Scan at 300 dpi in black and white or grayscale.
- Keep pages straight and flat; crop out dark edges and shadows.
- Use clean originals. Handwriting, faint print and decorative fonts recognize poorly.
- Always proofread: OCR often confuses similar characters such as “rn” and “m,” “l” and “1,” or “O” and “0.” Word’s spelling check helps catch these.
- For forms with fields, consider filling the PDF directly instead of converting.
Fixing Formatting After Conversion
- Select everything (Ctrl + A) and use Home > Clear All Formatting to remove odd fonts and spacing, then reapply styles.
- Turn on Show/Hide ¶ to find stray line breaks and text boxes.
- Rebuild complicated tables with Insert > Table if the converted ones are messy.
Frequently Asked Questions
Can Word open a JPG and make the text editable?
Not directly. Inserting an image into Word only places the picture. Use Google Docs, OneNote or Snipping Tool to extract the text first.
Is my document private if I use online tools?
Uploading sends the file to that service. For sensitive documents, use offline tools such as Word, OneNote or Snipping Tool.
Does this work on a Mac?
Yes. Word for Mac can open PDFs, and macOS Live Text lets you copy text from images in Preview.
Summary
- Scan to PDF at 300 dpi.
- Open the PDF in Word and let it convert.
- Or use Google Docs, OneNote or Snipping Tool for OCR.
- Proofread and fix formatting, then save as .docx.

Kermit Matthews is a freelance writer based in Philadelphia, Pennsylvania with more than a decade of experience writing technology guides. He has a Bachelor’s and Master’s degree in Computer Science and has spent much of his professional career in IT management.
He specializes in writing content about iPhones, Android devices, Microsoft Office, and many other popular applications and devices.