Giving another account administrator rights on Windows 10 usually takes a trip through Settings, but Command Prompt does it with a single command. That’s handy when you’re already in a terminal, managing a PC remotely, or when the Settings app isn’t cooperating. This guide shows the commands to promote a user, confirm the change, remove admin rights, and enable the built-in Administrator account. The same commands work on Windows 11.
Quick Answer
Open Command Prompt as administrator and run net localgroup administrators “UserName” /add, replacing UserName with the account name shown by net user. The user gets admin rights the next time they sign in.
Before You Start
- You must already be signed in with an administrator account (or know an administrator’s password) to run these commands.
- Admin accounts can install software and change any setting, so only promote accounts you trust.
- On work or school PCs joined to a domain, admin rights are usually controlled by IT; these commands may be blocked or reversed.
Step 1: Open Command Prompt as Administrator
- Click Start and type cmd.
- Right-click Command Prompt and choose Run as administrator.
- Click Yes in the User Account Control prompt.
The title bar should say Administrator: Command Prompt. Without it, the commands fail with “System error 5 has occurred. Access is denied.”
Step 2: Find the Exact Account Name
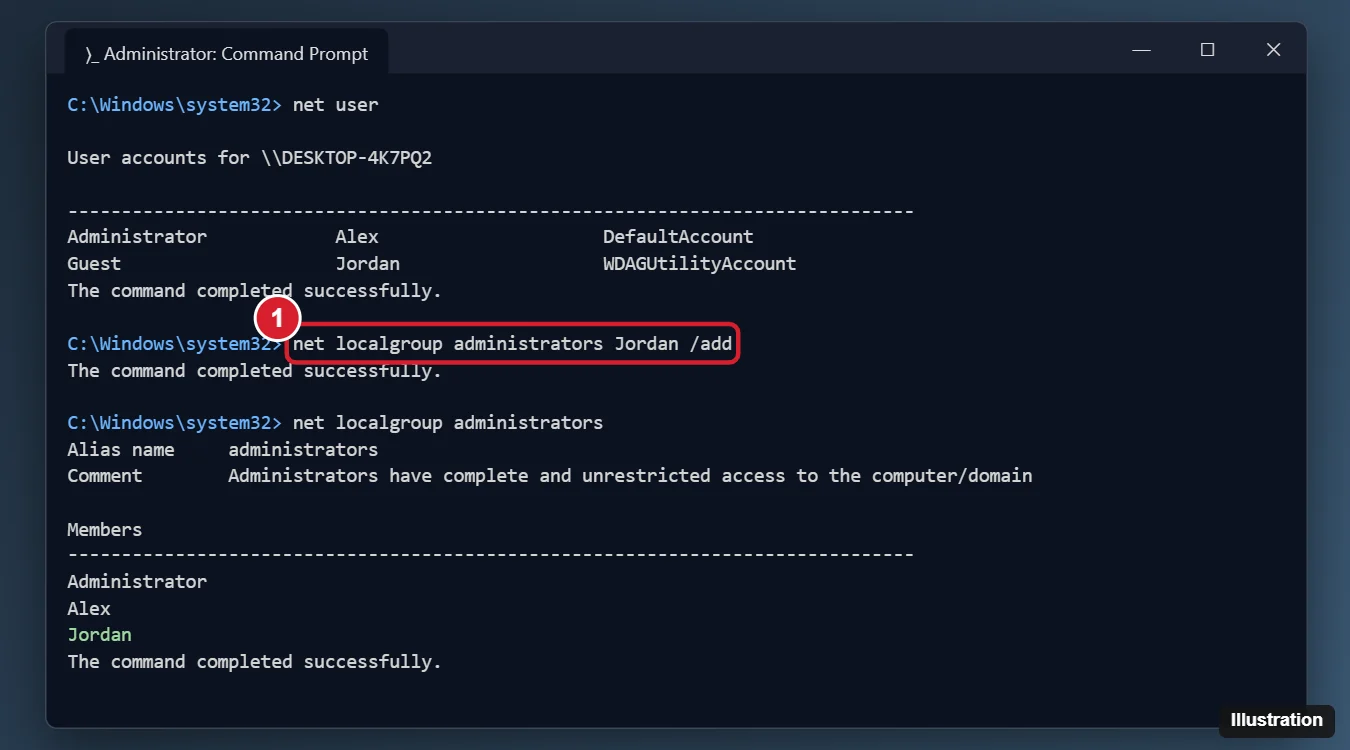
net userThis lists every local account. For an account that signs in with a Microsoft account, the name is usually the first five letters of the email address or the name of the user’s folder in C:\Users. Run whoami while signed in as that user to see it exactly (the part after the backslash).
Step 3: Add the User to the Administrators Group
net localgroup administrators "Jordan" /addReplace Jordan with the account name. Quotes are only needed if the name contains a space, but they don’t hurt. You should see “The command completed successfully.”
Step 4: Confirm the Change
net localgroup administratorsThe account should appear under Members. You can also run net user Jordan and check Local Group Memberships. The user needs to sign out and back in for the new rights to take effect.
Remove Administrator Rights
To make the account a standard user again:
net localgroup administrators "Jordan" /deleteStandard users are members of the Users group; if the account isn’t in it, add it with net localgroup users “Jordan” /add. Make sure at least one other administrator account remains.
Create a New Admin Account From Command Prompt
net user Jordan * /add
net localgroup administrators Jordan /add
The asterisk makes Windows prompt for the password so it isn’t shown on screen or saved in the command history.
Enable the Built-In Administrator Account
Windows includes a hidden account called Administrator. It’s disabled by default and runs without UAC prompts, so use it only for troubleshooting.
net user administrator /active:yesSet a password for it with net user administrator *, and turn it off again when you’re done with net user administrator /active:no.
PowerShell Alternative
In an administrator PowerShell window:
Add-LocalGroupMember -Group "Administrators" -Member "Jordan"
Get-LocalGroupMember -Group "Administrators"
Use Remove-LocalGroupMember to take the rights away. On non-English versions of Windows, the group name may be translated; the net localgroup command accepts the local name.
Settings Method (No Commands)
- Open Settings > Accounts > Family & other users (called Other users on Windows 11).
- Select the account and click Change account type.
- Choose Administrator and click OK.
You can also run netplwiz, select the user, click Properties > Group Membership, and choose Administrator.
Troubleshooting
- System error 5 / Access is denied: Command Prompt isn’t running as administrator. Reopen it with Run as administrator.
- “The user name could not be found” (error 2220 or 1789): the name is wrong. Copy it exactly from net user.
- “The specified account name is already a member of the group” (error 1378): the user is already an administrator.
- Rights don’t seem to apply: have the user sign out completely and sign back in.
Frequently Asked Questions
Can a standard user make themselves an administrator?
No. Adding someone to the Administrators group requires an administrator account’s permission. If you’re locked out of your own PC, use another admin account or reset the admin password through your Microsoft account.
Does this work on Windows 11?
Yes. The net user and net localgroup commands are identical on Windows 10 and 11.
How many administrator accounts should a PC have?
At least one, and ideally two, so you’re not locked out if one account has problems. Use a standard account for everyday tasks if you want extra protection against malware.
Summary
- Open Command Prompt as administrator.
- Run net user to find the account name.
- Run net localgroup administrators “Name” /add.
- Verify with net localgroup administrators, then have the user sign out and back in.

Kermit Matthews is a freelance writer based in Philadelphia, Pennsylvania with more than a decade of experience writing technology guides. He has a Bachelor’s and Master’s degree in Computer Science and has spent much of his professional career in IT management.
He specializes in writing content about iPhones, Android devices, Microsoft Office, and many other popular applications and devices.