JPEG files can have very large file sizes, especially if they are images that you are exporting from a digital camera. While large image files offer the highest resolution and look the best, they may not always be practical if you need to upload those pictures somewhere, or share them with someone else.
Photoshop provides two different ways for you to lower the file size of a JPEG file. Our guide below will show you both of the ways to accomplish this.
Here are two methods for making JPEG file sizes smaller in Photoshop –
Method 1 –
- Click File at the top of the window.
- Click Save As.
- Change the file name if you would like to keep the original file, confirm that JPEG is selected in the Format menu, then click the Save button.
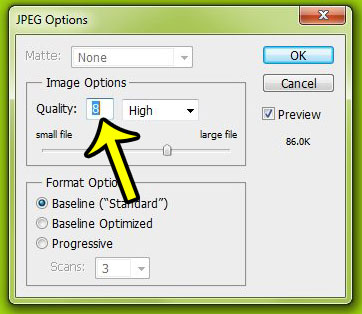
- Reduce the number in the Quality field to a lower value, then click OK.
Method 1 with pictures –
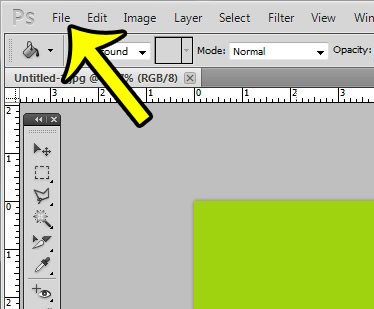
Step 1: Click the File button at the top-left of the window.
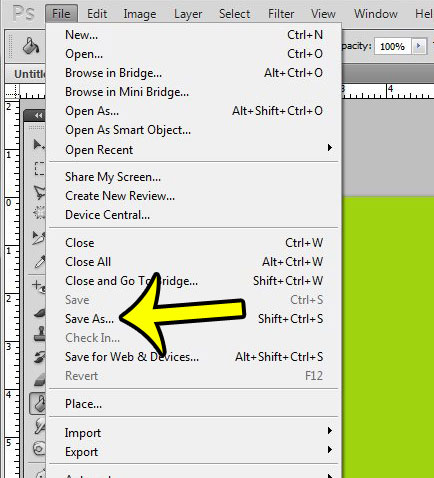
Step 2: Click the Save As option.
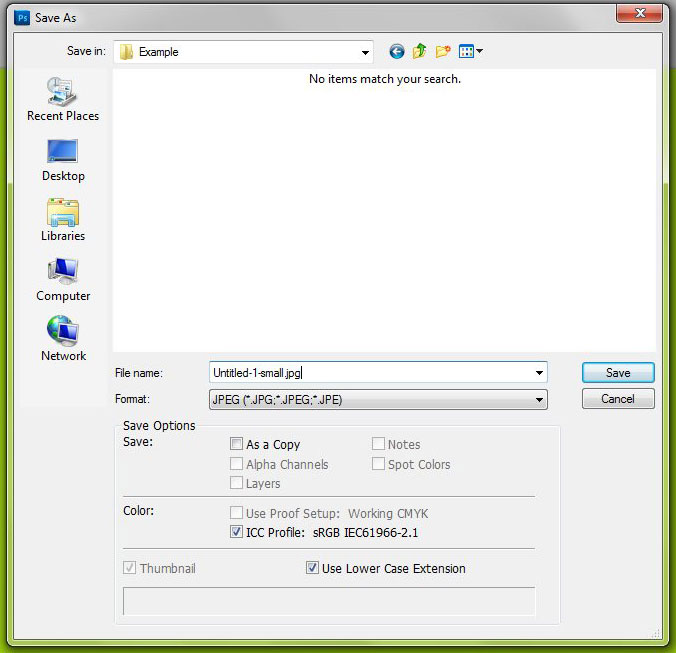
Step 3: Change the name of the file in the File Name field to something different so that you don’t overwrite the original file, make sure that JPEG is selected in the Format drop-down menu, then click the Save button.
Step 4: Lower the number in the Quality field. Note that the file size under Preview should be lowering as you lower the value. I like to use 8 as my quality when I am concerned about file size. Once you are done selecting a value, click the OK button.
Method 2 –
- Click File at the top of the window.
- Click Save for Web & Devices.
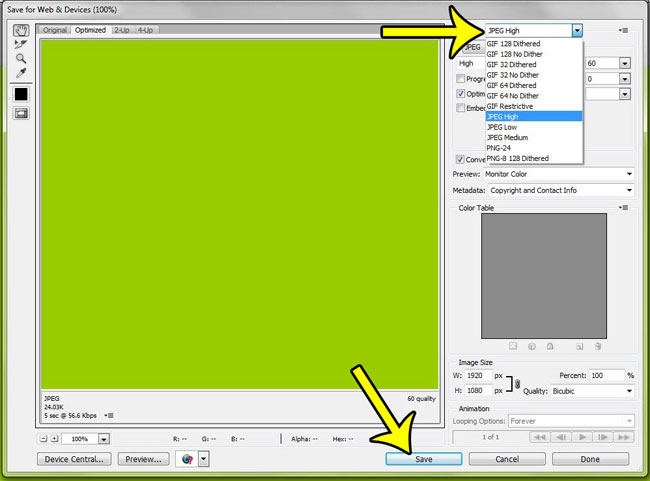
- Click the Preset drop-down menu at the top of the window, click one of the JPEG options, then click the Save button at the bottom of the window.
- Select the file location and change the file name if desired, then click the Save button.
Method 2 with pictures –
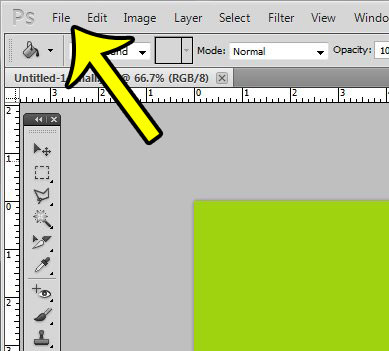
Step 1: Click the File button at the top of the window.
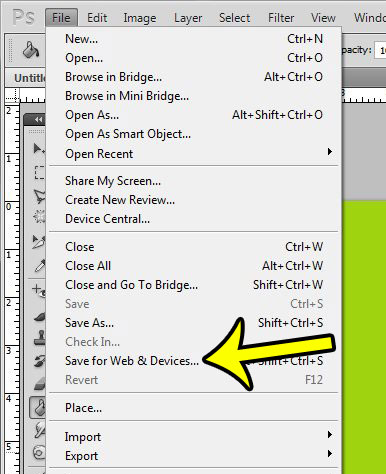
Step 2: Click the Save for Web & Devices option.
Step 3: Click the Preset menu at the top-right of this window, click one of the JPEG options (I like to use JPEG High, but using Low or Medium will give you a smaller file size at the expense of image quality), then click the Save button.
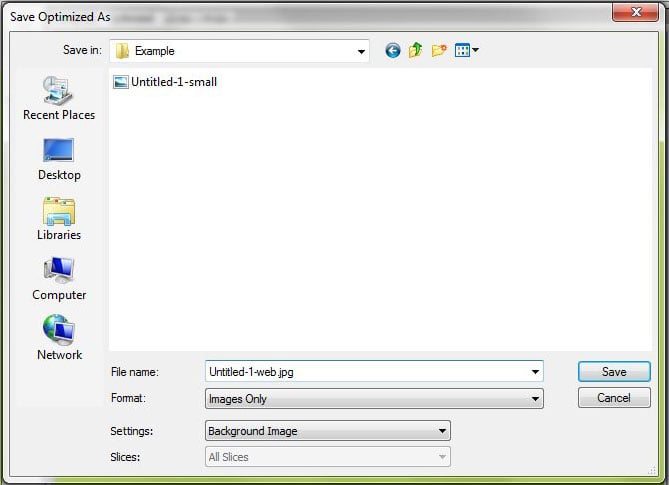
Step 4: Browse to the folder in which you would like to save the file, change the name of the file if you wish, then click the Save button.
Would you like to change the size of one of the layers in your Photoshop file without affecting everything else? Learn how to resize a Photoshop layer instead of resizing the entire image.

Kermit Matthews is a freelance writer based in Philadelphia, Pennsylvania with more than a decade of experience writing technology guides. He has a Bachelor’s and Master’s degree in Computer Science and has spent much of his professional career in IT management.
He specializes in writing content about iPhones, Android devices, Microsoft Office, and many other popular applications and devices.
