The ability to start a private browsing session is something that you have been able to do on desktop and laptop computers for a while.
When you enter a private browsing session, your computer will not remember or keep any data from that session.
This means that any sites you visit will not be stored in your browser history, and any cookies or cache data will be erased once the session is over
This is a very helpful feature, so it’s great that it is something you can do on your iPhone, too.
How is Private Browsing Different from Regular Browsing?
When you are browsing in “Normal” mode in the Safari browser on your iPhone, Safari is keeping track of every Web page that you visit.
This makes it easy to return to a site later if you are unable to find it yourself.
But it also means that anyone with access to your iPhone can see what sites you have visited.
Additionally, a lot of popular websites keep you signed into your account.
This is helpful, but you may find that you need to sign in with a different account on one of those sites, but don’t want to sign out of the first account.
That sign-in data won’t be stored when you start a private browsing session, which means that you can be signed into the same site with two accounts on one device.
So, to summarize, a “Normal” browsing mode is remembering the pages you visit, it’s remembering your log-in data for websites, and it’s caching resources from Web pages so that they load faster in the future.
A private browsing session is starting fresh, and it’s forgetting everything that you did once you close the session.
What is Different About Private Browsing in iOS 8 vs. iOS 7?
Private browsing has been available for several different versions of iOS, including iOS 7. In iOS 7 you had one distinct browsing session, and it could either be normal or private.
When you switched from private back to normal, Safari would ask you if you wanted to close all of the pages or keep them open.
In iOS 8, however, you can simultaneously have a private and normal browsing session going, and there is no prompt when you switch between the two.
This means that you can exit a private browsing session without actually closing it out.
If you leave pages open in a private browsing session, they will still be open the next time you enter private browsing.
Therefore, it is very important to manually close all of your open tabs in private browsing if you do not want someone else to be able to view them.
How to Start Private Browsing in iOS 8
The steps in this section are going to show you how to bring a private browsing session in the default Safari web browser on your iPhone.
Step 1: Open the Safari browser.
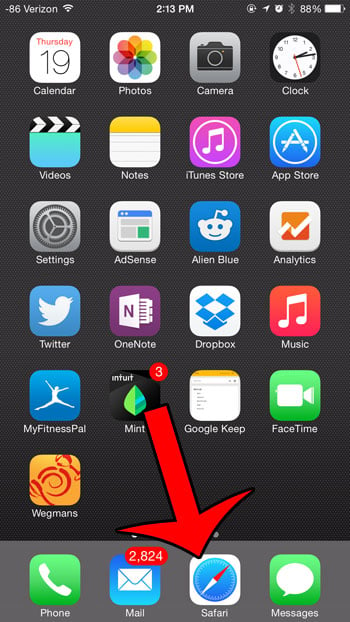
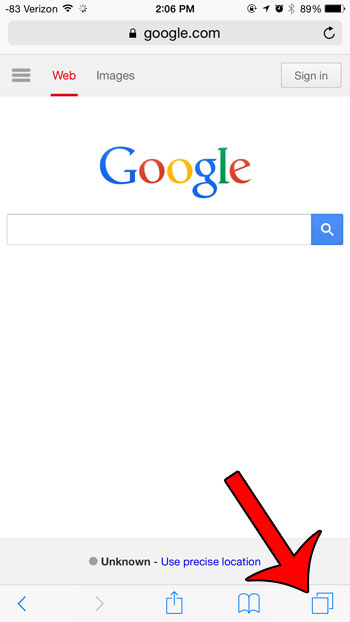
Step 2: Touch the tabs icon at the bottom-right corner of the screen.
If the menu bar is not visible, swipe down on the screen.
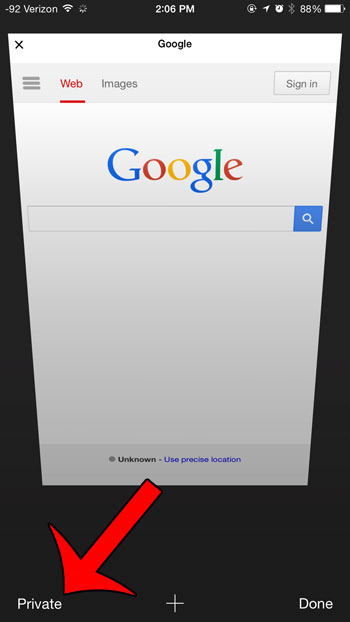
Step 3: Tap the Private button at the bottom-left corner of the screen.

The next section will show you how to make this adjustment if you are using an older version of the iOS operating system on your iPhone.
If the tabs on your iPhone seem to be closing on their own, check out this Safari keeps closing tabs tutorial and see why it’s happening.
How to Stop Private Browsing in iOS 8
The steps in this section were performed in the iOS operating system on an iPhone.
Step 1: Open the Safari browser.

Step 2: Tap the tabs icon at the bottom-right corner of the screen.


Step 3: Enter the Private browsing mode.
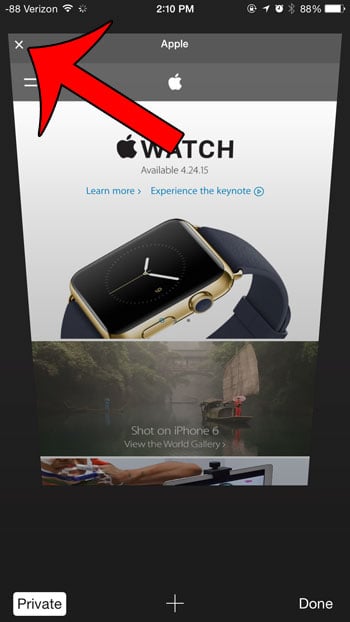
You will know that you are in private browsing when there is a white rectangle around the word “Private” as in the image below.
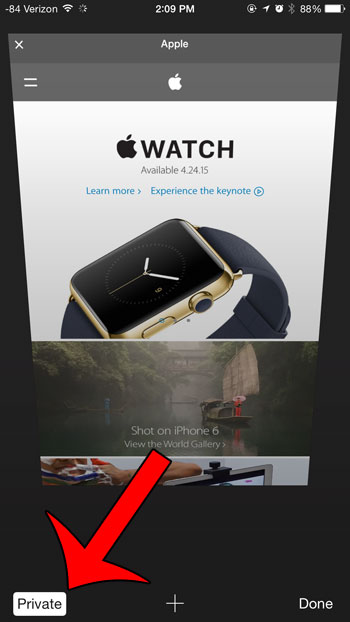

Step 4: Tap the small x at the top-left corner of each tab.
Once all of the tabs are closed, your private browsing session is over, and you can tap the Private button to return to normal browsing.

Did you know that you can block contacts and phone numbers on your iPhone, so that they can’t contact you from that phone number again? Read here to learn how to use this excellent feature.


Kermit Matthews is a freelance writer based in Philadelphia, Pennsylvania with more than a decade of experience writing technology guides. He has a Bachelor’s and Master’s degree in Computer Science and has spent much of his professional career in IT management.
He specializes in writing content about iPhones, Android devices, Microsoft Office, and many other popular applications and devices.