Microsoft Excel 2010’s default state is a series of cells laid out in rows and columns of equal sizes. But as data is added to those cells and you begin to format that data to appear a certain way, you may find that you need to merge certain cells in order to achieve a specific look.
Merging cells may be helpful at one stage of a spreadsheet’s existence, but you might find later that you need to unmerge those cells for a previously-unforeseen reason. Fortunately you can unmerge cells in a manner similar to how the cells were initially merged, so continue reading below to see how.
Unmerging Combined Cells in Excel 2010
The steps in this article will show you how to undo a Merge & Center command that was performed on a group of cells. The result will be a series of individual cells that are restored to their normal, individual sizes and places in the Excel spreadsheet. The data that was contained within the merged cells will be placed entirely into the top-leftmost cell.
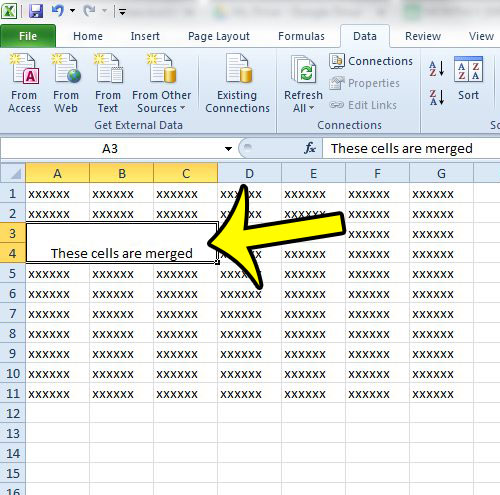
- Open the spreadsheet containing the cells that you wish to unmerge.
- Click the merged cell.
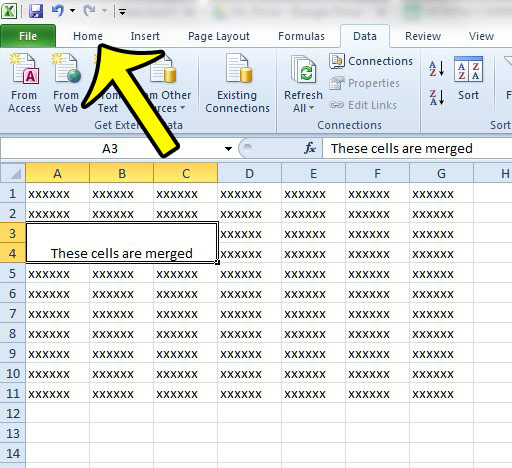
- Click the Home tab at the top of the window.
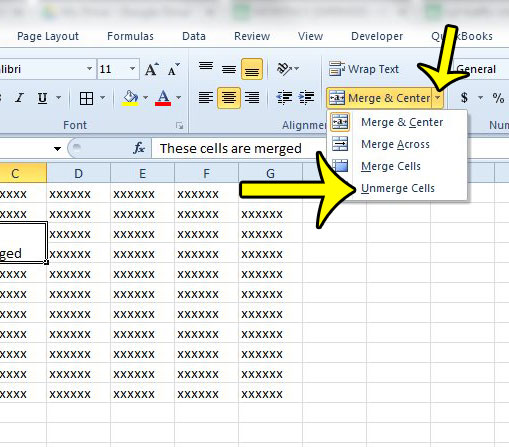
- Click the arrow to the right of Merge & Center in the Alignment section of the navigational ribbon, then click the Unmerge Cells option.


As mentioned earlier, the data that was in the merged cells will be placed in the cell at the top-left of the range of merged cells.
Printing is one of the biggest problems for most Excel users, but there are a number of common changes that you can make to your spreadsheet so that it looks better when printed on paper. One such change is repeating the top row on every page. This helps to identify the columns of data on each page that is printed after the first, which will ensure a better reading experience for your audience.

Kermit Matthews is a freelance writer based in Philadelphia, Pennsylvania with more than a decade of experience writing technology guides. He has a Bachelor’s and Master’s degree in Computer Science and has spent much of his professional career in IT management.
He specializes in writing content about iPhones, Android devices, Microsoft Office, and many other popular applications and devices.