While some of the images that you add to a document will look perfectly fine as they are, you might have pictures that need some adjustments.
One particular option you might want to change is the level of transparency for one of your pictures.
Our tutorial below will show you how to make your Google Docs pictures more transparent by following just a few short steps.
How to Make a Picture Transparent in Google Docs
- Open your document.
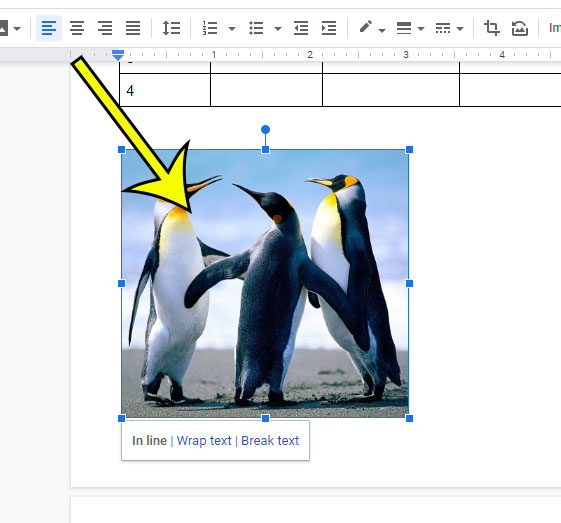
- Select the picture.
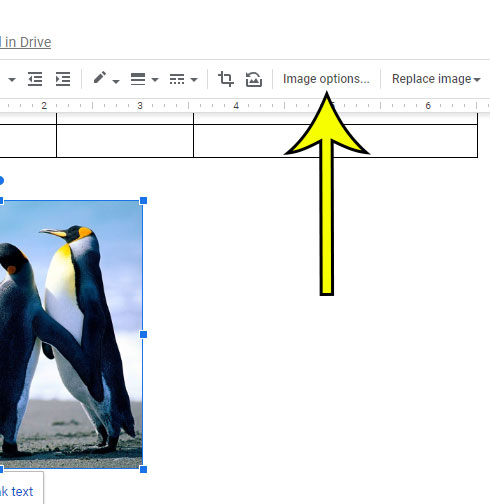
- Click Image options.
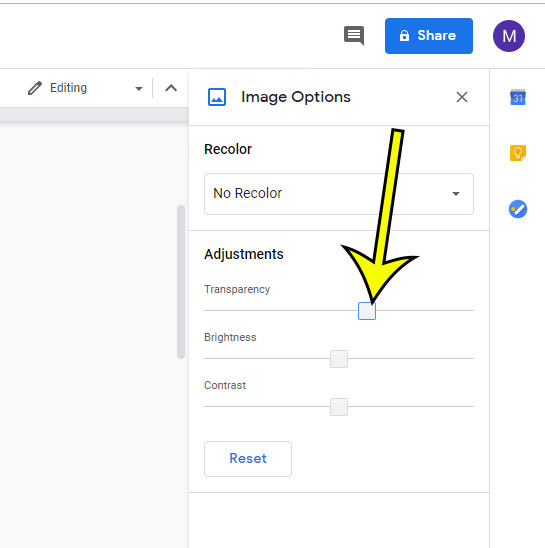
- Adjust the Transparency slider.
Our article continues below with additional information on changing the transparency of a Google Docs picture, including pictures for these steps.
You can do something similar in Powerpoint, too, by following the steps in our how to change opacity in Powerpoint 2013 tutorial.
Pictures that we add to documents are rarely in the format that we need them.
Whether the orientation isn’t correct or the picture needs to be cropped, it’s common to do some basic editing.
But you may be wondering how to make a picture transparent in Google Docs if you’re layering document objects or the picture is too vibrant.
Adding a picture to a Google Docs file is as simple as clicking a button in the toolbar and finding the picture you want to insert.
But that picture is going to be in your document in its original orientation, at its original size and transparency.
If you’ve already edited the picture in another program like Photoshop then that is probably not an issue, but if you haven’t done so you may need to make some edits to the picture so that it looks how you want it to look.
Our guide below will show you how to adjust the transparency of a picture in Google Docs.
You can perform a similar action in your presentations, too. Check out our guide on how to make an image transparent in Google Slides for more information.
How to Adjust Google Docs Image Transparency (Guide with Pictures)
The steps in this article were performed in the desktop version of the Google Chrome Web browser. Once you have completed these steps you will have a version of your image in the document with an increased level of transparency.
Step 1: Sign into your Google Drive at https://drive.google.com and open the document with the picture to modify.
Step 2: Click the picture in the document to select it.

Step 3: Select the Image options button in the toolbar above the document.

Step 4: Click the slider under Transparency and drag it to the right. When you’re done, click the X at the top of the Image Options column to close it.

Now that you know how to change the opacity of an image in Google Docs you will be able to apply these types of image adjustments to any picture that you add to a document that might be improved by it.
Have you made too many changes to the picture and are having trouble getting it back to normal? Find out how to reset your image in Google Docs to undo the edits that you have made.

Kermit Matthews is a freelance writer based in Philadelphia, Pennsylvania with more than a decade of experience writing technology guides. He has a Bachelor’s and Master’s degree in Computer Science and has spent much of his professional career in IT management.
He specializes in writing content about iPhones, Android devices, Microsoft Office, and many other popular applications and devices.