Some Windows 7 tutorials that you find online will have you make changes to the settings in Windows Explorer before you will be able to achieve your desired goal. Some of the steps in these tutorials will ask you to click a File, Edit, View or Tools link at the top of Windows Explorer. But those links may not be displaying in Windows Explorer on your computer, which can make it difficult for you to continue with the tutorial.
Fortunately you are not completely out of luck, as you can change a setting in Windows Explorer to show the menu bar, which is the horizontal bar at the top of Windows Explorer that contains the menus that you need. Our guide below will point you to the setting that you need to adjust in order to continue along with making your Windows 7 adjustments.
Add the Menu Bar to Windows Explorer in Windows 7
The steps in this article will the Menu Bar to all of the Windows Explorer instances that you open. The Menu bar is displayed at the top of the window, and includes options such as File, Edit and View.
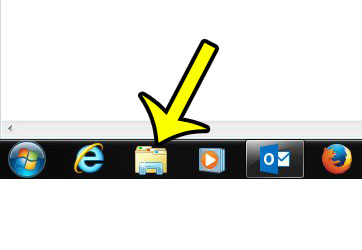
- Open a Windows Explorer window by clicking the folder icon in your taskbar, or by opening any folder on your computer.
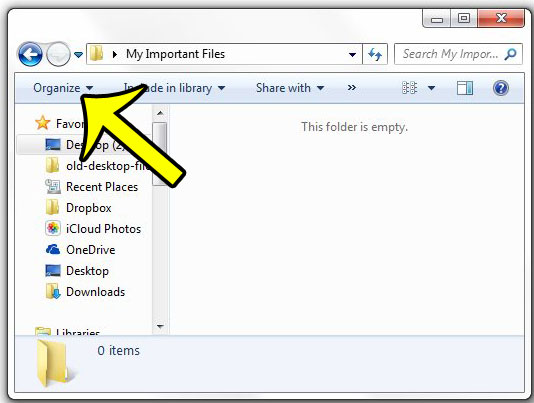
- Click the Organize button in the blue bar at the top of the window.
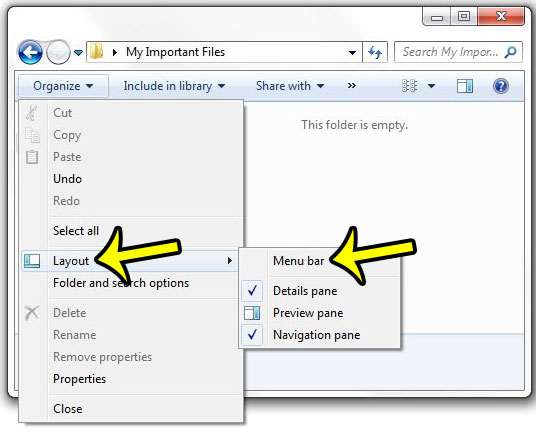
- Click the Layout option, then select the Menu Bar option.


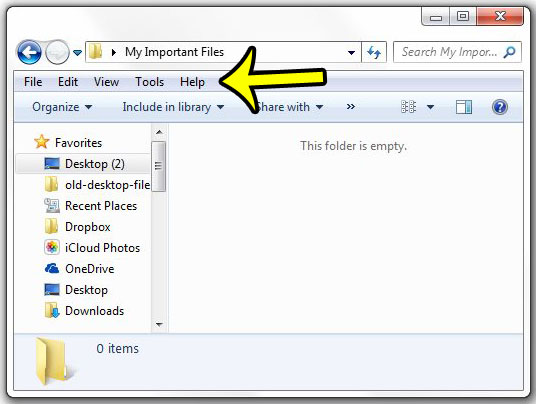
You should now see the Windows Explorer menu bar at the top of the window.

Are there hidden files or folders on your computer that you need to access, but you don’t know how to find them? Or do you need to know or change a file extension? Learn how to change some settings in Windows Explorer to enable both of these options so that you can complete your task.

Kermit Matthews is a freelance writer based in Philadelphia, Pennsylvania with more than a decade of experience writing technology guides. He has a Bachelor’s and Master’s degree in Computer Science and has spent much of his professional career in IT management.
He specializes in writing content about iPhones, Android devices, Microsoft Office, and many other popular applications and devices.