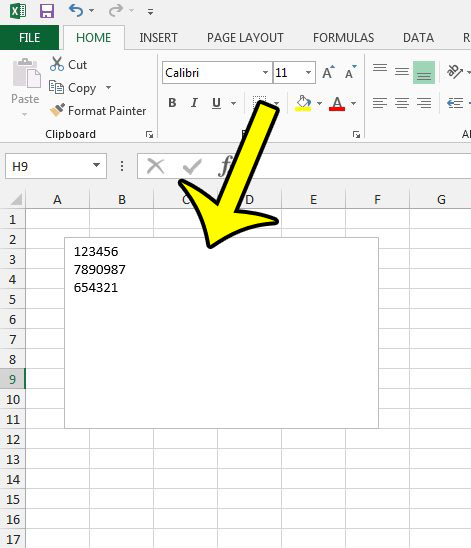
The cell structure in an Excel spreadsheet is pretty rigid, so you don’t have a lot of options when you need to display text in an atypical way.
A text box has some more flexibility and can serve some important functions. But you might have previously added a text box you no longer need, which can leave you looking for a way to get rid of it.
Our delete text box in Excel tutorial continues below with additional information on removing unwanted text box objects from your spreadsheets.
How to Remove Text Box in Microsoft Excel
- Open your Excel spreadsheet.
- Find the text box.
- Click on one of the text box border lines to select it.
- Press the Delete key on your keyboard.
Our guide continues below with additional information on deleting a text box in an Excel workbook, including pictures of these steps.
There are several document elements that you can use in multiple Microsoft Office products, and one of those elements is the text box.
You can insert a text box independently of the other information in your Excel spreadsheet, which allows it to be used in a manner that does not affect the data that has been entered directly into a cell.
There are some limitations to how text boxes can interact with your spreadsheet, and you may find that you no longer need a text box that you have created.
But deleting a text box can be a little more challenging than deleting other data types in Excel, so we will show you how to do it in the guide below.
Deleting a Text Box from an Excel 2013 Spreadsheet (Guide with Pictures)
The steps in this article were performed in Microsoft Excel 2013. However, these same steps will work for other versions of Excel as well.
Note that we will be deleting a text box in these steps, which is a special element in an Excel spreadsheet that exists on a level above the actual worksheet. Deleting the text box will not delete any cells in the worksheet, even if those cells have been resized so that the text box appears to be contained within a cell.
Step 1: Open the Excel worksheet containing the text box that you wish to delete.
Step 2: Locate the text box in the spreadsheet.

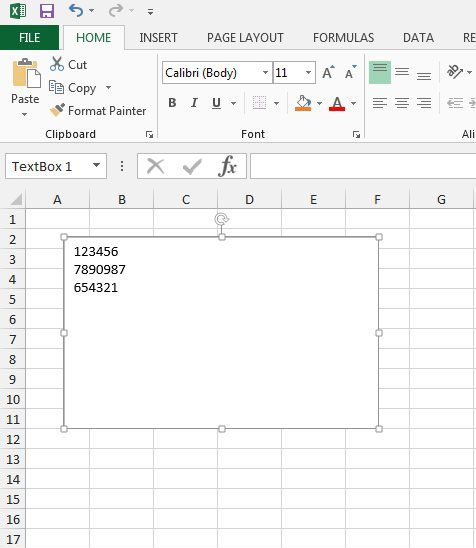
Step 3: Click the border of the text box so that the controls are visible along the perimeter of the text box.
If you are having trouble clicking in the correct spot (the text box border is quite small) you might find it easier to click inside of the text box first, then click on the border after that.

Step 4: Press the Delete or Backspace key on your keyboard to remove the text box from the worksheet.
The text box should now be completely gone from the worksheet.
If you press the Delete key or the Backspace key and the text box does not delete, then you will need to try again.
Now that you have completed our delete text box in Excel guide, you won’t need to resort to unusual methods to hide a text box in your worksheet.
If you see the boxes along the text box border and the circular arrow at the top of the text box, drag your mouse cursor slowly near the border of the text box until you see an icon with an arrow pointing in each direction.
If you click while that is the active cursor shape, then you will select the text box instead of clicking inside of it.
Our tutorial continues below with additional discussion on deleting a text box in an Excel spreadsheet.
More Information on How to Delete a Text Box in Excel 2013
While the steps in our guide above focus specifically on removing text boxes from a worksheet in Microsoft Excel 2013, it will work in other versions of Microsoft office as well. This means that you can select the text box border and press the Delete key to get rid of unwanted text boxes in Excel 2016, Excel 2010, or Excel for Office 365.
If your Excel file has multiple worksheets then you can switch between them by selecting the worksheet tabs at the bottom of the window.
When you click on the border of the text box to select it, a handful of different icons are going to appear on the text box border. If you click one of the icons that appear on the corner of the text box then you can drag it to make the text box larger or smaller.
If you click on the circular arrow at the top of the text box you can rotate the orientation of the text box.
It can be a little tricky to click on the border of the text box. You will know that you have positioned your mouse cursor in the correct location when you see an icon with four directional arrows. Additionally, there won’t be a blinking cursor inside of the text box when the border is selected.
You can insert a new text box by clicking the Insert tab at the top of the window, then clicking the Text button and choosing the Text box option.
While you can press the delete key to remove a single text box from a worksheet, you aren’t going to be able to delete multiple text boxes using a similar method. You can use the Go To dialog box instead.
- Press F5 on your keyboard to open the Go To window.
- Click the Special button.
- Choose the Objects option, then click OK.
- Press the Delete or Backspace key to delete all of the selected text boxes.
One of the options for getting rid of more than one text box involves VBA code, which can be a little trickier to use. You are going to need this VBA code, which you can copy and paste.
Sub SYTRemoveAllTextBoxes()
ActiveSheet.TextBoxes.Delete
End Sub
The steps are:
- Press Alt + F11 to open the Visual Basic window.
- Click Insert at the top of the window.
- Select Module.
- Copy and paste the code above into the window.
- Press F5 on your keyboard to run the code.
Are you having difficulty printing your entire spreadsheet in Excel? There are many different settings that control the way files print in Excel 2013, but one common source of frustration is print areas. Learn how to clear a print area in Excel 2013 so that the entire spreadsheet will print.

Kermit Matthews is a freelance writer based in Philadelphia, Pennsylvania with more than a decade of experience writing technology guides. He has a Bachelor’s and Master’s degree in Computer Science and has spent much of his professional career in IT management.
He specializes in writing content about iPhones, Android devices, Microsoft Office, and many other popular applications and devices.