There are many applications that let you modify pictures.
Usually, these tools give you ways to crop pictures, adjust the color balance, or maybe rotate the picture.
But if you want to do something a little trickier, such as when you want to crop a photo into a circle, you may be struggling to find the circle crop tool so that you can circle crop images.
Luckily this is something you can accomplish for a picture that you add to your slideshow. Our tutorial below will show you how to make a photo round in Powerpoint.
How to Crop a Circle in Microsoft Powerpoint
- Open the slideshow.
- Click on the picture.
- Select the Format tab.
- Click Crop.
- Choose Crop to Shape, then select a circle.
- Drag the handles to resize.
Our article continues below with additional information on how to crop to a circle in Powerpoint, including pictures of these steps.
It’s rare for a picture that you want to use in a slideshow to not require editing. Whether it’s rotating it or cropping out something, the picture might require some work.
But you might want the picture to be a shape other than a rectangle, which can leave you wondering how to crop to a circle in Powerpoint.
When you insert a picture into a Powerpoint slide, the picture will be in its original shape and layout.
You can use third-party image editing programs, like Photoshop, to edit a picture before you add it to a slideshow, but Powerpoint itself actually has a good selection of image-editing tools that you can use to perform many common actions on your pictures.
One of the options in Powerpoint will let you crop your image, but within that crop tool is an additional option where you can crop a picture to a certain shape.
This is something that can be a little difficult to achieve in other programs, but Powerpoint lets you easily change the shape of your image so that your audience sees the picture as that desired shape.
Our tutorial below will show you how to use this to crop a picture to a circle in Powerpoint 2013.
How to Use a Circle Crop in Powerpoint 2013 (Guide with Pictures)
The steps in this article were performed in Microsoft Powerpoint 2013. This guide assumes that you already have a picture in one of your Powerpoint slides and that you would like to crop that picture to a circle.
Note that you will be able to resize the circle after you have performed the crop.
These steps will show you how to make a picture a circle in Powerpoint.
Step 1: Open your presentation in Powerpoint 2013.
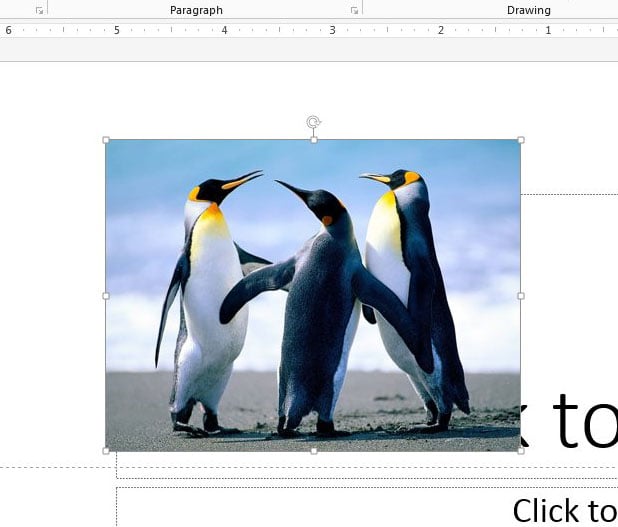
Open the Powerpoint slideshow.
Step 2: Click on the picture to select it.

Select the picture.
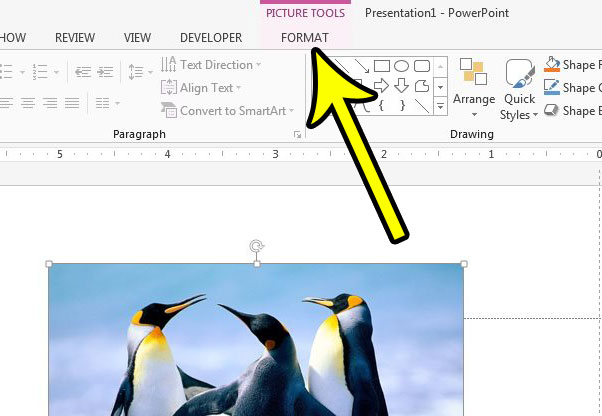
Step 3: Click the Picture Tools Format tab at the top of the window.

Choose the Picture Tools – Format tab.
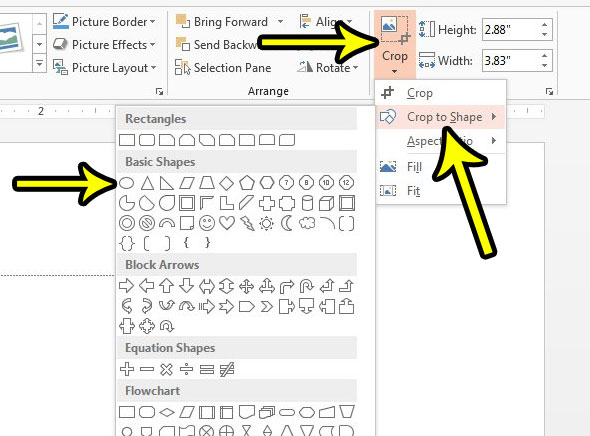
Step 4: Click the Crop button at the right end of the ribbon, select the Crop to Shape option, then click the circle shape.

Select Crop > Crop to Shape > Circle.
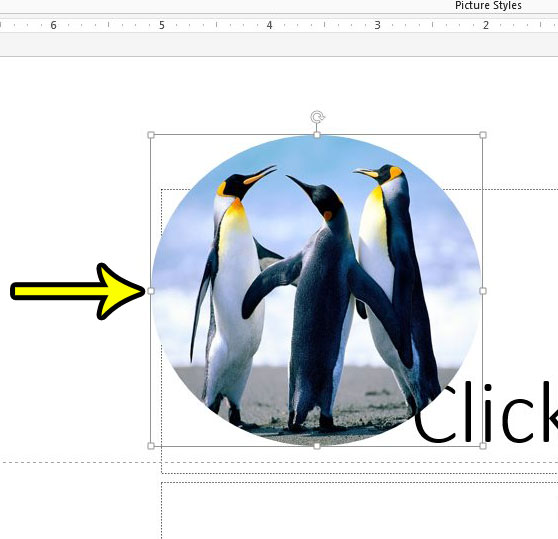
Step 4: Drag the white handles on the border of the circle to resize it. You can click off of the picture when you are finished.

Resize the crop as needed.
Now that you know how to make a picture a circle in Powerpoint you will be able to use a similar technique whenever you have an image in one of your slides that you would like to convert to a different shape.
Our tutorial continues below with additional discussion about how to circular crop Powerpoint pictures.
More Information on Powerpoint – How to Crop a Picture into a Circle
While we have focused primarily on creating a cropped image with the oval shape from the crop dropdown menu, you can crop images into a number of other shapes as well.
There are arrows, squares, rectangles, equation shapes, and many more options for cropping images into basic shapes or even unconventional ones.
If you are trying to make a perfect circle crop then you will need to use the steps above to select the oval shape crop from the shapes gallery, then click the Crop button again, choose Aspect Ratio, then click the 1:1 option under Square. The perfect circular crop can look pretty good in comparison to a rectangular image, and is one of the Powerpoint shape crops that I find myself using the most.
If you want to apply a picture border you can select the picture, choose the format picture tab, then click the Picture Border button in the Picture Styles group of the ribbon and apply the various border options that you wish to use for the image.
Note that the cropped picture you create will not completely lose its cropped area. You can remove a crop option from an image or exit cropping mode by selecting the picture, clicking the Picture Format tab, then clicking the Reset Picture button in the Adjust group of the ribbon.
Note that there will be a “Reset Picture” option and a “Reset Picture and Size” option, so you can choose whichever one is appropriate for what you need.
If you want to crop multiple pictures at the same time, then you can hold down the Ctrl key on your keyboard and click each of the images for which you wish to use the cropping tools.
You can then click the Picture Format tab, click the Crop button, then select crop options and enter into crop mode. You will see the crop applied to each of the selected images.
This same method can be used if you want to change other things like borders or the aspect ratio or more than one picture at the same time.
Do you need to draw your audience’s attention to a particular object on your slide? Find out how to draw arrows in your slideshow and make it a little clearer where your viewers should be focusing their attention on the slide.
Some of the other applications in the Microsoft Office suite, such as Microsoft Word, also have tools like this available.
Frequently Asked Questions About How to Make a Powerpoint Picture a Circle
Can I undo a circle crop in Powerpoint?
Yes, Microsoft Powerpoint has an option where you can reset the picture to how it was before you made edits to it.
You will find this button by selecting the image, choosing the Picture Tools Format tab, then you can click the Reset Picture button in the Adjust group.
How do I change picture formatting options in Microsoft Powerpoint?
While we have focused on the crop image steps in this guide, you can also do more than just transform a square image into a circle.
If you click on the picture in your slide to select it, you can click the Picture Format tab and change a variety of different things like the height and width, alignment, and rotation.
You can also right-click on the image and choose the Format Picture option, which will open a new column at the right side of the window. Here you will find options like:
– Shadow
– Reflection
– Glow
– Soft Edges
– 3-D Format
– 3-D Rotation
– Artistic effects
– Fill
– Line
– Size
– Position
– Text Box
– Picture Corrections
– Picture Color
– Picture Transparency
– Crop
As you can see, Microsoft Office applications like Powerpoint provide a lot of different tools that you can use to change or enhance the appearance of a picture that you have added to a slide.
With a few clicks you can give your image a new border color or apply interesting effects without needing to use a tool like Adobe Photoshop.
Can I crop to different shapes in Powerpoint, too?
Yes, you can use the crop tool to use other shape options instead of the circular shape option we discussed in this guide.
You can also use things like rectangles, basic shapes, arrows, flow chart shapes, and much more.
You will find these additional options after you select the Crop to Shape option from the Crop dropdown menu.
Where is the circle photo Powerpoint tool?
A common use of the circle crop photo tool is when you are putting pictures of people into one of your slides, such as when you are identifying employees on a team and have some headshots where you want to crop photos into circles.
The make photo circle in Powerpoint process can be accomplished by selecting a photo, choosing the Picture Tools Format option, then going to Crop > Crop to Shape > and choosing the crop circle option.
You can then drag the picture handles as needed until your Powerpoint make picture round action is completed.

Kermit Matthews is a freelance writer based in Philadelphia, Pennsylvania with more than a decade of experience writing technology guides. He has a Bachelor’s and Master’s degree in Computer Science and has spent much of his professional career in IT management.
He specializes in writing content about iPhones, Android devices, Microsoft Office, and many other popular applications and devices.